- Created by Andrew Aylesbury, last modified on Feb 14, 2023
You are viewing an old version of this page. View the current version.
Compare with Current View Page History
« Previous Version 20 Current »
Overview
Student letters can be issued for a variety of reasons, including to confirm a student's enrolment in a course, to verify their completion of a qualification, or to provide evidence of their academic progress or attendance. These letters may be required by employers, government agencies, or other organizations that need to verify a student's credentials.
Letters can also be issued to students for issues relating to a Students attendance, academic progress, or finance.
Student letters are typically issued by the education provider where the student is enrolled. The letters may include information such as the student's name, course title, enrolment dates, completion date, and other relevant details.
The Meshed Platform generate Letters from reports, using Templates for Letters.
The Reports are predefined in the system and are grouped in categories.
The system has a predefined list of reports for each Category that can be used to generate letters. Other predefined reports that have Student ID, Course ID, and Course Attempt can optionally be added to the list of reports used to generate letters by contacting Meshed Support (support@meshedgroup.com.au)
Generate Report
This menu allows you to generate Letters depending on Report Category.
Report Category can be Accounts, Student Applications, Enrolment etc.
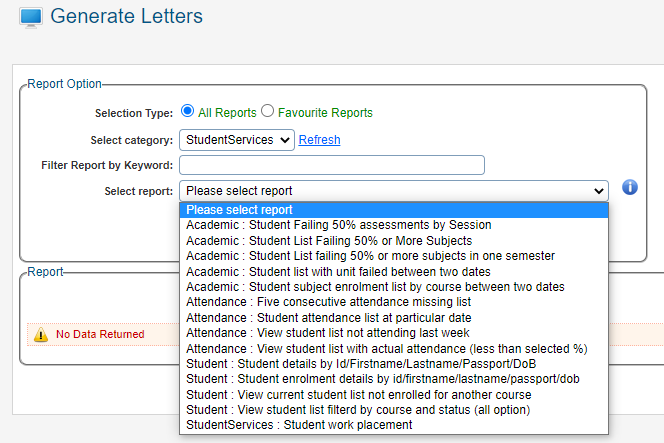
The system has a predefined list of reports for each Category that can be used to generate letters.
To Generate Letters navigate to Reports
Click the Letter Icon
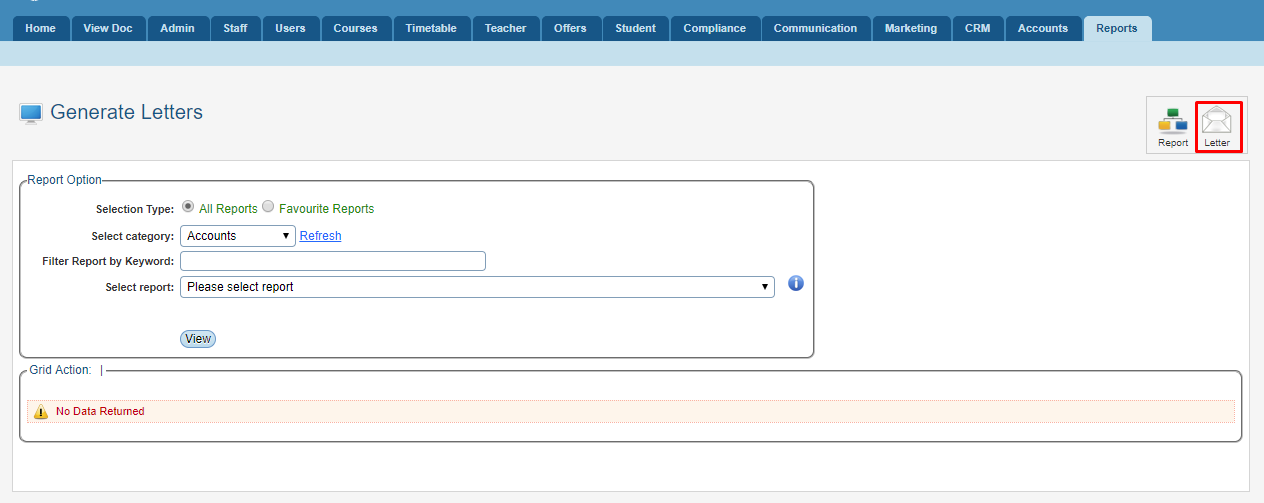
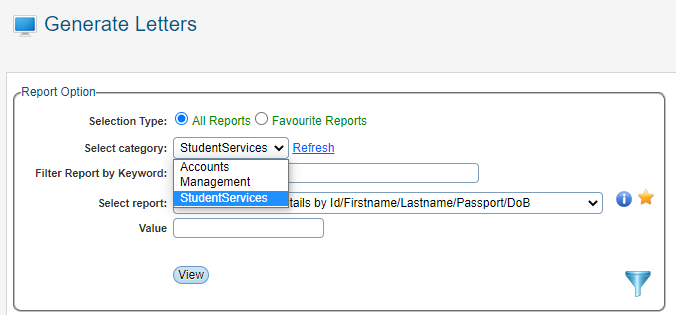
Select Category
Select Report that you need to generate from the drop down menu. These reports for Letters are predefined in the system (as shown below).
Click View to generate report.
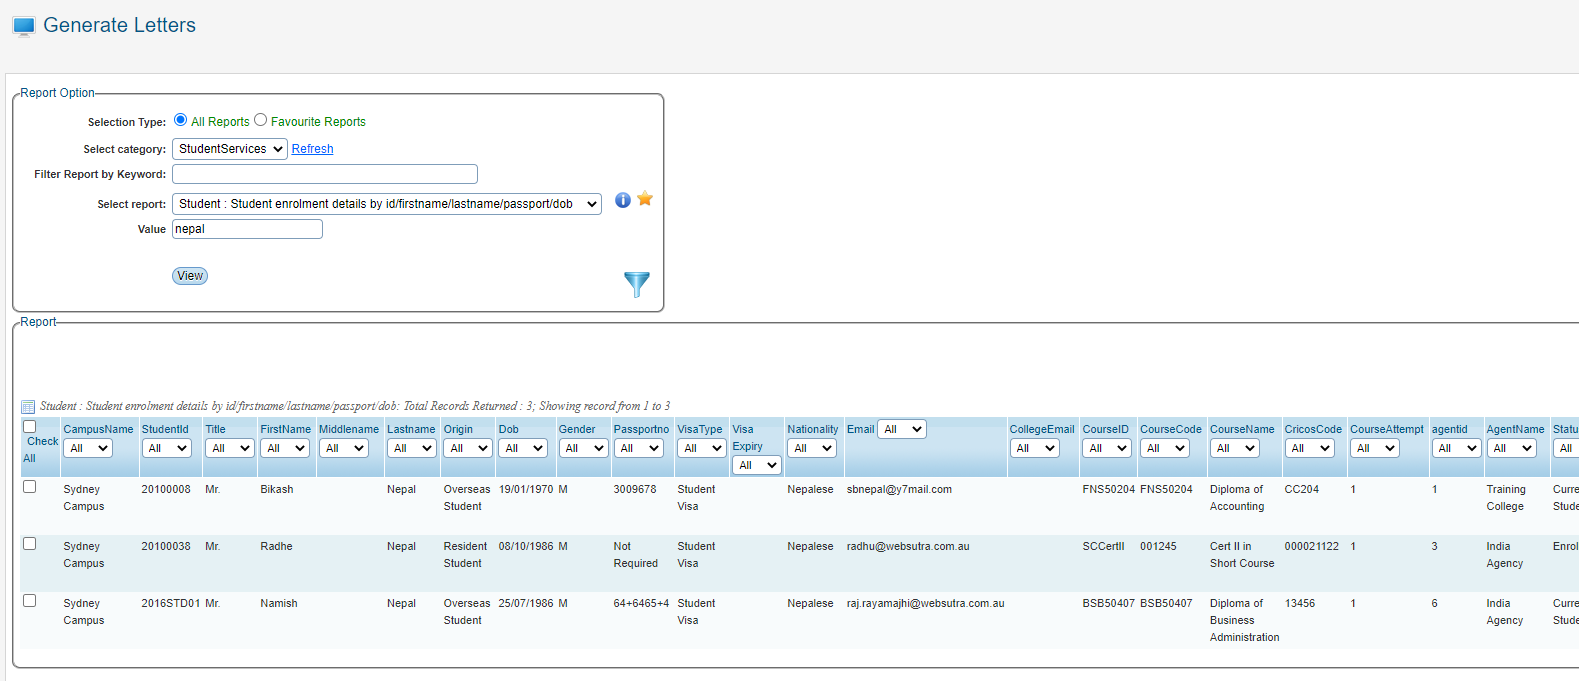
Note: You can mark some of the regularly used reports as your favourite ![]() which can then be displayed when you select Favourite Report. You can also click on the
which can then be displayed when you select Favourite Report. You can also click on the ![]() icon to view the description and further information about the particular report.
icon to view the description and further information about the particular report.
Results Sorting
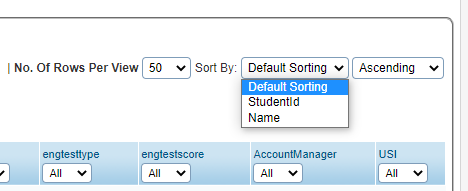
Report results can be sorted as either Ascending or Descending with the following criteria:
Student ID
- Course Name
This option will only be visible when you have Student record information available in the Report Result.
Letter Management
- Select Students to send the Letter to
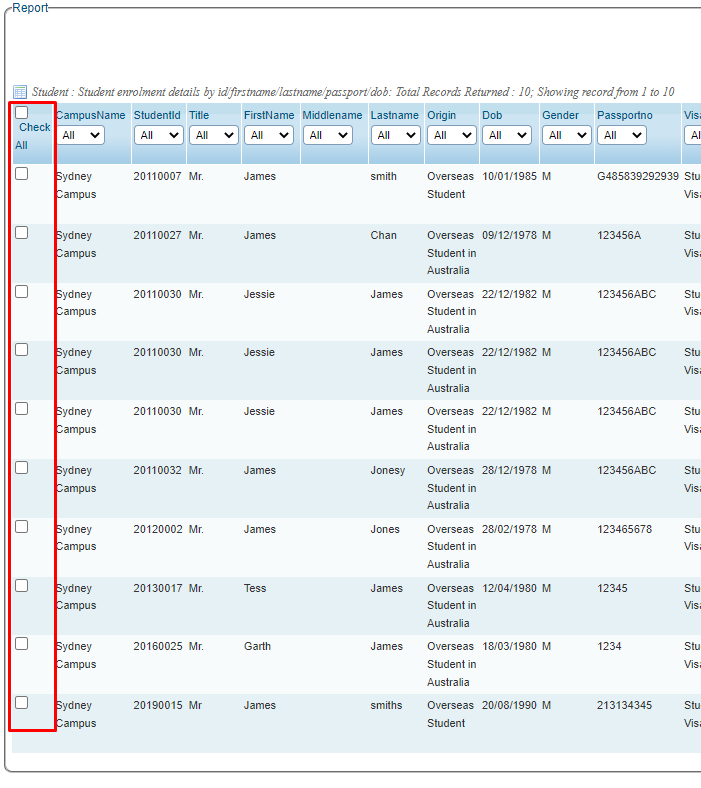
- Select the Letter to send. Available Letters to select is determined by the Letter Templates setup for the Report used.

- Select the options for creating and sending the Letter.

- The options for creating and sending the Letter are:
- Student - one of the following:
- Not send letter content as an Email to Student
- Send letter content as an Email to Student Personal email and Provider Email & Add To Student Communication Log and optionally CC the Agent
- Send letter content as an Email to Student Personal Email only & Add To Student Communication Log and optionally CC the Agent
- Send letter content as an Email to Student Provider email only & Add To Student Communication Log and optionally CC the Agent
- Send letter content as an Email To Agent & Add To Student Communication Log and optionally CC the Student
- Generate PDF Letter
- Save PDF Letter to each Student Directory
- Select the From email address
- Send a CC to entered email addresses
- Send a BCC to entered email addresses
- Student - one of the following:

- Click Confirm to create and send the Letter to the selected Students
Student Portal (Optional Module)
Letters Generated using this function are also available in the Student Portal Warning Log
Letter Tracking

Letter Set-up
Create and manage Letters
This is only available to Users with the SAdmin Role.
To Manage Letters navigate to Reports > Add New or Edit Letter

Select Report Name
A list of Letters linked to the selected Report will be displayed

The Action Icons are used to manage a Letter
The option to provide Tracking of a Letter when sending can be modified.
The Priority of a letter can be modified
Add New Letter
To create a new Letter
Select Report Name to link to the Letter being added
Click New Letter Action Icon
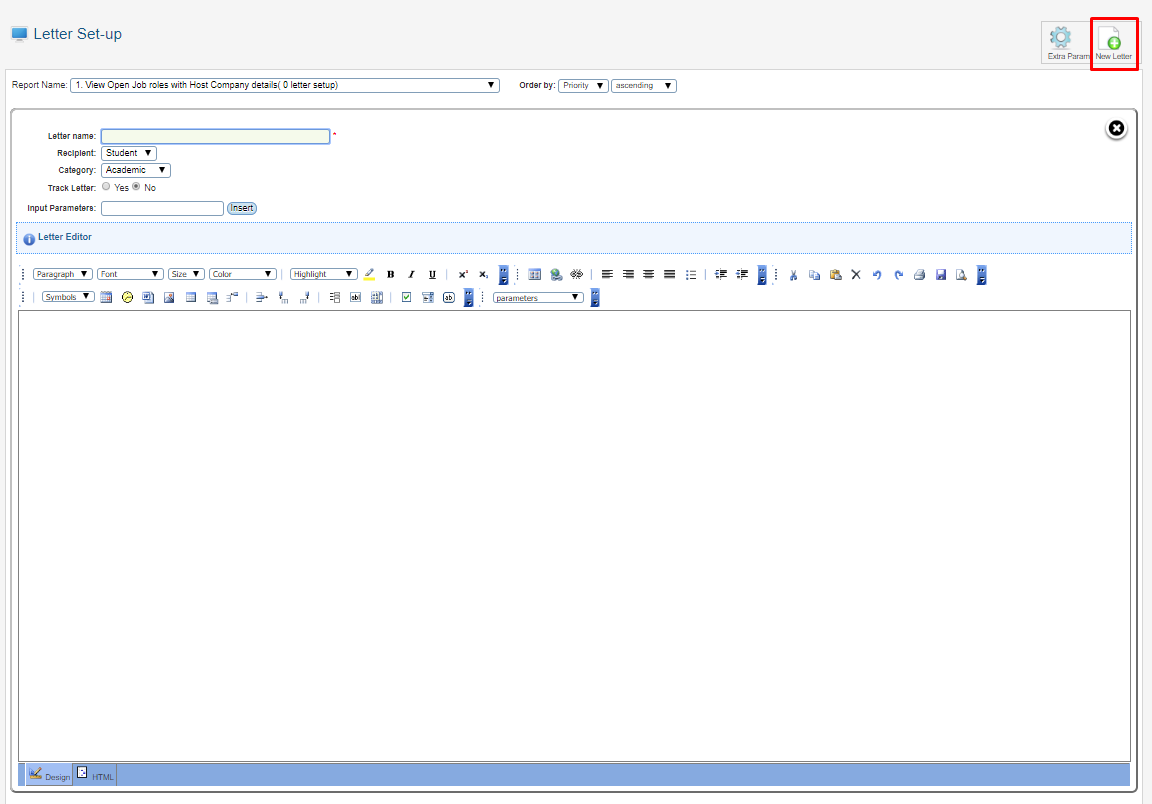
Fill in the Letter Editor form. See the Field Descriptions table below for more information.
Click the Save Icon in the Letter Editor.

Field Descriptions
Field | Description |
|---|---|
Letter Name | The name for the Letter being added. |
Recipient | Options are:
Only one option can be selected. |
Category | Options are:
Only one option can be selected. |
Track Letter | Option to provide tracking of Letters when sending. Default is No |
Tracking Color | The color that will be used for tracking this Letter. This field is only displayed if the Track Letter field is Yes |
Input Parameters | Additional parameters to allow user to input data before generating the letter. Input Parameters are included in the Content field and represented by the Parameter name between curly braces and number signs e.g. {#InputText#} |
Content | The text for the Letter. The Letter Editor tool bar provides various tools for formatting the content. |
Parameters | System identifiable Parameters can be used in the body of the Letter e.g. Student first name, last name, date of birth (DOB), Student ID etc. These Parameters will be replaced by the value automatically when sending the letter. System identifiable Parameters are included in the Content field and represented by the Parameter name between curly braces e.g. {Name} Characters which are reserved and should not be used in the Letter are '{' and '}'. If the Letter contains these symbols the Letter will not send. |
Extra Parameter
This is used to create a Parameter which is based on a calculation e.g. Current Date + 7 days. Extra Parameters are available for selection in the in the Parameters field in the Letter Editor.
To add an Extra Parameter
Select Report Name to link to the Parameter
Click Extra Param Action Icon

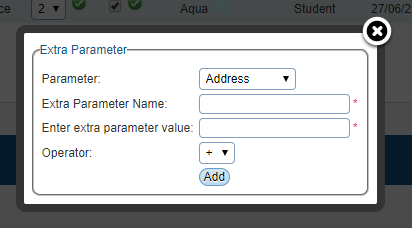
Fill in the Extra Parameter form. See the Field Descriptions table below for more information.
Click Add
The new Parameter will be shown in the table at the bottom of the Extra Parameter form
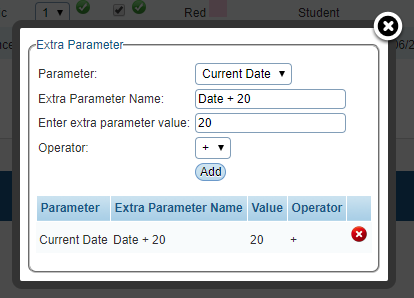
Parameters can be deleted using the Delete Action Icon  in the table at the bottom of the Extra Parameter form
Field Descriptions
Field | Description |
|---|---|
Parameter | The base System identifiable Parameter |
Extra Parameter Name | The name for the new Parameter |
Extra Parameter Value | The numerical value for the calculation |
Operator | The mathematical operator for the calculation. Options are:
Only one option can be selected. |

- No labels