Teacher Portal Module
- RTOManager Admin (Deactivated)
- Andrew Aylesbury (Deactivated)
Overview

Teacher Portal
A Teacher Portal within a Student Management System (SMS) is dedicated online access designed to provide teachers with comprehensive tools and resources to efficiently manage and monitor student-related information. It serves as a centralized hub where teachers can access, update, and analyse student data, facilitating effective communication, assessment, and instructional planning. Here is an overview of the key features and functionalities typically found in a Teacher Portal:
- Class Management: Teachers can manage their classes by creating and organizing class rosters, tracking attendance, and assigning students to specific groups or sections. They can also view individual student profiles and access essential demographic data, contact information, and academic records.
- Class Management: Teachers can view class timetables and class rosters, track attendance. They can also view individual student profiles and access essential contact information, and academic records.
- Assessment: The Teacher Portal allows teachers to record, calculate, and manage student grades and assessments.
- Communication and Messaging: The Teacher Portal enables effective communication between teachers and students. Teachers can send announcements, reminders, group or individual messages to students, facilitating timely and efficient information exchange. The portal may support email notifications, chat functionality, or discussion forums.
- Analytics and Reporting: Teachers can access analytics and reports to gain insights into student performance, attendance trends, or assessment outcomes. The portal may provide visual representations of data, allowing teachers to identify patterns, spot areas for improvement, and make data-informed instructional decisions.
- Integration and Connectivity: The Teacher Portal is typically integrated with other modules or components of the Student Management System, such as the student information system, Student portal, or administrative tools. This integration ensures seamless data flow, reduces redundancy, and provides a holistic view of student information.
Overall, a Teacher Portal in a Student Management System serves as a comprehensive platform that empowers teachers with the necessary tools to efficiently manage student information and enhance instructional effectiveness. It streamlines administrative tasks, improves communication, and facilitates data-driven decision-making, contributing to an enriched educational experience for both teachers and students.
Meshed Platform
In the Meshed Platform, the Teacher Portal allows the Teacher to:
- Manage Profile details, Password, Security Question and Answer, Leave and Availability
- Download and view College documents
- Download and view Timetable information
- Manage Student Academic results
- Manage Student Attendance
Access communication tools; Student Mailing Lists, SMS (Optional), Student Communication Logs, Requests to Provider.
- Manage and view Course and Subject resource Materials
Enter and Submit Timesheets (Optional)
- Record and view Work Placement Activity for Students
- Generate relevant reports
User Login
To log in to your Teacher portal, follow the instructions below:
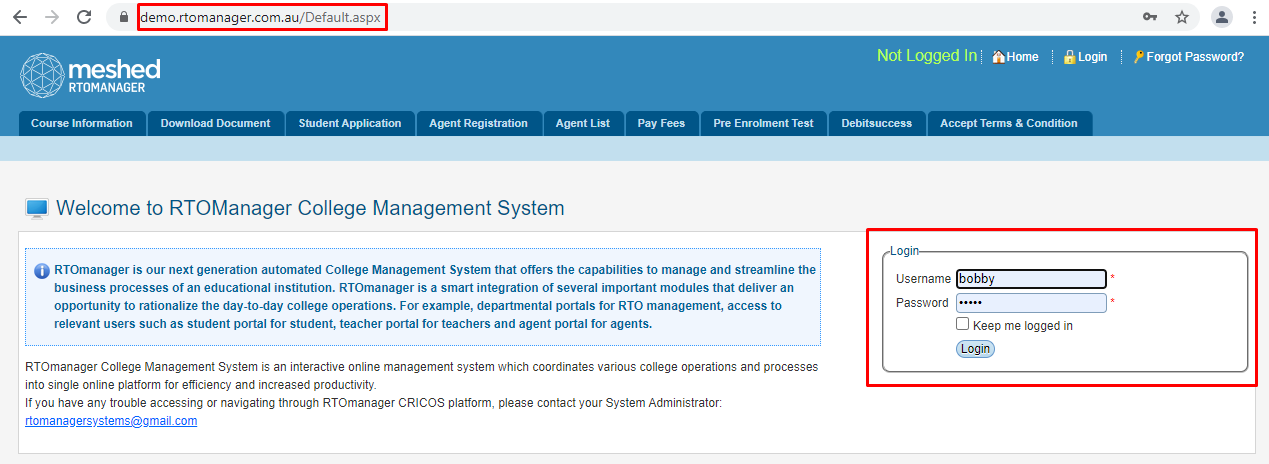
- On your web browser, enter your college system's URL account e.g. https://yourcollege.rtomanager.com.au
- Enter your username and password as shown below and click Login.
Home Page
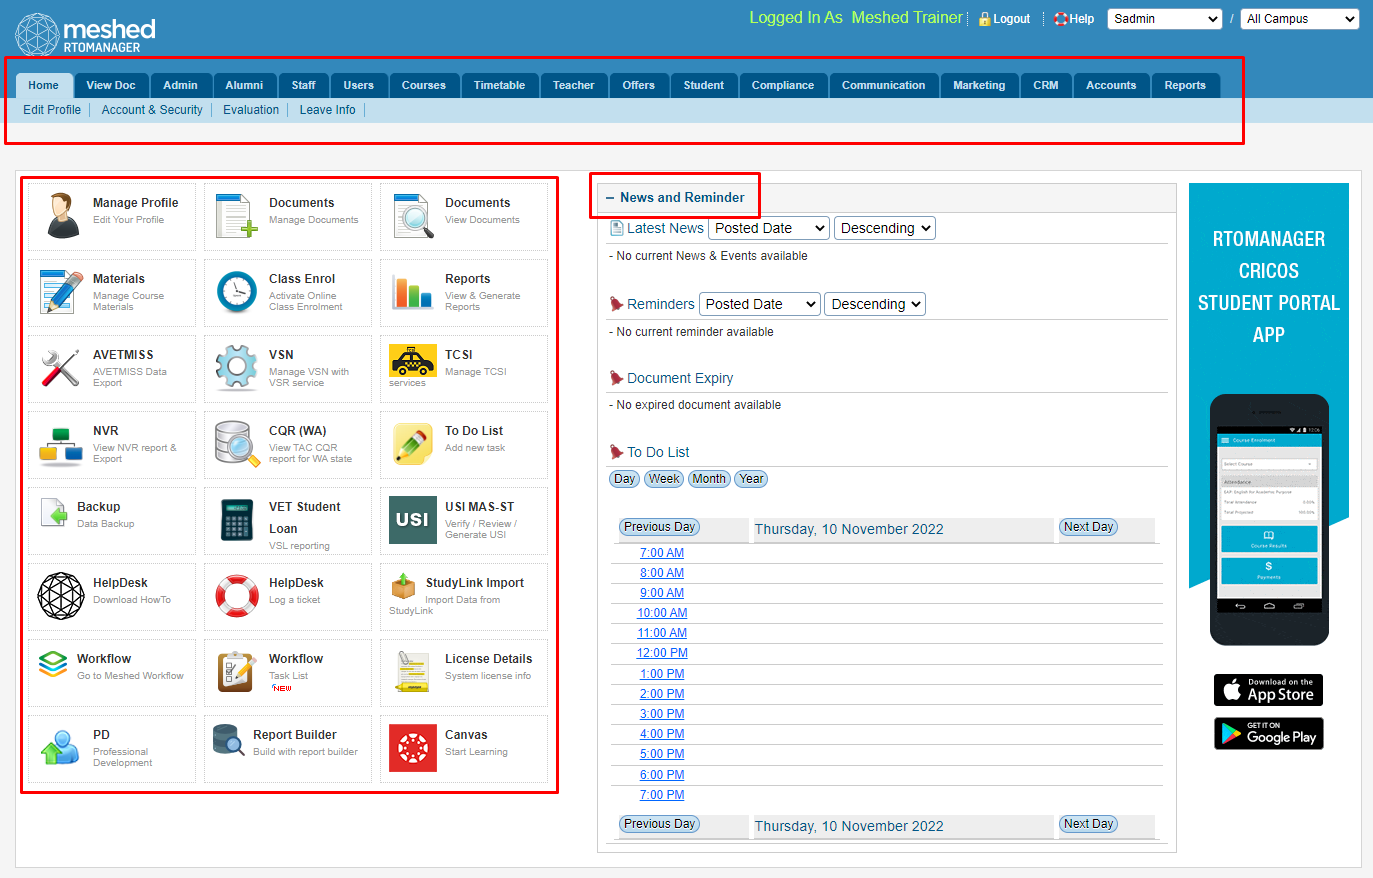
Home page is the initial screen you see after you log in to the system. Your homepage is composed of the following:
- Main Navigation Tabs (menu) – which includes Home, View Doc, Result Management, View Timetable, Attendance Entry, Communication, Course Materials, Time Sheet, Work Placement Activity and Reports. These menus allow you to navigate to any page by clicking on any menu as per your role and permissions.
- Quick Access Icons – These icons on the left hand side (as shown above) represent their functionality. They are also called short cut icons as they allow user to access the functions easily with one click of the button.
- News and Reminder – allows you to view new College updates and other important reminders.
- To Do List – allows you record and keep track any tasks, appointments or meetings you may have scheduled for the day. You can also view this list on a daily, weekly, monthly or yearly format (as required).
Main Navigation tabs
Home
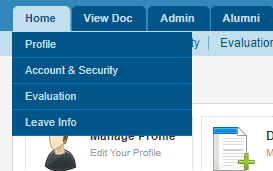
From this menu you can edit and view your profile. To do this, follow the instructions below:
- Click Home > Profile
- You will go to the Edit your profile page where you can edit your personal information. Once changes has been made, click Update.
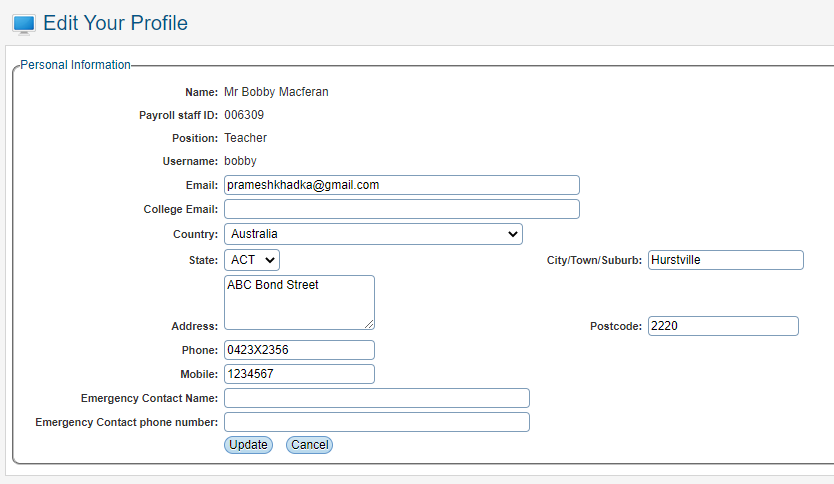
Note: A confirmation message will appear to validate changes (as shown below).

Change Password
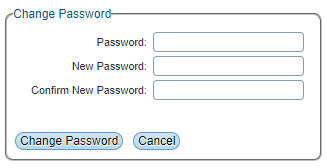
From this menu you can change your password by following the instructions below:
- Click Home > Account & Security.
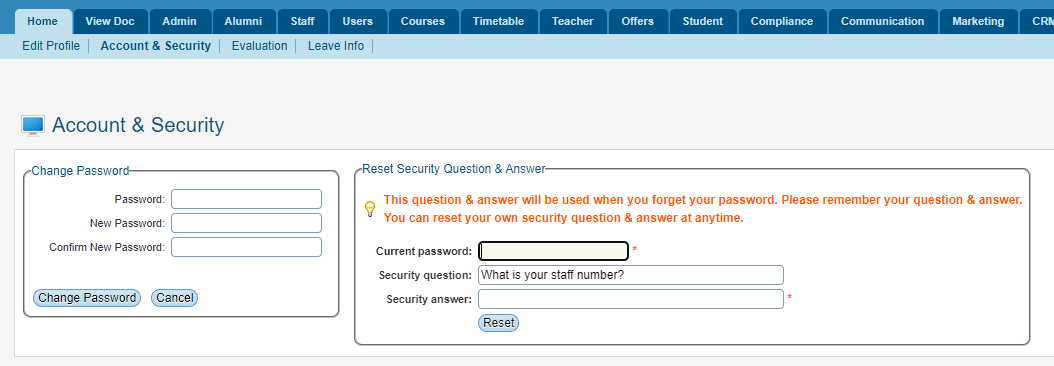
- Enter existing password, new password and confirm your new password. Click Change Password to confirm changes. Note that the system will send an auto generated email to advise you of your new password.
- Once password has been changed, system will confirm that the process has been completed.
- Click Continue and you will be redirected to your Homepage.
- You may also reset your Security Question & Answer by entering your current password and adding your own security question and answer.
- Click Reset once done.

Leave Info
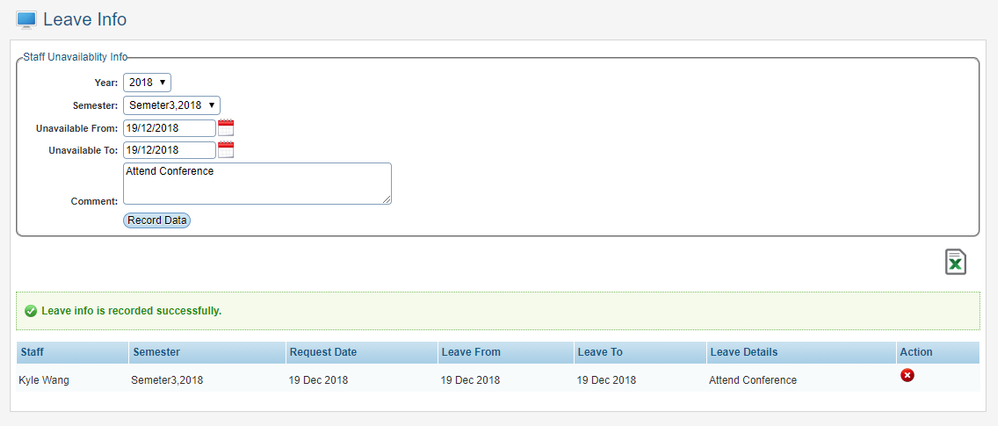
From this menu you can enter your Leave information by following the instructions below:
- Click Home > Leave Info.
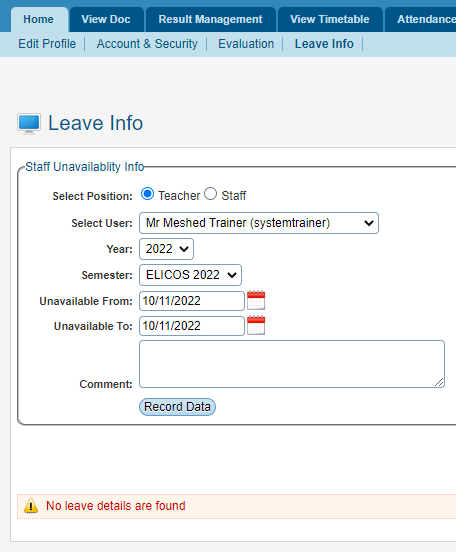
- Enter leave details for the required Semester
- Click Record Data
Teacher Availability
This menu allows for the recording of a Teachers day and time availability for each semester. e.g. Monday 3PM-5PM, Tuesday 9AM-2PM. This supports situations where Teaching Staff are not full-time and may only be available for specific days and times.
This information is integrated into the timetabling functionality to check Teacher availability.
To add Teacher Availability, follow the instructions below:
- Click Home > Teacher Availability.
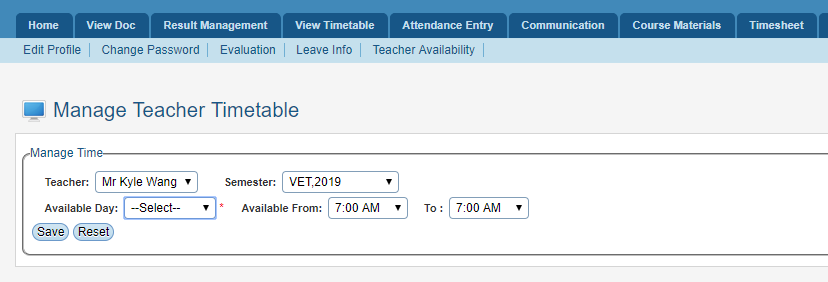
- Select the Semester
- Select the Available Day, From and To times
- Click Save
- Repeat for additional days as required
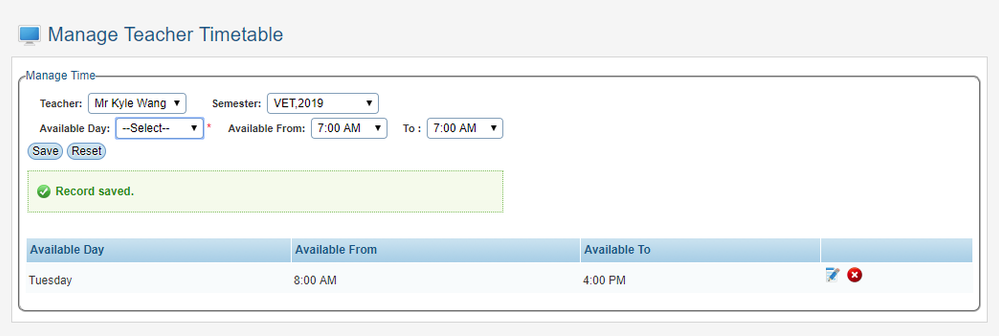
There is an option to delete ![]() the record if required.
the record if required.
There is an option to modify  the record if required.
View Documents
This menu allows you to download and view all the College documents like College news, fees updates and changes, college notices published by the College.
To view/perform the download, follow the instructions below:
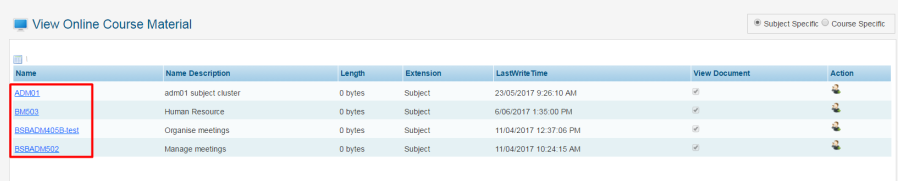
- Click View Doc > College Materials. Note that only those documents that has been set visible for Teacher Role will be available (as shown below).
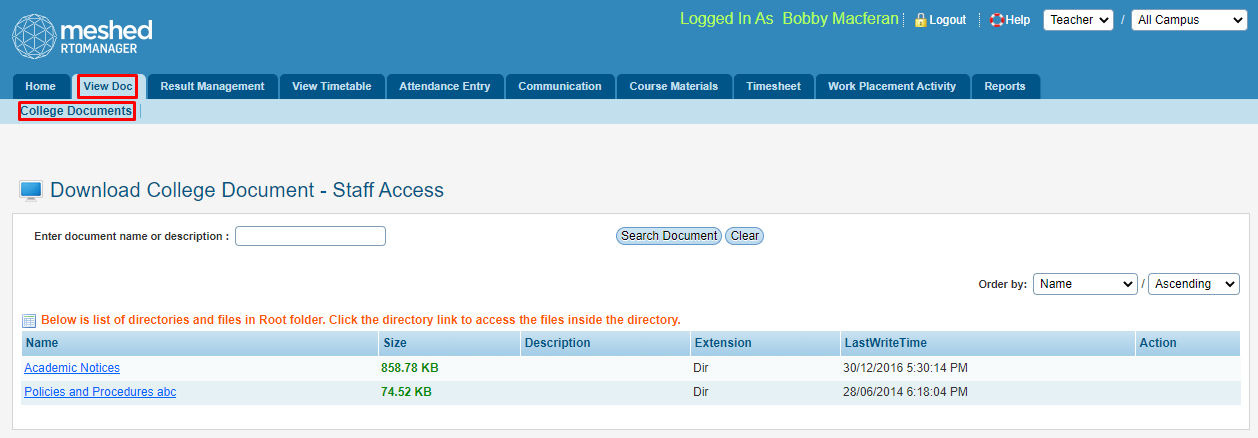
- The documents you are looking for are arranged in the folders (directories). Click on the hyperlinked Folders located on the left hand side of the list to access documents required. They can be downloaded in a PDF version which can be saved on your desktop or printed (as needed).
Result Management
This menu allows you to add your students' assessments results online.
To manage this function, follow the instructions below:
- Click Result Management.
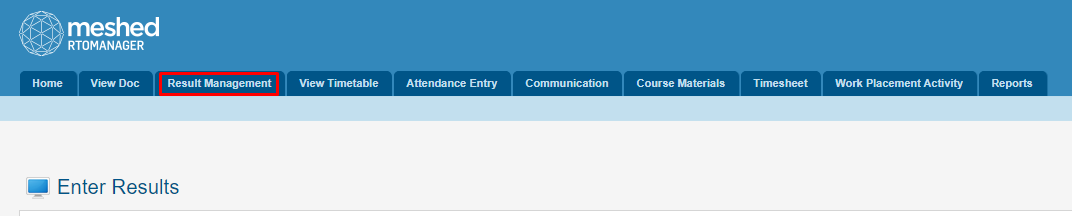
- You will go to Enter Results page as shown below.
- Select Course Type
- Select Year
- Select Semester and Term
- Select Subject (listed in order of Subject Code)
- Select Class
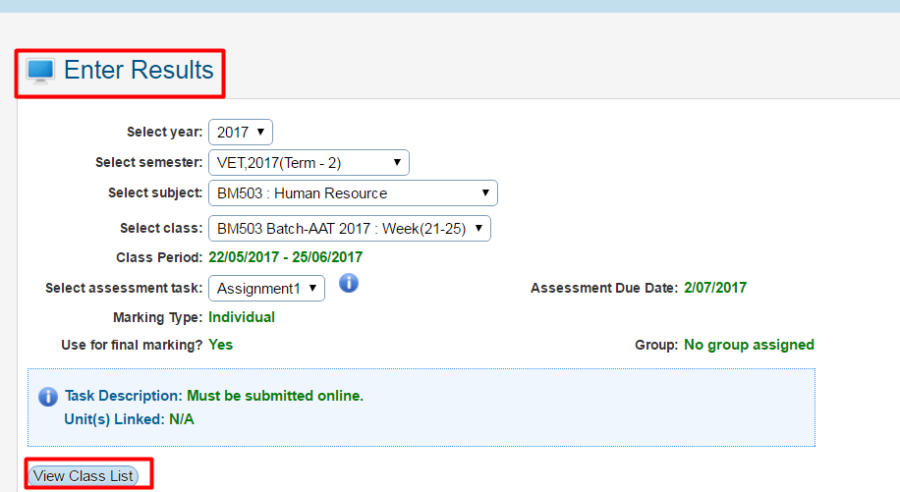
- Click View Class list to bring up Student list for the semester semester/class selected.
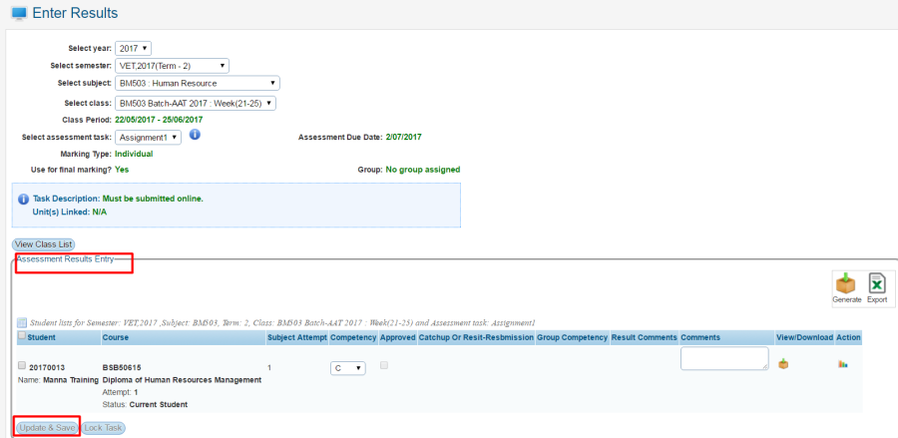
- Enter the marks obtained or competency achieved by the student in assignment 1 (as selected) as shown in figure 3.
- Type any comments as required and click Update and Save.
You also have the option to lock the task by clicking Lock task after which you may no longer be able to make any changes until and unless someone higher in position in hierarchy unlocks the task.
- You may also select other assessment task from the drop down menu and enter the result (marks) as discussed above.
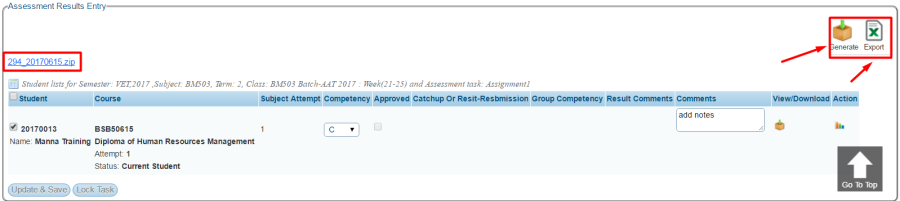
- You can also generate all the assessments submitted by your students. Click Generate icon
 located on the right hand side as shown below. All Documents will be downloaded in a zip file.
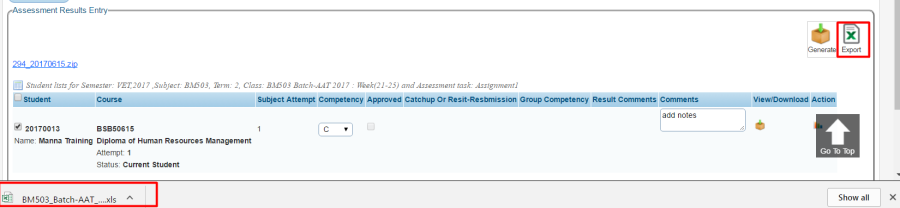
- Once all marks has been submitted, you can export the updated Student marks to an Excel spreadsheet by clicking the Export button
 located on the right hand side of the Student list.
- You may also view individual Student submitted assessments in two different ways:
- Click View document icon on the student list to download a copy of the assessment for you to review.
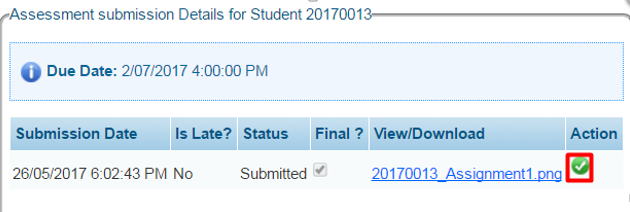
- Click action icon
 to view Student's assessment details. A page will open as a pop up window for your to see due date, submission date and status e.g. submitted. You may also change the status by clicking the green icon
  (as shown below).
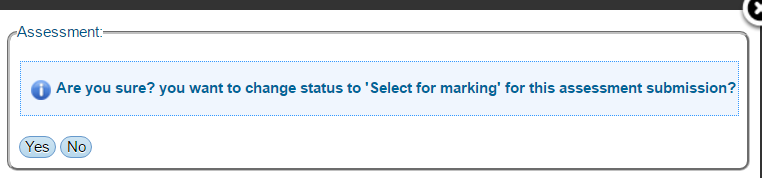
- Another pop up window will appear to endure you want to change status to 'Select for marking'. Click Yes or No.
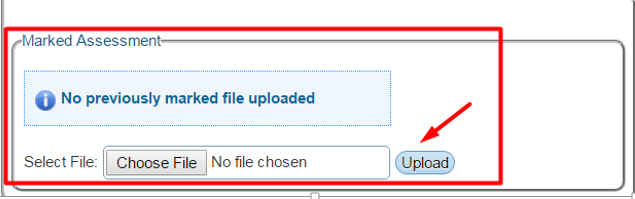
- Once student assessment has been marked, Click Upload to ensure a copy has been recorded on the system.
View Timetable
This menu allows you to view your teaching timetable online by logging in to your Teacher portal. To use this function, follow the instructions below:
- Click View Timetable. You will go to the View Timetable page as shown below:

- Select View Timetable as weekly/Monthly/Between Dates to view the timetable as per your choice.
- Select semester, term week for which you want to view your timetable.
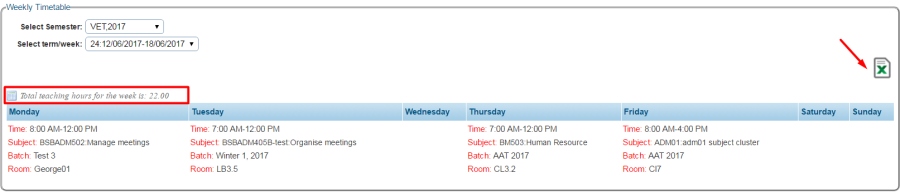
- Your Class Timetable (if present) will be displayed as per below:
Note: You may also export information in Excel format by clicking Export icon ![]() .
.
Attendance Entry
This menu allows you to mark your Students' attendance either online or manually.
If you want to mark their attendance online, you may log in to the system and mark the attendance online one by one or in some cases, you may have marked their attendance on paper but you may want to upload them later either by yourself or by an administration staff.
To perform attendance entry, follow the instructions below:
- Click Attendance Entry.

- You will go to Daily Attendance Roll page.
- Select the semester, Term/week, day, and class from the drop down menu as shown below.
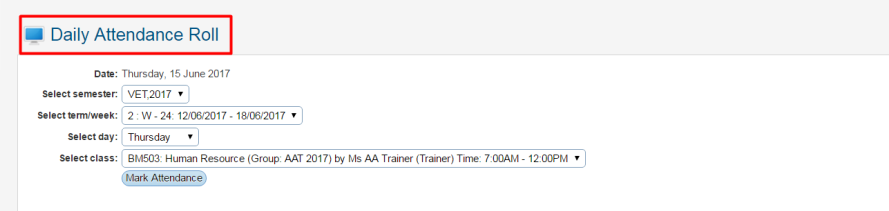
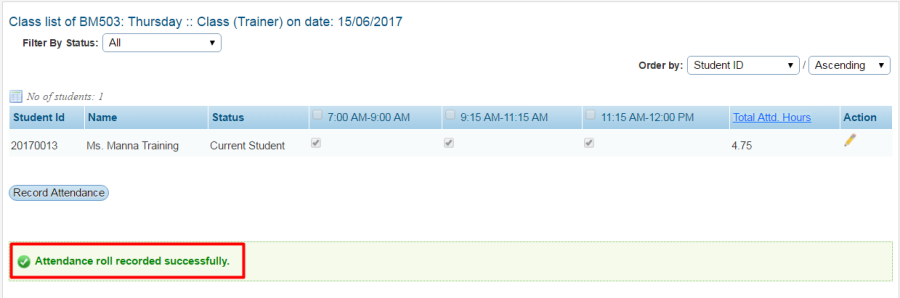
- Once all information has been entered, Click Mark Attendance. You will be directed to Attendance Roll page as shown below:
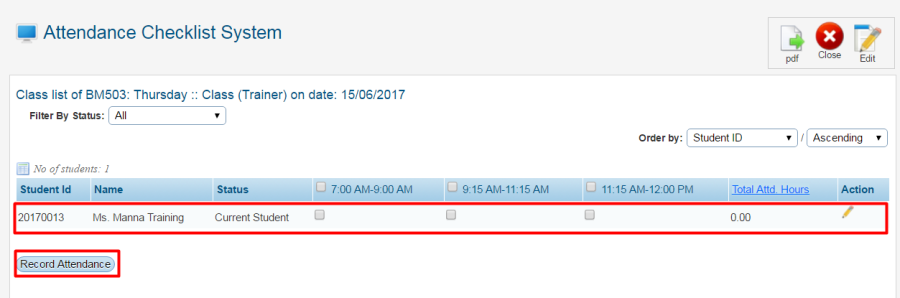
- Please note that there is only one Student in the class as shown. Tick the check box
 for the Students to mark their attendance \ and click
  link to calculate total number of hours the Student has attended that day for that class. On the below example, this student has a total attendance hours of 4.75 hours.

- You may also modify Student's attended hours by clicking this modify icon


- To modify the hours, click on each time slot and you can change the time. This features is useful in instances where Students attended the Class but left an hour earlier. You may record only the attended hours as required. To record changes, click the green icon


- Once attendance is marked, click Record Attendance. You will receive a confirmation message in green which will confirm that the attendance has been recorded successfully as shown below:
Communication
This menu allows you to access the methods of communication available within your System:
- Mailing List
- SMS
- Communication Log
- Request to Admin
For your reference, each method has detailed instructions written below:
Mailing List
Teachers can communicate (send email) to their Students (Class) through group emails in a single click. However, it is a must that the Students have at least one email address.
To understand this, follow the instructions below:
- Click Communication > Mailing list
- Select Semester, Current Term and Class from the drop-down menu in the Selection Criteria.
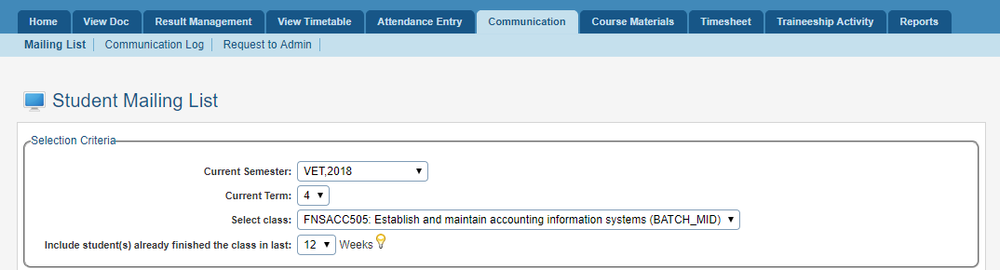
- The list of all Students as per the above criteria will be displayed as shown in Student list section as shown below. Note - Class for Timetables and Assessment Groups can be selected.

- Using this screenshot as an example, follow the below steps in sending email via mailing list:
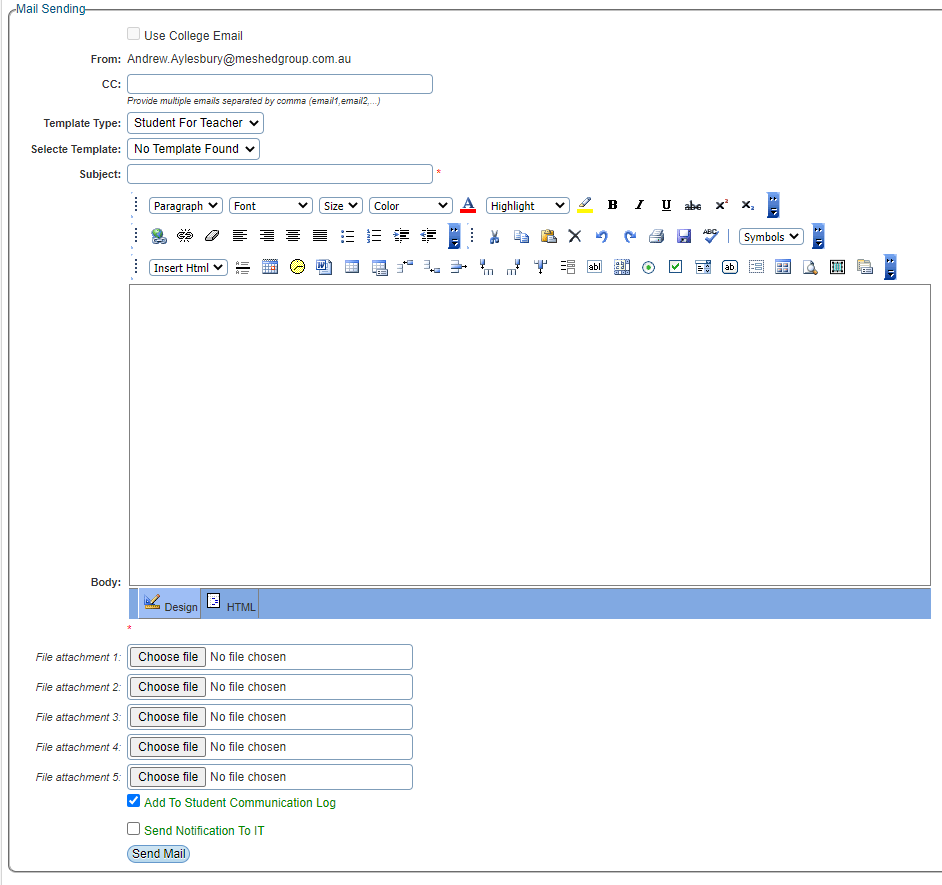
- Type the subject of the email e.g. Recommendation to attend class that you are sending to the selected Students.
- Type the body of the message
- Click Browse and attach any files that you want to send the Student. No files selected in the above figure.
- Tick the check box if you also want this email to be recorded in each Student Communication Log.
- Tick the check box if you also want this email to be copied to IT.
- Tick the check box in Student list section to select the Students to receive the email. (You have option to choose either Private Email or College Email.

- Click Send Email. You will see message in green confirming your delivery of mail.
![]()
Preventing email sent from Meshed System being considered as spam or treated as Junk email
To assist with preventing email sent from Meshed Student Management System from being considered as spam and treated as Junk email, our Network Administrator has suggested adding or modifying an SPF record in your DNS server. Further information see Ensuring Email Delivery (Security): SPF, DKIM, and DMARC Implementation
SMS (Optional Module)
Teachers can communicate via SMS to their Students (Class) through group SMS. However, Students need to have a mobile number.
To understand this, follow the instructions below:
- Click Communication > SMS as shown below.
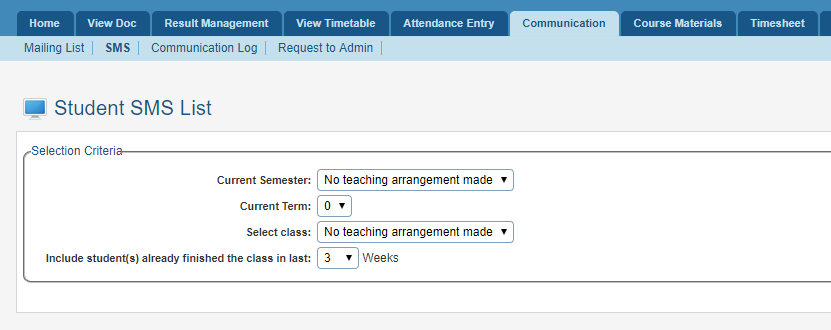
- Select Semester, Current Term, Class, and Include Students from the drop-down menu in the Selection Criteria.
- The list of all Students as per the criteria will be displayed as shown in Student list section
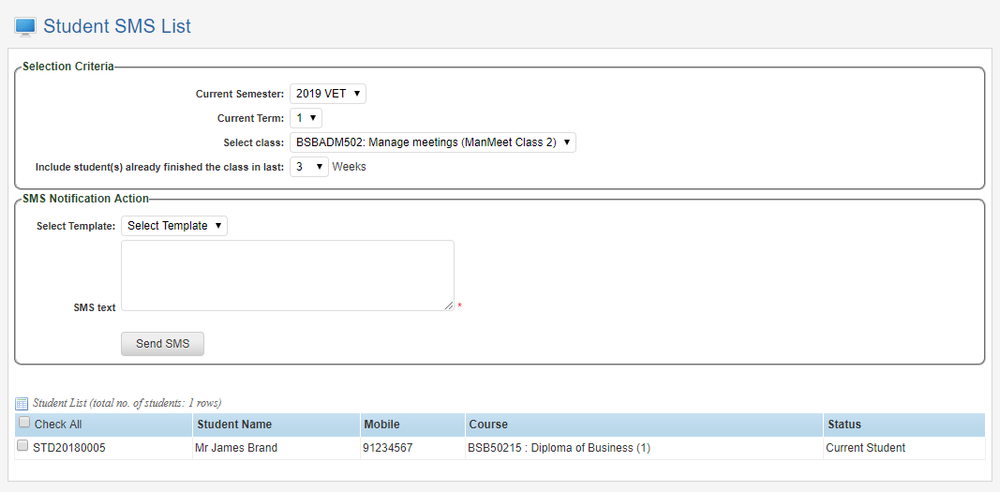
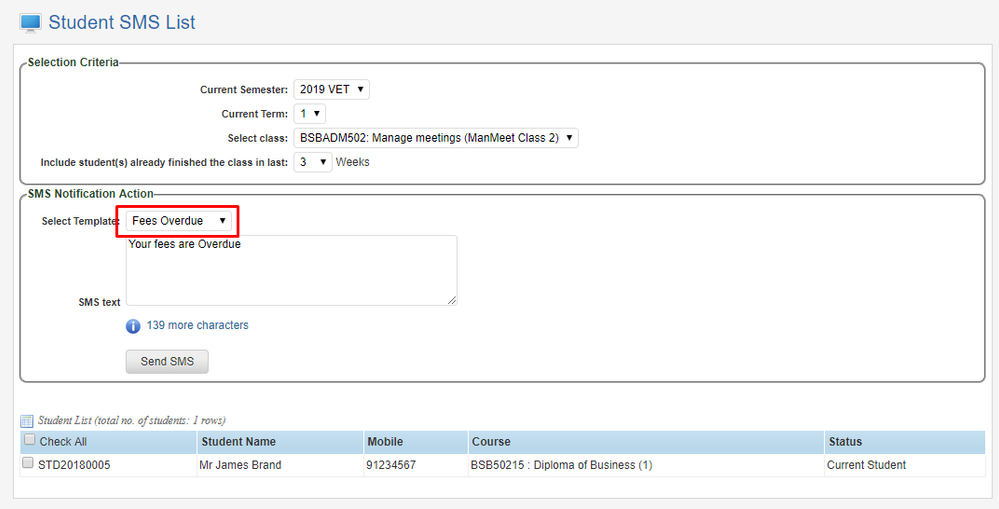
- Select a Template or enter the required text
- Select the required Student recipients for the SMS by ticking the check-box
- Click Send SMS
SMS Integration
Meshed Higher-Ed has the capacity to integrate SMS capability from a third party provider to send bulk and/or individual text/ SMS messages. This integration is required to use SMS functions. More information on the SMS Integration can be found on the SMS Functionality Integration page.
Communication Log
This menu allows you to record and view all the communications made about the Students (e.g. the Student not attending the class, Student not submitting any assignments on time etc.). This communication log can be viewed by other Staff in hierarchy.
To add and understand communication log, follow the instructions below:
- Click Communication Menu > Communication Log as shown below.

- Select relevant Semester, term, Class and Student Name from the drop down menu.
- Type in the comments on the fields provided.
- Indicate the Status of the communication log e.g. Assessed, Escalated, In progress (refer to the drop down shown below).
- Select Type of log – e.g. for which communication this log is pertaining to – i.e. Academic, Administration, payment etc.
- Tick the box to whom you want to send the notification to – e.g. applicable college staff.
- Optionally Add File Attachments
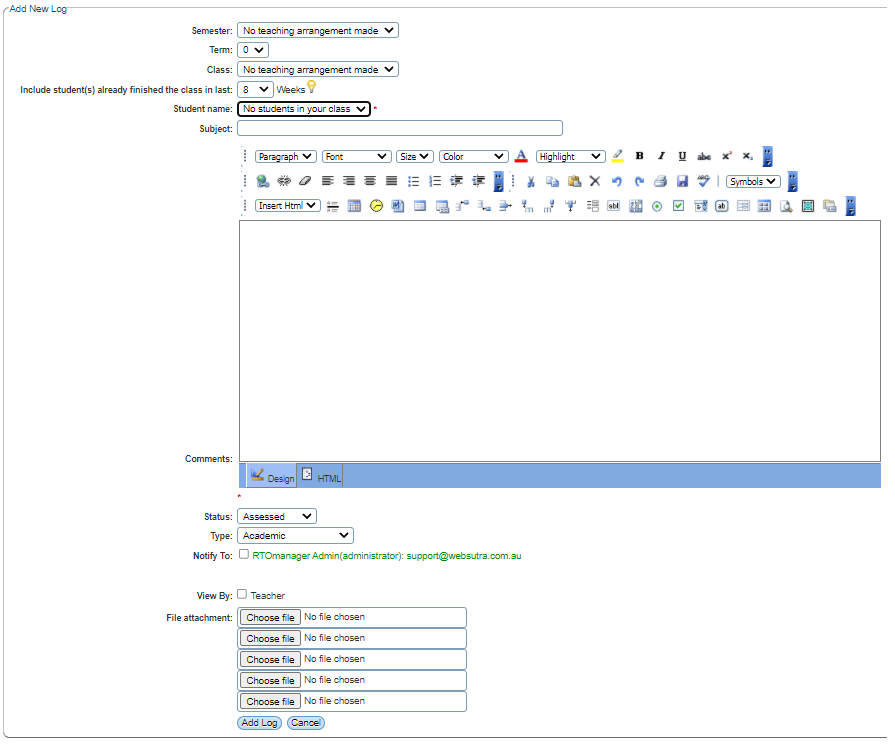
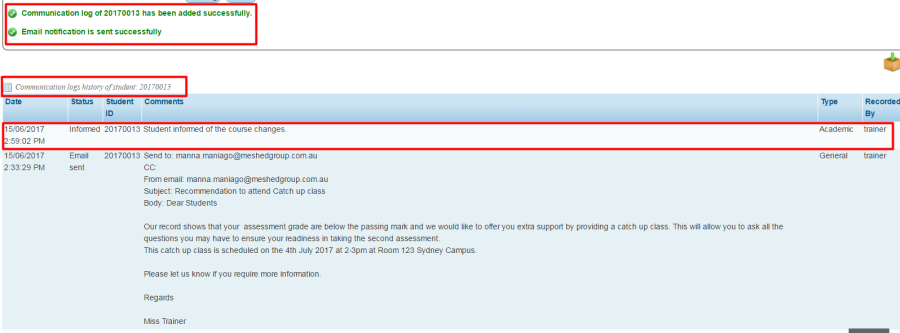
- Click Add Log. Your recently entered log will appear in the list and a confirmation message will be displayed as shown below:
Request to Admin
This menu allows you to access online interface from which teachers can directly contact the administration staff by writing a message. The message normally has a subject and a body. To do this, follow the instructions below:
- Click Communication > Request to Admin.

- You will be directed to Email request to College page as shown below.
- Type in the request or concern you need to flag to the College. Refer to the example below:
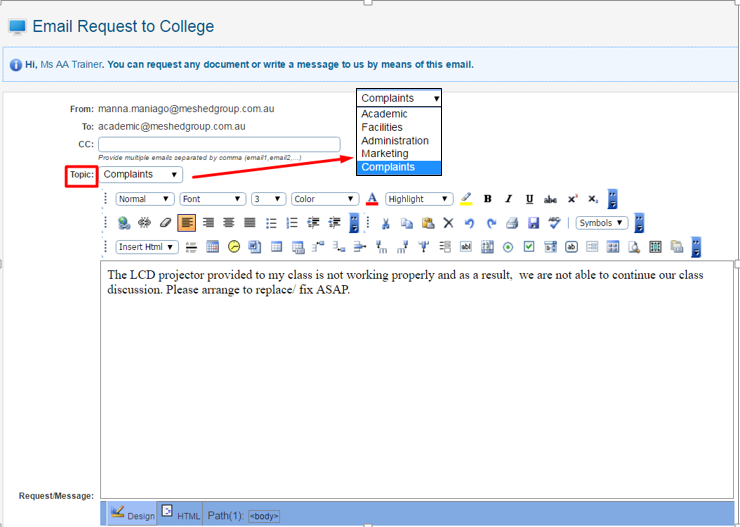
- Select the topic of the email request for e.g. Complaints as shown in the example above.
- Type the body/content of request/message.
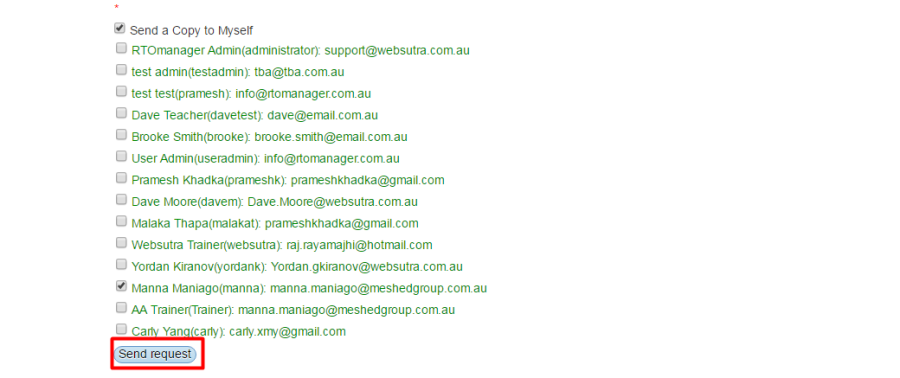
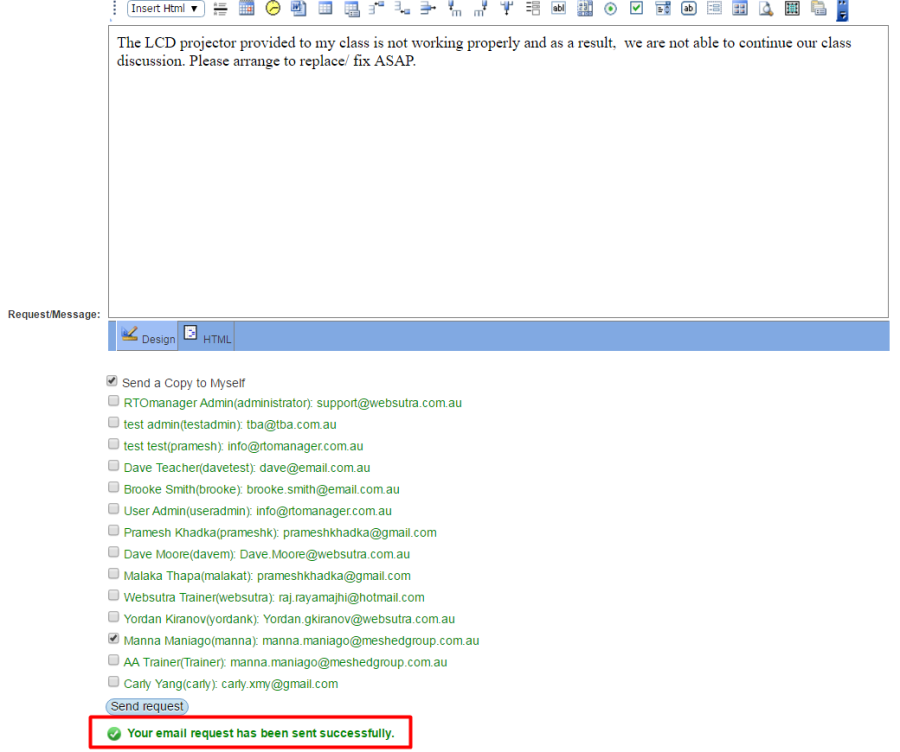
- Click Send Request to send the email. You will receive a confirmation for the delivery of the message as shown below:
Preventing email sent from Meshed System being considered as spam or treated as Junk email
To assist with preventing email sent from Meshed Student Management System from being considered as spam and treated as Junk email, our Network Administrator has suggested adding or modifying an SPF record in your DNS server. Further information see Ensuring Email Delivery (Security): SPF, DKIM, and DMARC Implementation
Course Material (Optional Module)
This menu allows you to view course materials uploaded by the College. You are also allowed to upload any other materials for your Students.
Upload Functions are only available for your Batch/Class. Here, the concept of hierarchy applies where the administration department of the College can control access to Teacher and Student whereas Teacher can control access to only Student.
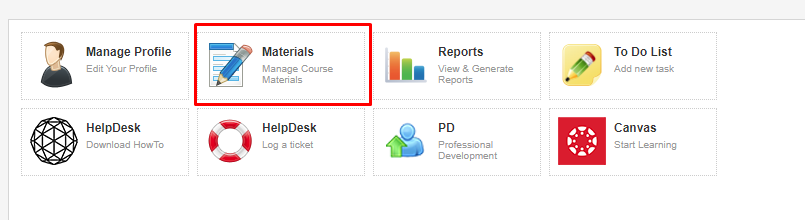
To access Materials, click on the Course Materials menu tab or the Materials Icon.

Available materials are categorised into Subject Specific and Course Specific.

Subject Specific
Material and resources that are specific to a Subject or to a Class. A top level Folder for the management of relevant materials exists for each Subject that you have a timetabled Class/Batch for.
In each Subject Folder there are Folders for Batch and for Unit.
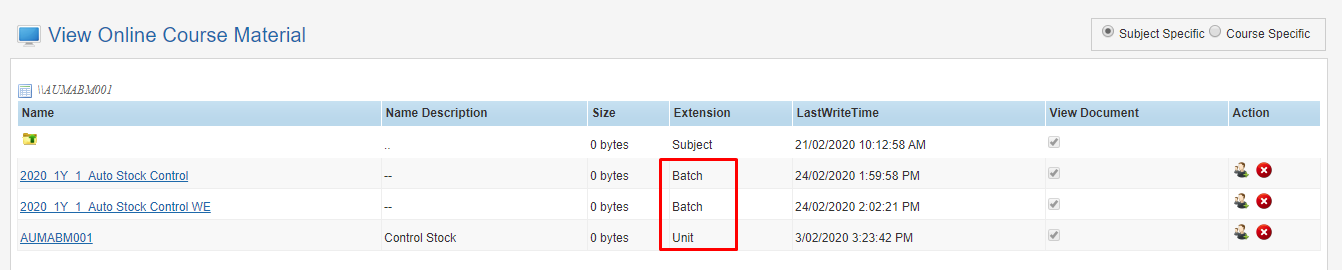
Batch folder (for each class) - access to the material for the enrolled batch (class). Students can see the Class Folder after their class start date until the Class end date.
Unit folder (for the subject) - Unit level folder within each subject to access materials specific to that unit.
Student Visibility
![]()
For the Folders and Material files you can manage the Student Visibility using this icon.

Rename folders and material files
![]()
This Icon allows you to rename the Folders and Material files.
Delete folders and material files
![]()
This Icon allows you to delete the Folders and Material files.
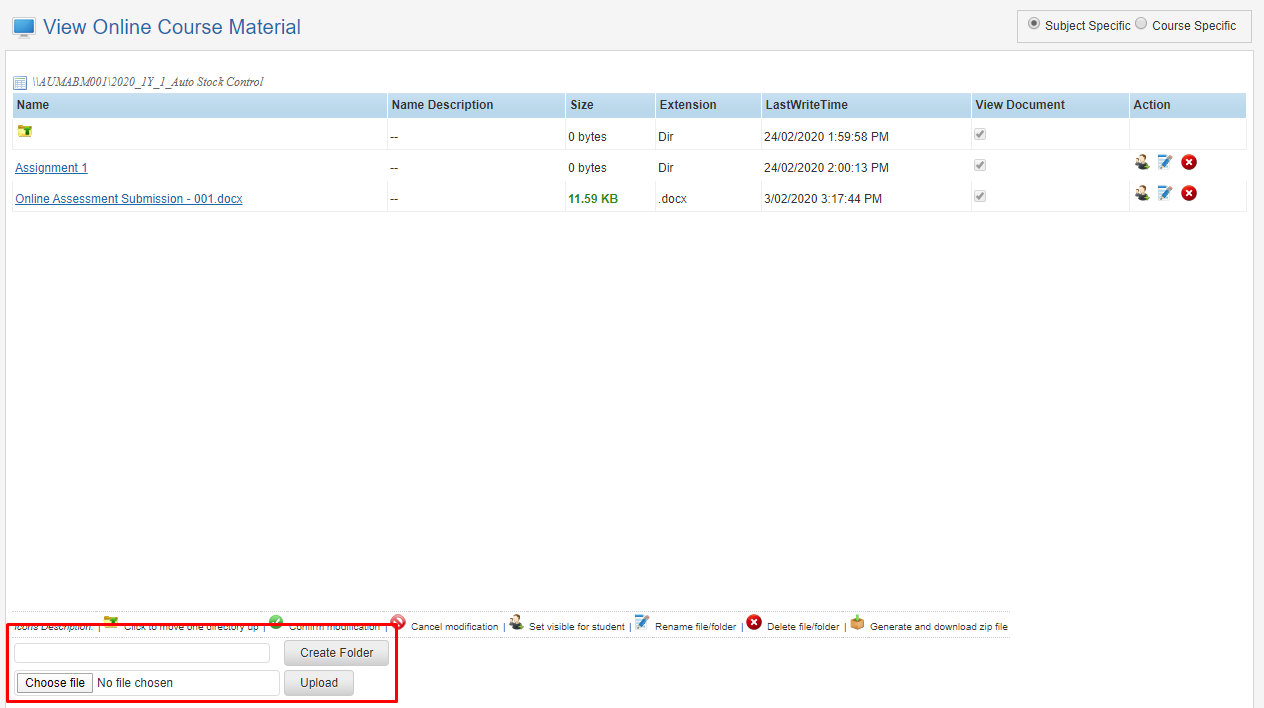
Create folders and upload material files
You can create folders and upload material in the Batch folders (not the Unit folders)
Course Specific
Material and resources, provided by the College, specific to a Course. A top level Folder for the management of relevant materials exists for each Course that you have a timetabled Class/Batch for.

Student Visibility
Course Folders and Materials indicate the Student visibility as determined by the College.

Timesheet (Optional Module)
This menu allows you to submit/upload your timesheets as an evidence of number of hours you have worked. This will be reviewed by the Director of Studies (DOS) or someone in higher position in hierarchy and then be approved for the payment. To work with your timesheet follow the instructions below:
Timesheet Submission
This submission uses the Class Timetables for the Teacher. A Teacher must have a timetabled Class.
If a Teacher is replaced the Class Teacher is changed (updated) to the new Teacher. The Class timetable will be available for the new Teacher and not for the original Teacher.
If a Teacher is relieved, the timetable is still available for the original teacher. This needs to be handled using the Manual Time sheets functions.
- Click Timesheet in figure below. You will go to the timesheet submission page as shown below:
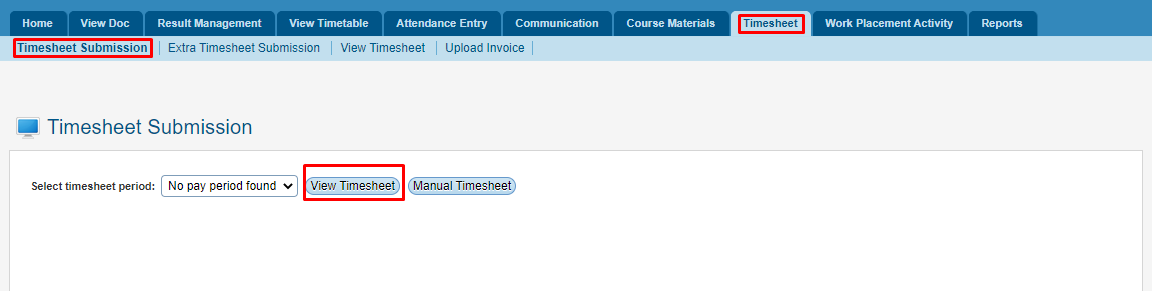
- Select appropriate Timesheet Period from the drop-down menu.
- Click View Timesheet to generate a list of possible timesheets for the above selected period as shown below:
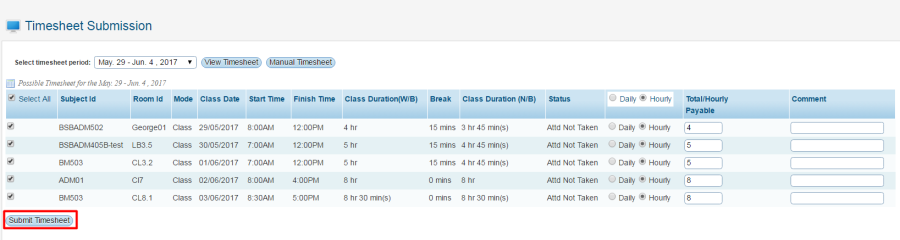
- Select the timesheet you want to submit by ticking the check box

- You can also write comments about the timesheet in the area as shown in figure 2.
- Once all information has been entered, click Submit Timesheet.
- You can see the Current and last pay period only to submit.
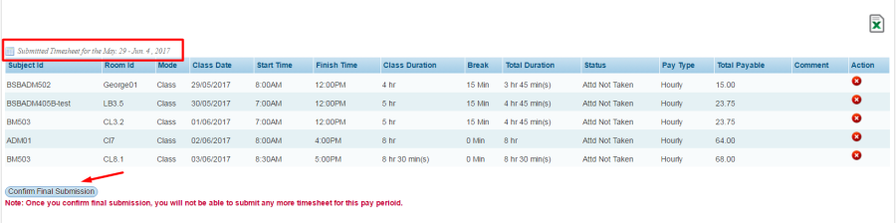
- As per example shown above, a list of submitted timesheet for the selected pay period will appear. You may review all the information as required. You can also export the timesheet list by clicking
 icon in the above mentioned example.
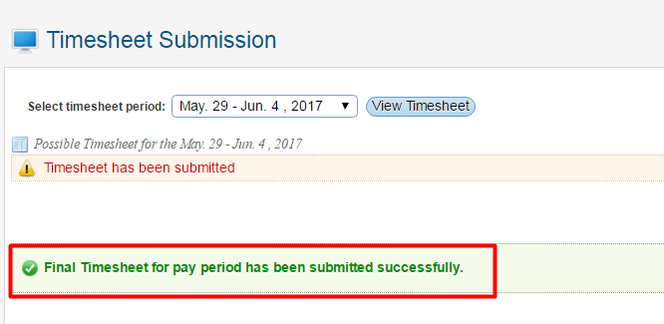
 - Click Confirm Final Submission. A message in green appears confirming that the timesheet has been finally submitted successfully as shown below.
Manual Timesheets
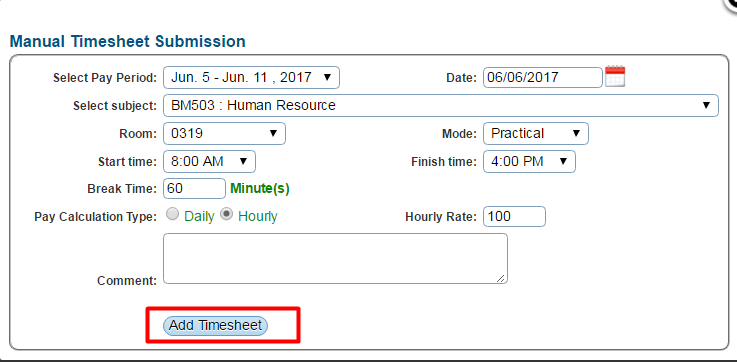
This menu allows you to submit timesheets manually. This situation might arise when a teacher takes leave (becomes sick, goes on annual leave etc.) and a relief teacher is assigned to conduct the class. In this case the relief teacher will have to submit his/her timesheet manually as instructed below:
- Click Timesheet as in figure below. You will go to the timesheet submission page as shown below:
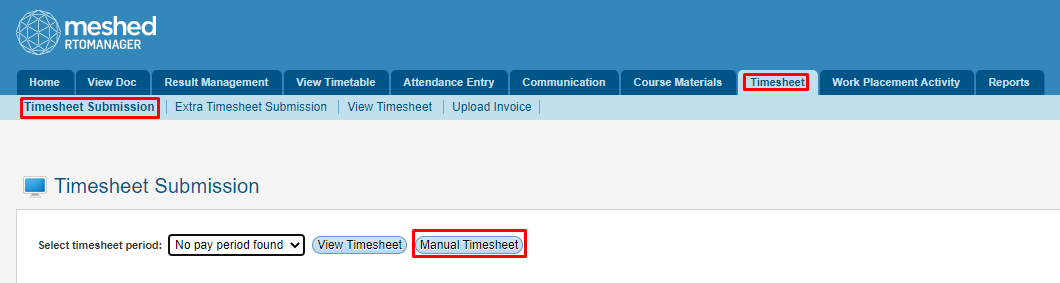
- Click Manual Timesheet. A pop up window will appear and will allow you to manually enter timesheet information as shown below. Once completed, click Add Timesheet.
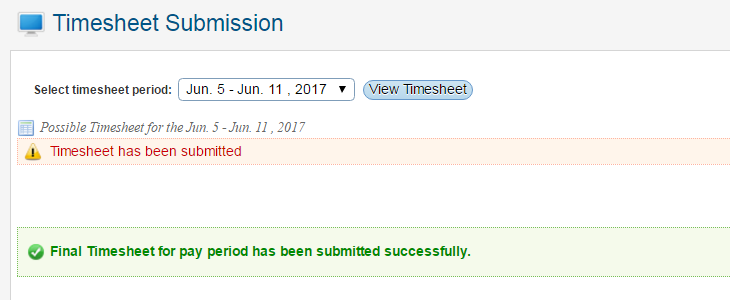
- A confirmation message in green will appear to confirm manual timesheet has been created as shown below:

- Click Confirm Final Submission to finalise submission. The following message will appear to confirm successful submission of timesheet.
Extra Activity Timesheet
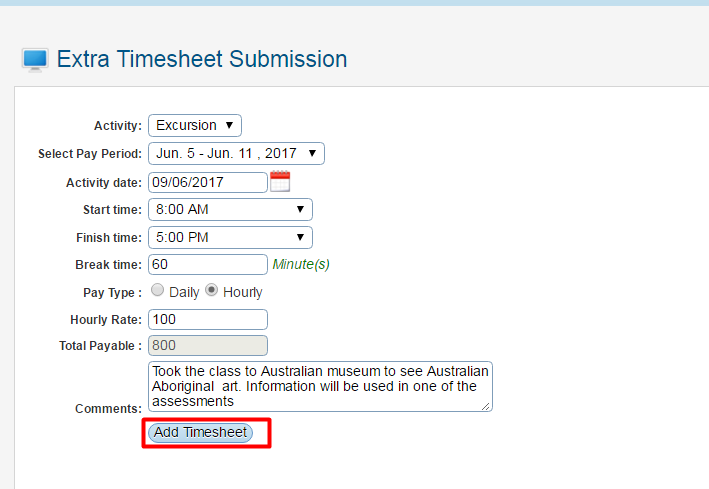
This menu allows you to submit extra activity timesheets like exam marking, exam supervision, student consultation, meetings, excursions which are not part of your regular timesheets. To create and submit extra activity time sheet, follow the instructions below:
- Click Timesheet >Extra Timesheet Submission. By default you will go to the page as shown below:

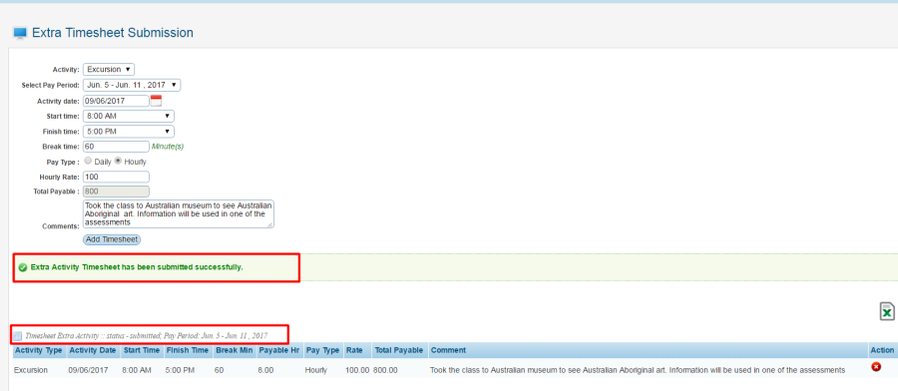
- Enter all your relevant extra activity information as shown below. Click Add Timesheet to save.
View Timesheet
This menu allows you to view submitted timesheets. You may also keep track of timesheets that has been approved or not for payment purposes. To view timesheet, follow the instructions below:
- Click Timesheet > View Timesheet
- Select Report Type and pay period from the drop down menu.
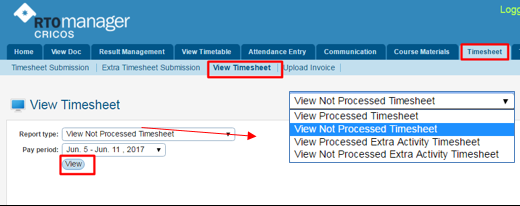
- As for the example above, we have Selected to view Not Processed Timesheet
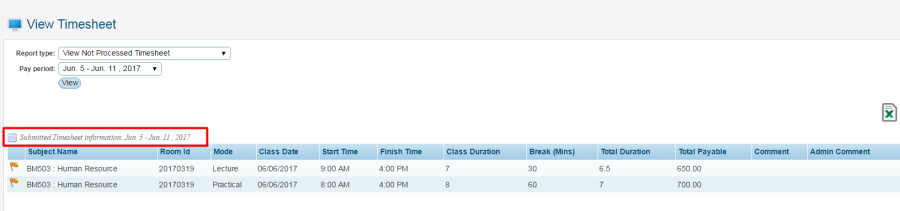
- Click View to generate list.
Upload Invoice
This menu allows you to upload your own invoices. This is applicable if you are a trainer contracted with the college. You must have your own ABN (Australian Business Number) so that you can issue an invoice for the college to pay for your services. The upload invoice will then be downloaded by admin staff, approved and further forwarded to account department for the final payment.
To upload the invoice, follow the instructions below:
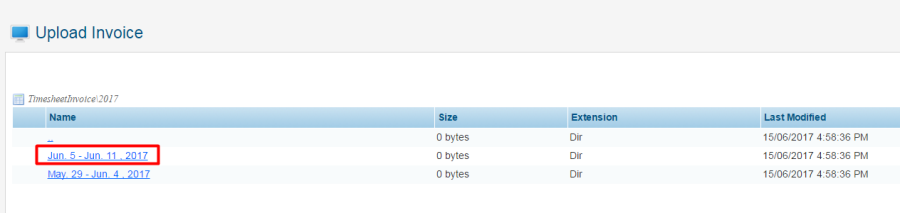
- Click Timesheet > Upload Invoice. This will direct you to page where you will be able to upload your invoice (as shown below).

- Click the required year folder to upload your invoice. You will be directed to the pay period link

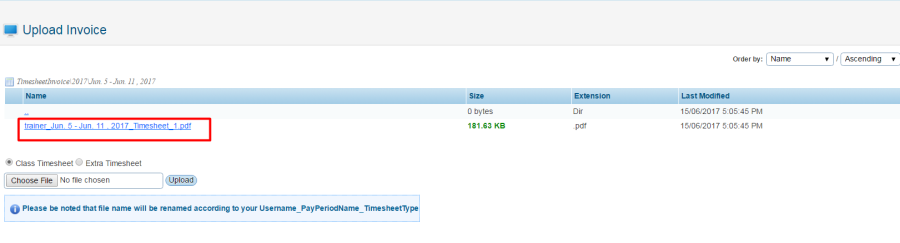
- Select the relevant pay period. Click the link of your pay period available for e.g. June 5- Jun11, 2017
- Select the type of your invoice whether it is related to Class Timesheet or Extra Timesheet
- Select the invoice (scanned copy or electronic file) from your computer by clicking Choose File button as shown below:
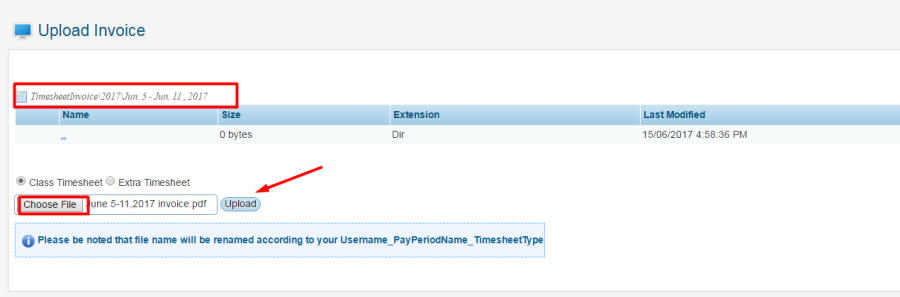
- Click Upload to upload Invoice. Your recently uploaded invoice will appear as shown below:
Work Placement Activity
This menu allows you to enter Traineeship related Work Placement Activity for students. A need to record traineeship activity will arise when your student is placed with any employer for training or apprenticeship experience.
You can view the list of Student activities between dates. All the activities will be displayed if it falls between the two dates selected.
To understand and record this, follow the instructions below:
- Click Work Placement Activity on the menu as shown below.
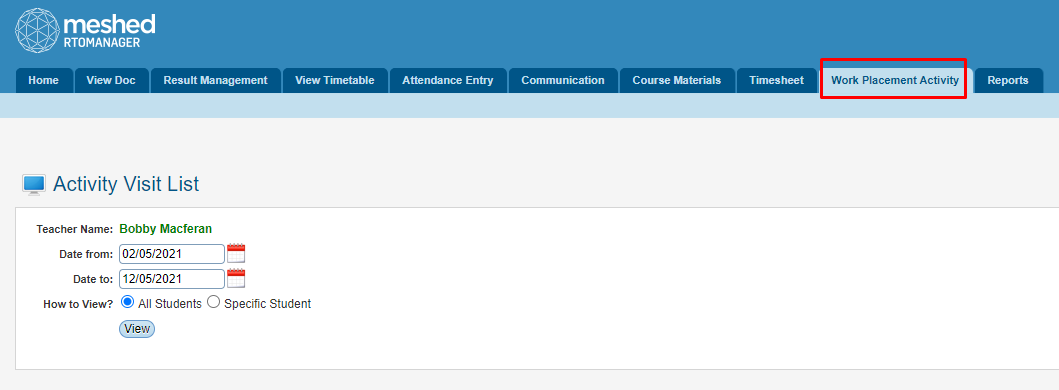
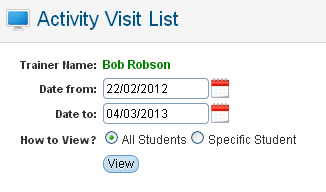
- Enter/select Date from: and Date to
- Select the radio buttons for How to View as e.g. all Students or specific Students (as shown below).
- Click View to generate the list of All the activities list between the date selected will be displayed as per below.
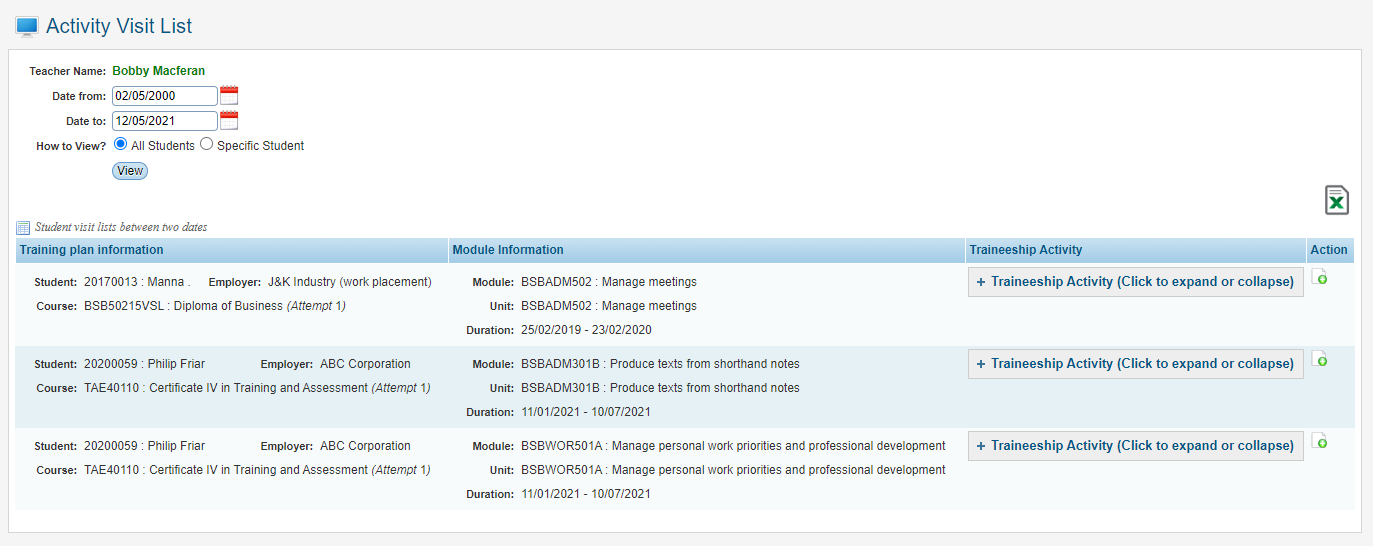
- To view all the traineeship activities for the student, click
 link
link
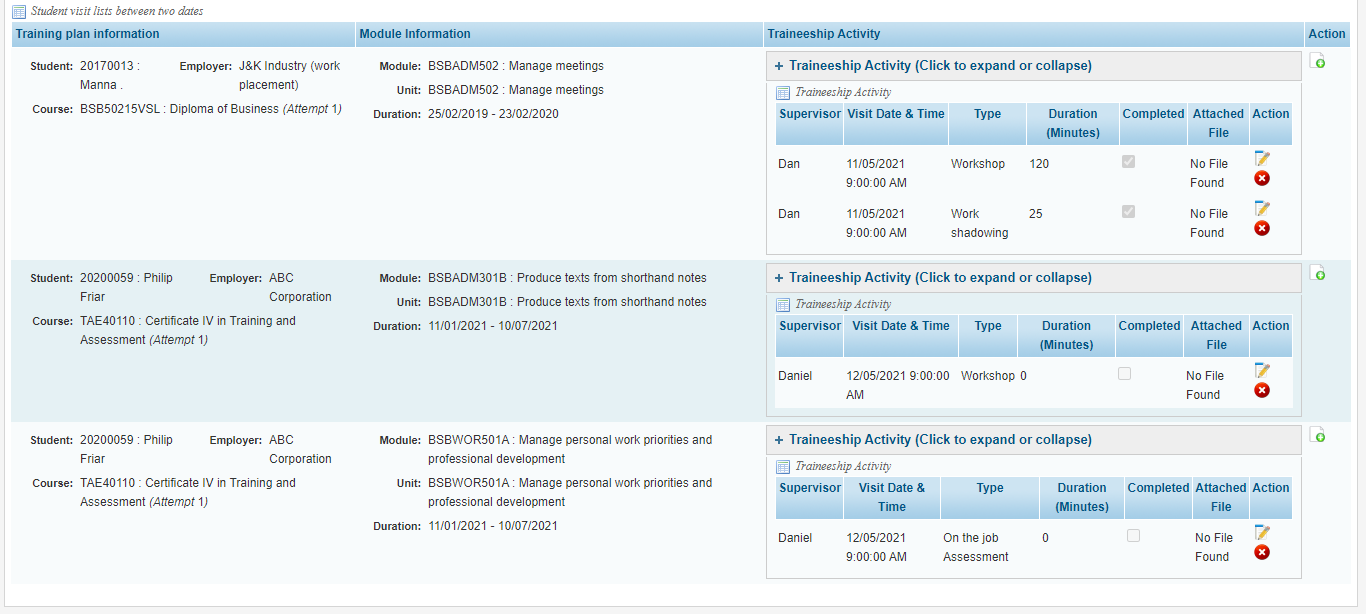
- Work placement activity for each listed Student can be added, modified, or deleted using the relevant Action Icons

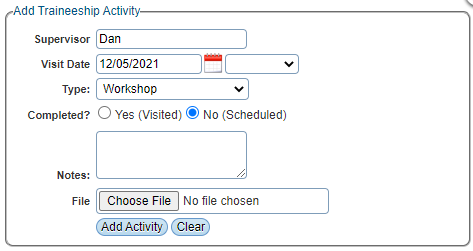
Add Traineeship Activity

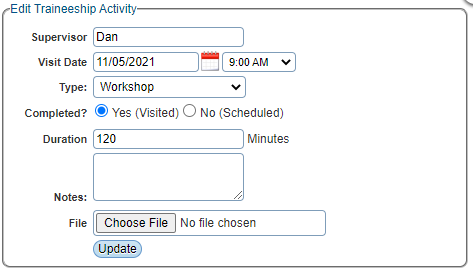
Edit Traineeship Activity

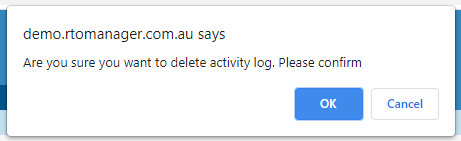
Delete Traineeship Activity

The Excel Icon exports the displayed Traineeship Activity information from the Meshed Platform in an Excel format.
Reports
From this menu you can generate various reports as per user rights assigned to you. To generate reports, follow the instructions below:
Note: Only Reports that are assigned to view by Teacher by Administrator will be listed in the Report section.
- On the main menu click Reports. You will be directed to Generate Reports page as shown below:
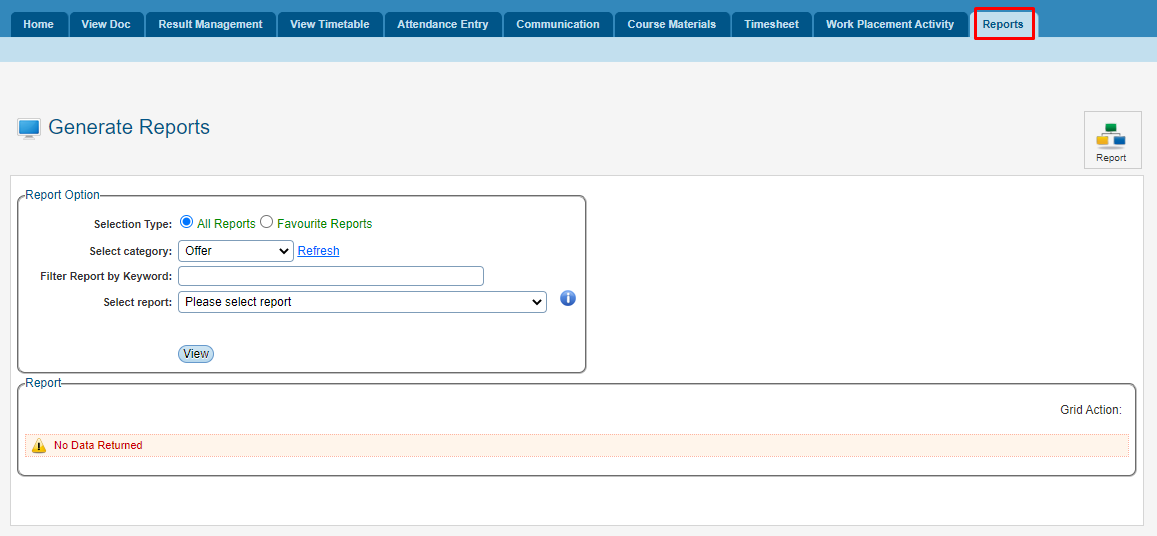
- Select Type, Category and Report from the drop down menu.
- Click View to generate selected Report
