Student Profile Summary Action Icons - Part 1
- Andrew Aylesbury (Deactivated)
Overview
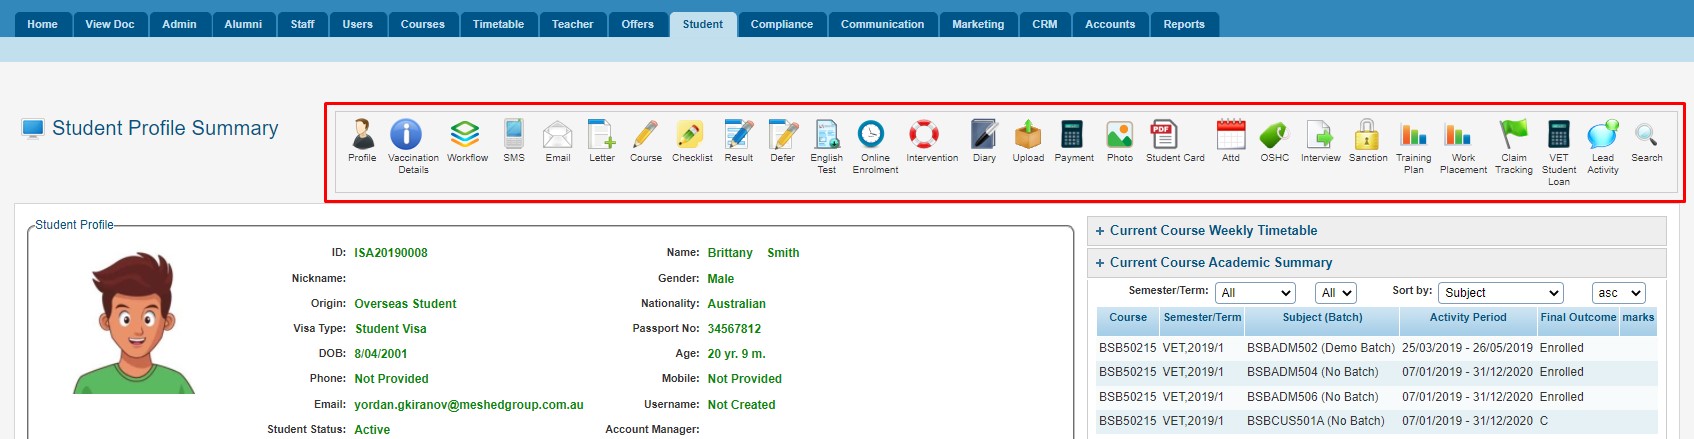
Note: The actual Icons displayed will vary based on Student information and the Meshed Platform optional features and modules that are enabled
The following table includes the list of the icons together with their descriptions.
Icon | Function |
| Allows you to view and edit student's profile. |
| Allows you the the ability to capture and manage Vaccination information for the Student |
| Allows you to add SMS to students (if the SMS Optional Module is enabled). |
| Allows you to send Email to students. |
| Allows you to Generate and send letter to the student using templated letter for selected course for the Student |
| Allows you to view/ edit/ check courses the students are enrolled in. This also lets you check if offer and enrolment process has been completed. Lastly, this also provides you the ability to review and verify all documents that has been sent. |
| This checklist allows you to check and verify all documents submitted. |
| This allows you to view and update Student Subject and/or Unit Enrolment information and lets you set up Study plan. |
| This menu allows you to defer (postpone) student's enrolled courses to another semester or study period. |
| Manage Student Course English Language testing and exemptions information (ESOS) |
| Allows you to apply intervention strategies to monitor and intervene student during their course of study – e.g. Poor attendance, poor academic performance, counselling to secure better grades, counselling to reduce absences. |
| This function allows you to keep track of all the communications and logs made for a student. Example: student complaints, student progress and student attendance. |
| This icon allows you to upload student documents such as offer letters, student application, passport copy and other relevant documents. |
| This icon allows you to view and add or make changes to Student Payment schedule. |
This icon allows you upload a Student photo to be used on the Student profile page and for the Student Identification card. | |
| This icon allows you to generate Student Identification card (PDF format) |
| This icon allows you to view and update Student attendance. |
| This icon allows you to view student's OSHC (Overseas Student Health Care) details. |
| This function allows you to record Student Exit interview details. This is helpful in gaining feedback and can be used for further improvement. |
| This function you allows you to add 'sanction' for students. A sanction is created in order to restrict the user to log in to the system (student) on or after some stipulated date due to various reasons e.g. payment not made on due date and/or library book not being returned on time. The system will not allow the user to log in to the system until and unless the sanction has been removed or disabled. To do this, follow the instructions below: |
| This function allows you to create a Training plan for student. |
| This function allows you to keep track of payment claim for students undertaking funding for NSW Training Courses and used to record their Initial, mid or completion funding lodgment details. (This function is for Domestic Students only) |
| This is an optional function. Related to VET Student Loan feature. |
| This is an optional function. Related to Higher Education Fee Help Feature. |
| This is an optional function. Related to CRM Lead Management and will appear if the optional module is activated |
| This icon allows you to search for another student profile while you are in one student's profile page. Enter other student ID number to move to that student profile page without going in and out of page. |
Profile
![]()
This page allows you to view and edit the Student details. The information originates from the Student application.
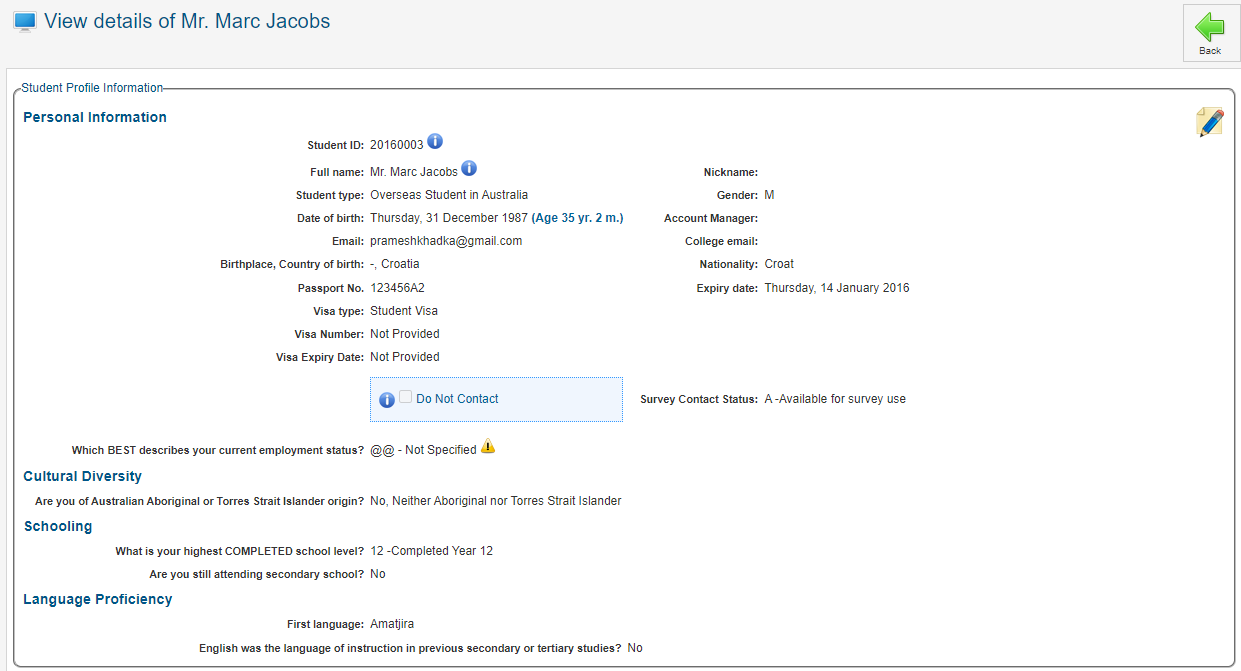
- Click
 to edit Profile information. This icon is located on the top right hand side of the section.
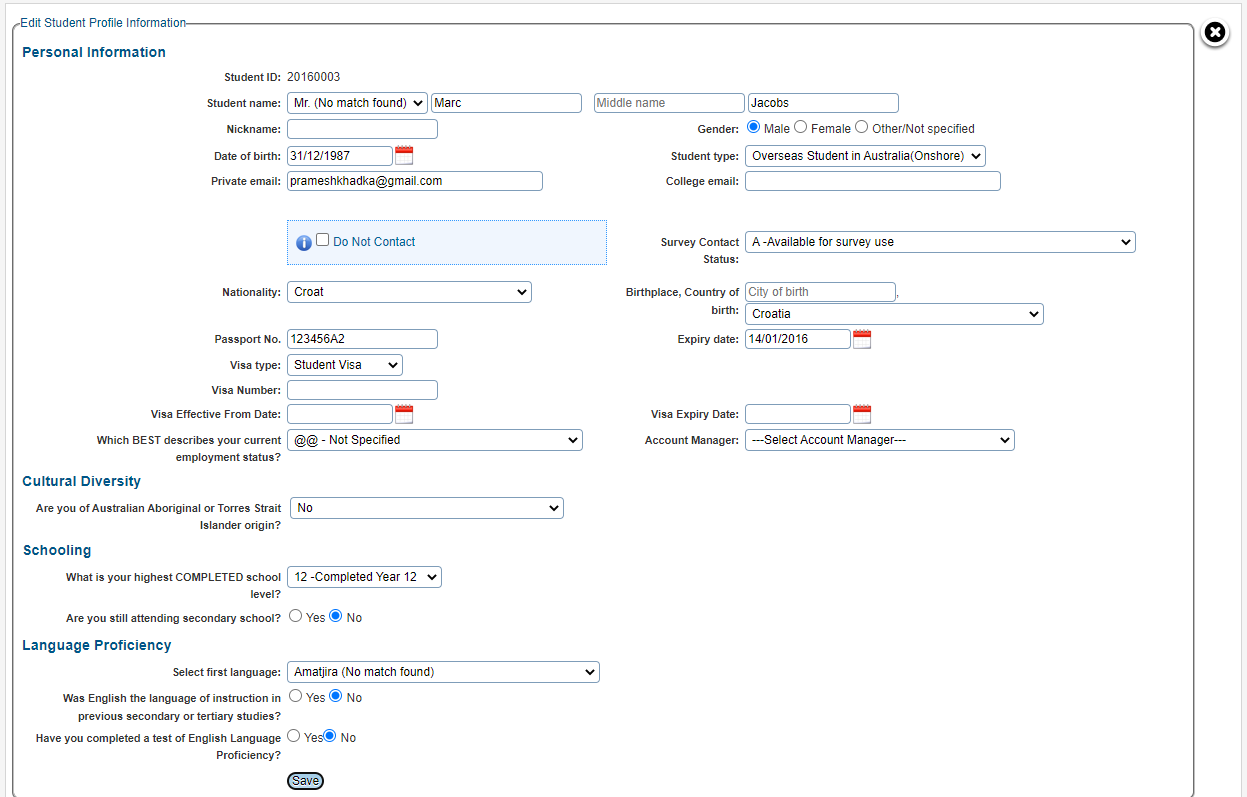
 - Fill in the required information/ values and click Save to record changes.
- Click Record to update USI information

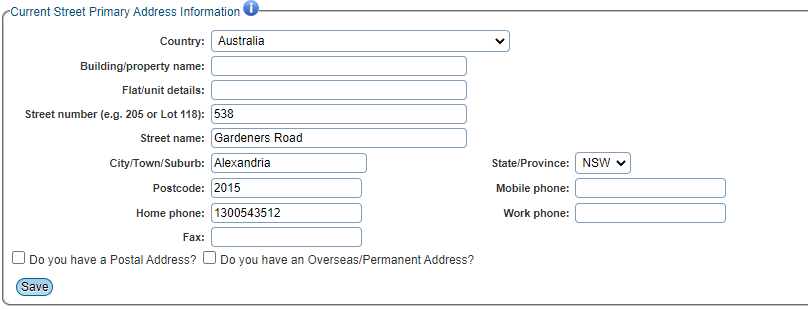
- Click to edit Address information. This icon is located on the top right hand side of the section.
- Enter or edit the required information and click Save to record changes.
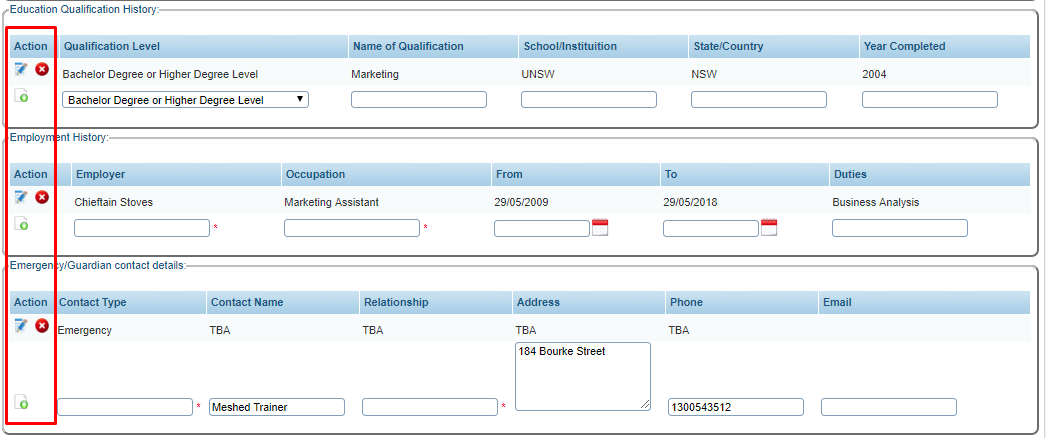
- Use the Edit, Delete and Add Action Icons for the Education Qualification, Employment History and Guardian information.
- Click to edit Disability information. This icon is located on the top right hand side of the section.
- Enter or edit the required information and click Save to record changes.
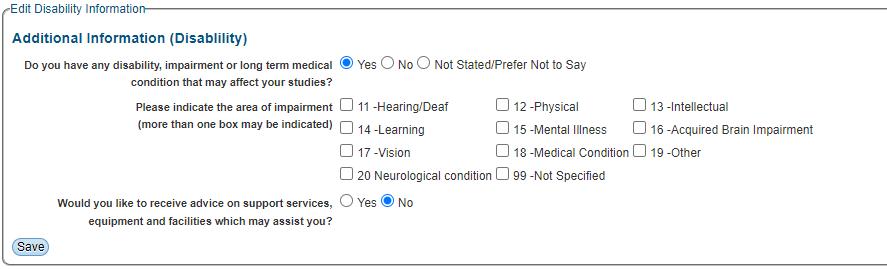
Note: All fields which have * (asterisks) require mandatory entry.
Applicant and Student Duplicate Check
The System has duplicate check functionality which applies to:
- Online Application entry process
- Admin Application entry Process
- Modification of an Application during the Offer Management processes
- Modification of a Student profile during Student Management processes.
Duplicate check is performed using the following criteria:
- First Name
- Last Name
- DOB
- Nationality and Passport combination
This System will alert the User when a potential duplicate is detected. This will assist with preventing duplication of Students and Applicants in the System.
Vaccination Details

Capture and manage Vaccination information for the Student:
- Create and manage multiple Vaccination document records.
- Create and manage multiple Vaccination details (doses) for each Vaccination document record.
- Manage Vaccination Details created by the Student using the Student Portal (Optional Module).
Page Permission can be used to enable or disable the Student View/update Vaccination Details in the Student Portal.
More information on Page Permission here.
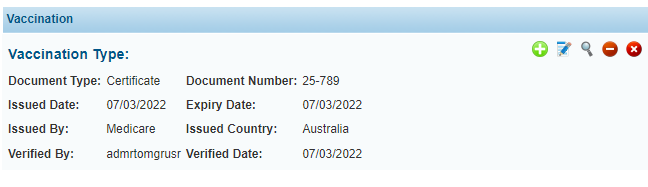
To record Vaccination Details for the Student follow the steps below:
- Multiple Vaccination Documents can be recorded for each Student.
- Enter the Vaccination Document information which includes Vaccination Type, Document Upload, Type, Number, Issue date, Expiry Date, Issued By and Issuing Country.
- Click Save.
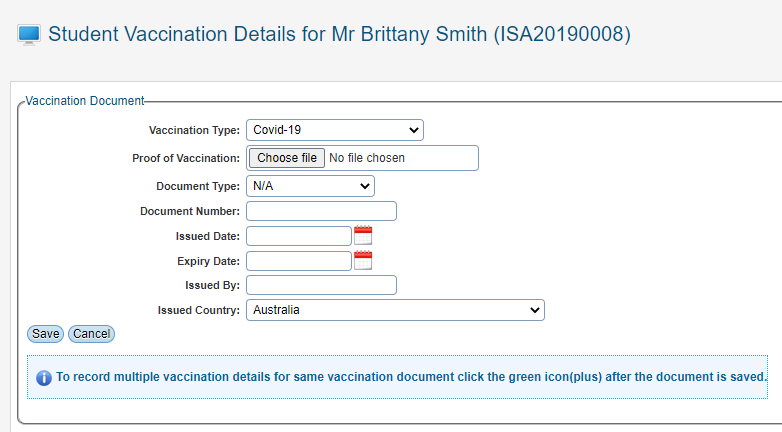
- The Vaccination Document will be shown in the lower grid
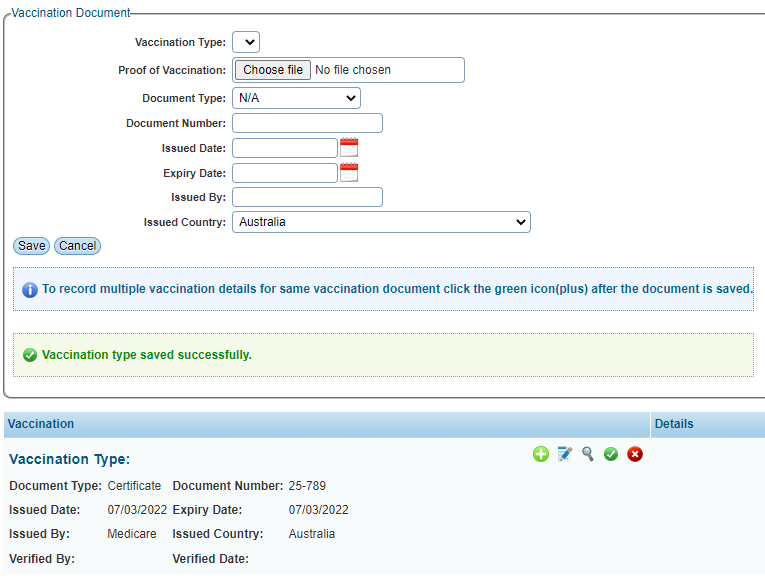
- The Vaccination Document(s) recorded by Staff or by the Student using the Student Portal (Optional Module) can be managed using the Icons.
 Modify Icon to manage the information
 Preview Icon to display the uploaded document
 Delete Icon to delete the Vaccination Document
 Add additional Vaccination details (e.g. doses) for each Vaccination document. Multiple Vaccination Details can be recorded for each Vaccination document.
Configurable System Field
The Vaccination Type field is a configurable system field
Some fields in the Meshed Platform can be configured by Users (Admin or Sadmin roles) to set custom types and/or values. The custom types and values will be displayed as options that can be selected for these fields (typically in a drop down list).
Navigation: Admin> Configuration and Setup > System Fields Setup
More information available here.
To record Vaccination Details for the Student follow the steps below:
- Enter the Vaccination Details information which includes Vaccination Date, Brand/Company, and Location.
- Click Add Vaccine.
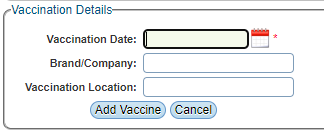
- The Vaccination Details will be shown in the grid.

- A Vaccination Detail recorded by Staff or by the Student using the Student Portal (Optional Module) can be deleted using the Delete Icon

- A Vaccination Detail recorded by Staff or by the Student using the Student Portal (Optional Module) can be edited using the Edit Icon

 Verification of Vaccination Details
Staff can record the verification of the Vaccination Details. This automatically records the User and the date for the Verification.
- Verification Details can be removed using the Remove Icon

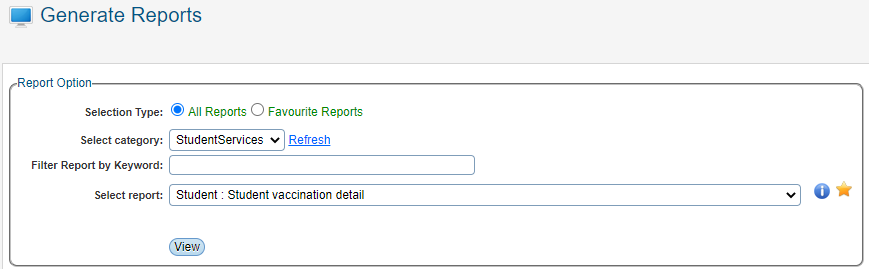
Report
A report is available to view and export data related to Student Vaccination Details.
SMS (Optional Module)
![]()
This icon allows you to send an SMS (Short Messaging System / Text) directly to the student. RTOManager has the capability to integrated with a third party Messaging provider* which allows you to send SMS from the system.
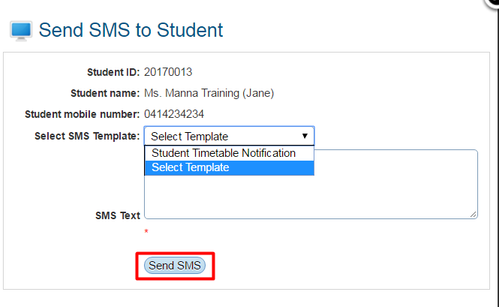
To send SMS, follow the steps below:
- Select SMS Template from the dropdown menu. To save you time typing messages, you may setup SMS template in the system e.g. Student Timetable Notification, Payment due reminders etc.
- If there's no template available, you can type in your message on the field provided. You can use up to 160 characters.
- Click Send SMS to send. The system will confirm if SMS has been sent
![]()
This icon allows you to send email directly to the student using RTOManager.
To send an email, follow the steps below:
- Select the email address you would like the email to be sent from (from the drop down menu). Note that the system has the ability to capture all email addresses as per your college's different department e.g. Academic, payment, student services, marketing, IT etc.)
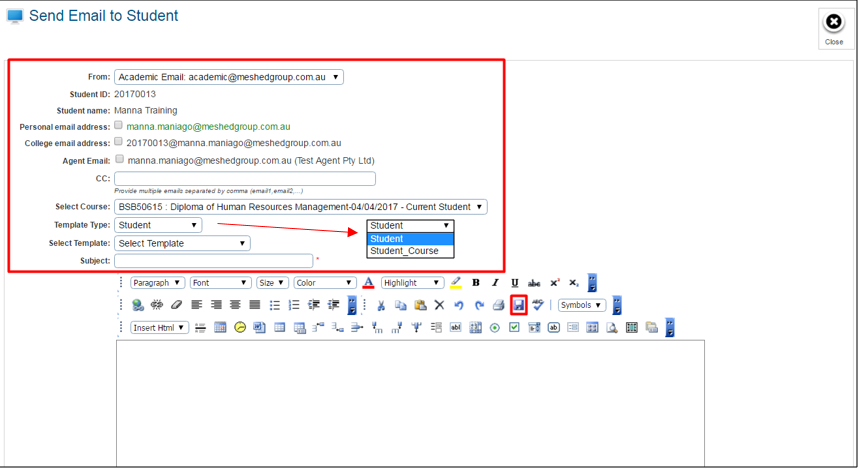
- Tick the box that correspond to student's email address. You also have an option to send email to the agent (if applicable).
- Select the Student's course (related to the purpose of the email). Note that students can enrol into multiple courses just as long as courses has different intake dates and course duration.
- Select applicable email template (if any). You may setup Email templates on the system for those frequent emails you send to students e.g. Welcome letter, Payment Reminders, Course Timetable information etc. See example below:
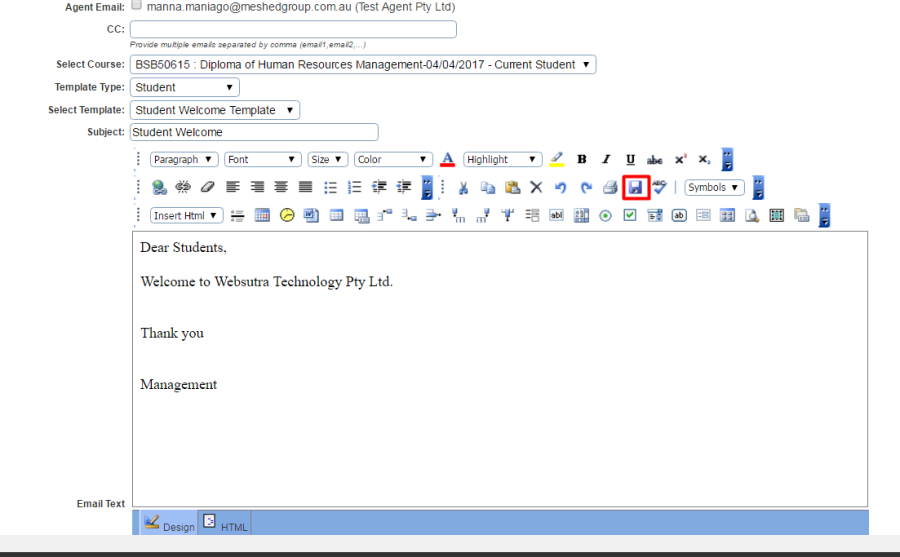
- Once email has been written, click the Save button
 and scroll down to add attachments (if any).
 - As a system default, the box to add to student communication is ticked to ensure that this communication is recorded. You may untick the box if you do not want to record. Click Send Email.

Preventing email sent from Meshed System being considered as spam or treated as Junk email
To assist with preventing email sent from Meshed Student Management System to your students from being considered as spam and treated as Junk email, our Network Administrator has suggested adding or modifying an SPF record in your DNS server. Further information see Ensuring Email Delivery (Security): SPF, DKIM, and DMARC Implementation
Letter
![]()
This icon allows you to generate a letter that you can send to your students. These letters can be downloaded as a PDF file.
To generate and send letter, follow the instructions below:
- Select Student course from the drop down menu. (Related to the purpose of the email). Note that students can enrol into multiple courses just as long as courses has different intake dates and course duration.
- Select Report name ( as applicable). System has the capability to generate a report depending on what data you are after e.g. Student enrolment details by id/firstname/lastname/passport/dob.
- Select Letter template from the drop down menu. Letter templates can be set up in the system following the data report that you have generated.
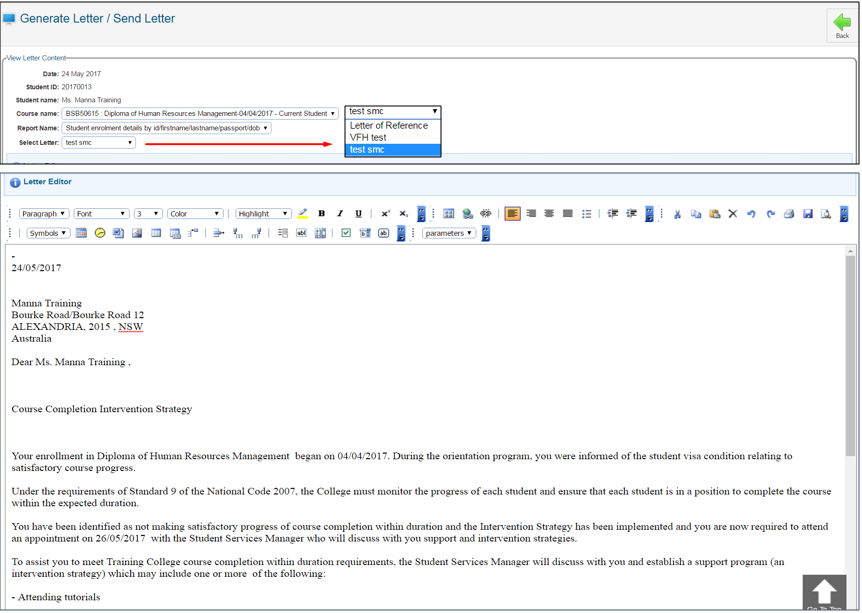
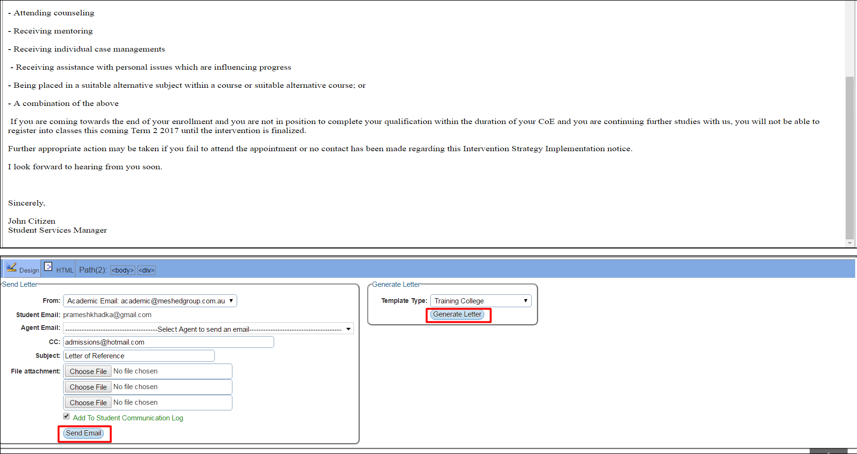
- Once a template has been selected, the body of the letter will automatically get pre-filled together with the set parameters.
- To send this letter via email, fill in the information needed e.g. email address, Subject attach files to be uploaded and click Send Email.
- To Generate letter, choose template type from the drop down menu e.g. Template with header, plain template etc and click Generate Letter. The letter will be downloaded as a PDF file that you may print and send via post as required.
Student Portal (Optional Module)
Letters Generated using this function are not available in the Student Portal Warning Log
