Reports
- Andrew Aylesbury (Deactivated)
Overview
One of the key features of the Meshed Platform is its ability to generate reports that provide insights into student performance, attendance, and other important metrics.
There are a number of reports that can be generated, and some common types include:
Attendance reports: These reports provide information about student attendance, including the number of classes attended and missed, and any tardiness or early departures.
Academic performance reports: These reports provide an overview of a student's academic progress, including their grades, results, and overall performance in individual subjects.
Student progress reports: These reports provide an overview of a student's progress towards their academic goals, including any milestones or achievements they have reached.
- Demographic reports: These reports provide information about the demographics of a student population, including age, gender, race, and ethnicity.
Financial reports: These reports provide information about the financial status of a student, including any outstanding fees, payments made, and financial statistics.
Overall, reports generated are an essential tool for educational providers, as they provide valuable insights into student performance, attendance, and progress. These reports can be used to identify areas for improvement, track trends, and make data-driven decisions to improve the overall performance of the institution and its students.
Reports in the Meshed Platform are predefined in the system and are grouped in categories and can be exported in Excel compatible formats.
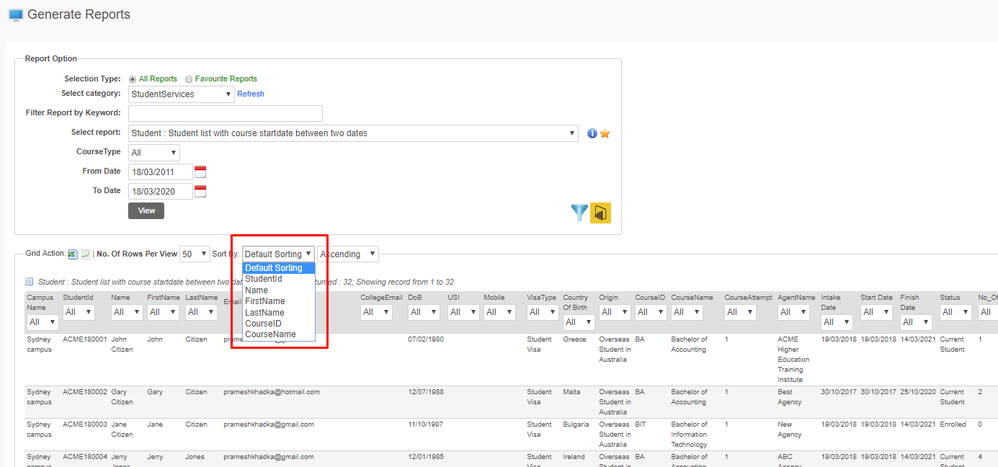
Generate Reports
This menu allows you to generate reports depending on Category. Reporting category can be Accounts, Student Applications, Enrolment etc. The system has a predefined list of reports that can be used to generate information.
To Generate Reports navigate to Reports
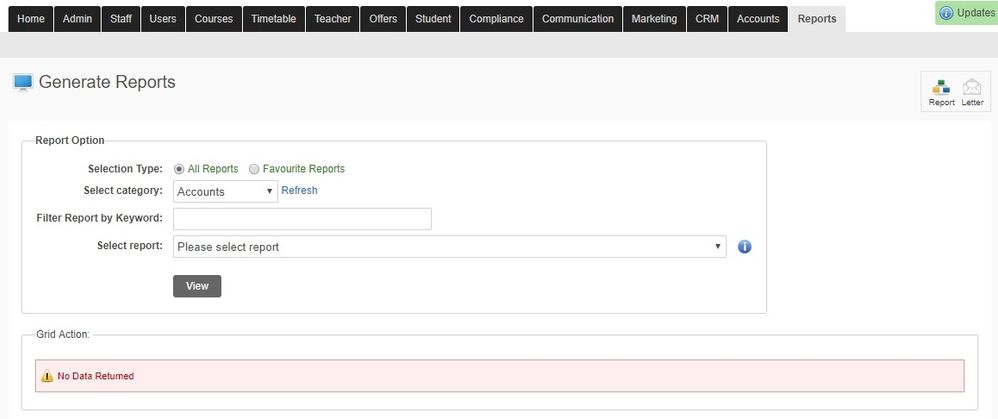
- Select Category from the down menu.
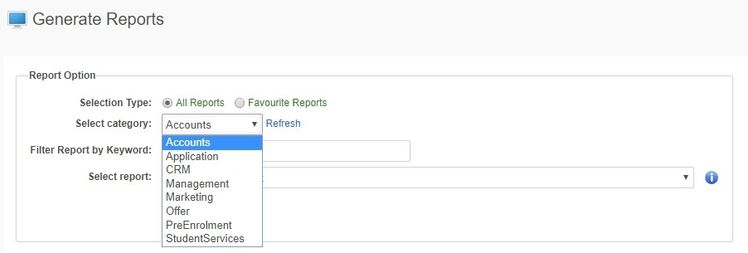
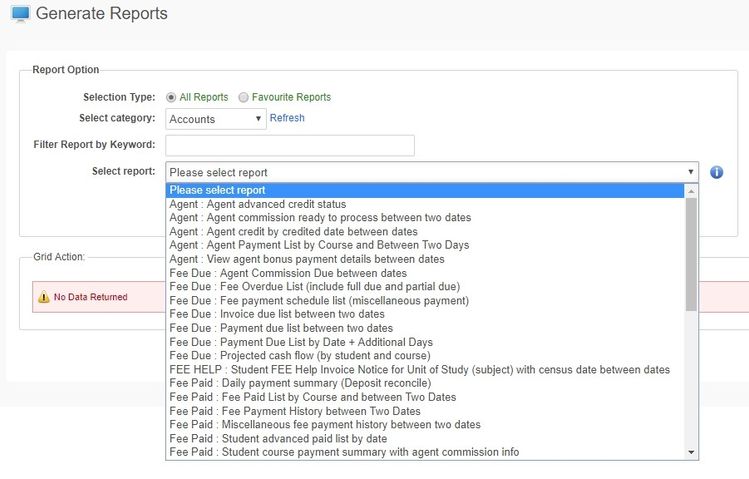
- Select Report that you need to generate from the drop down menu. These reports are predefined in the system (as shown below).
- Click View to generate report.
Reports Sorting
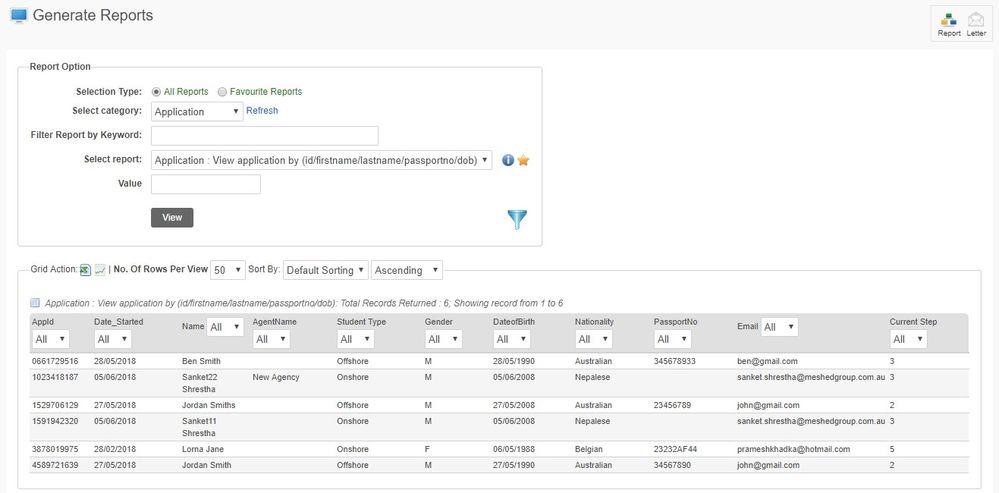
Report results can be sorted with the following criteria
- Student ID
- Name
- First Name
- Last Name
- Course ID
- Course Name
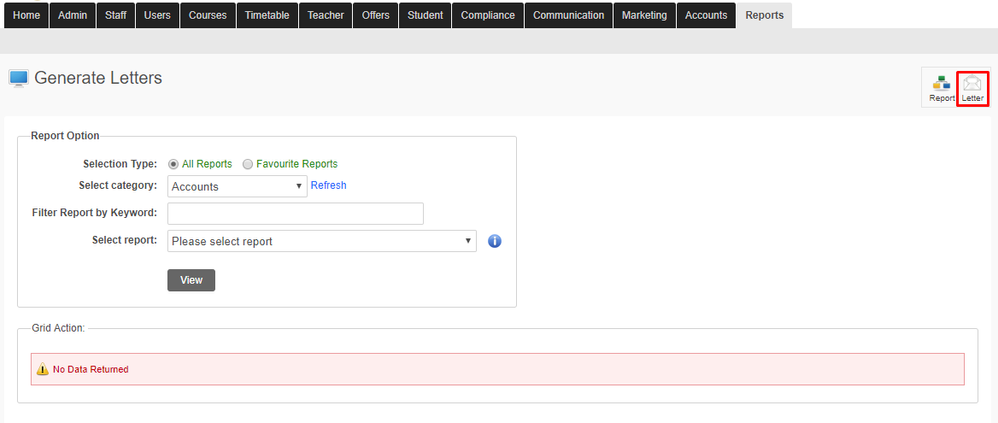
Generate Letters
To Generate Letters navigate to Reports > Letter
Student Portal (Optional Module)
Letters Generated using this function are also available in the Student Portal Warning Log
Letter Set-up
Create and manage Letters
To Manage Letters navigate to Reports > Add New or Edit Letter
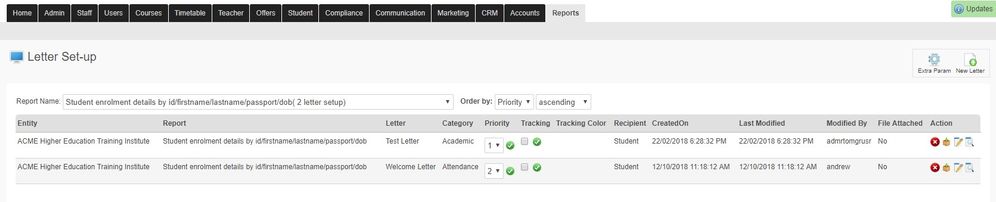
Select Report Name
A list of Letters linked to the selected Report will be displayed

The Action Icons are used to manage a Letter
- The option to provide Tracking of a Letter when sending can be modified.
- The Priority of a letter can be modified
Add New Letter
To create a new Letter
Select Report Name to link to the Letter being added
Click New Letter Action Icon
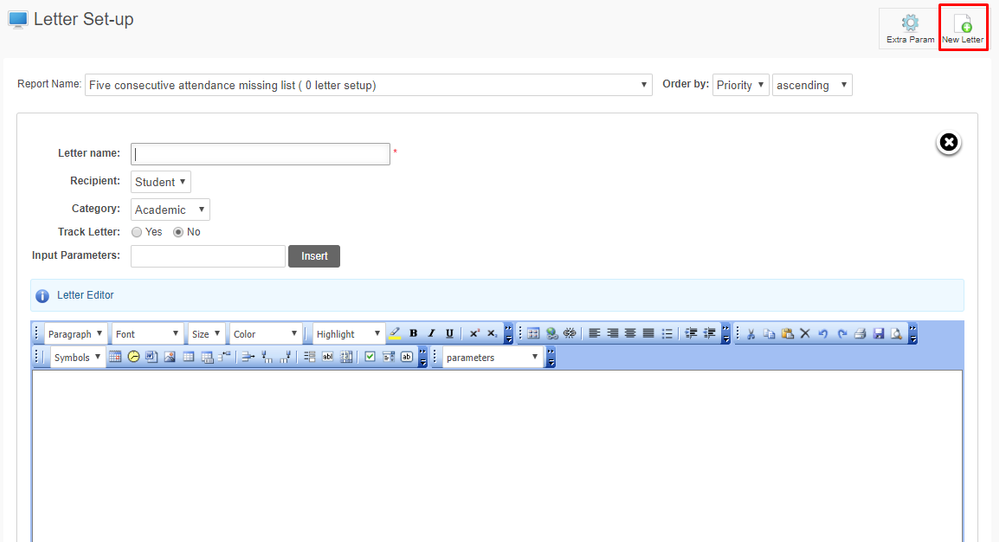
Fill in the Letter Editor form. See the Field Descriptions table below for more information.
Click the Save Icon in the Letter Editor.

Field Descriptions
Field | Description |
|---|---|
Letter Name | The name for the Letter being added. |
Recipient | Options are:
Only one option can be selected. |
Category | Options are:
Only one option can be selected. |
Track Letter | Option to provide tracking of Letters when sending. Default is No |
| Tracking Color | The color that will be used for tracking this Letter. This field is only displayed if the Track Letter field is Yes |
Input Parameters | Additional parameters to allow user to input data before generating the letter. Input Parameters are included in the Content field and represented by the Parameter name between curly braces and number signs e.g. {#InputText#} |
Content | The text for the Letter. The Letter Editor tool bar provides various tools for formatting the content. |
Parameters | System identifiable Parameters can be used in the body of the Letter e.g. Student first name, last name, date of birth (DOB), Student ID etc. These Parameters will be replaced by the value automatically when sending the letter. System identifiable Parameters are included in the Content field and represented by the Parameter name between curly braces e.g. {Name} Characters which are reserved and should not be used in the Letter are '{' and '}'. If the Letter contains these symbols the Letter will not send. |
Extra Parameter
This is used to create a Parameter which is based on a calculation e.g. Current Date + 7 days. Extra Parameters are available for selection in the in the Parameters field in the Letter Editor.
To add an Extra Parameter
Select Report Name to link to the Parameter
Click Extra Param Action Icon

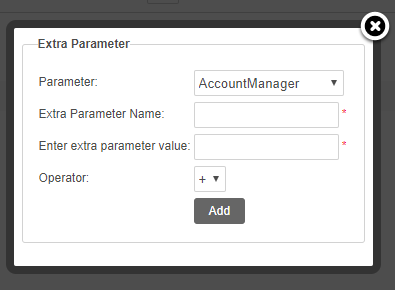
Fill in the Extra Parameter form. See the Field Descriptions table below for more information.
Click Add
- The new Parameter will be shown in the table at the bottom of the Extra Parameter form
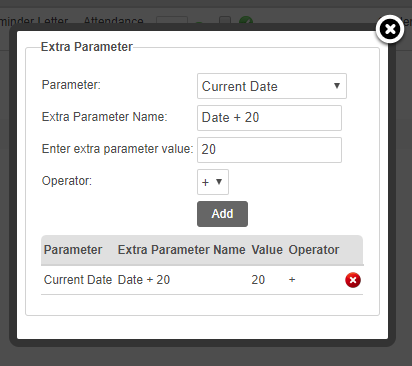
Parameters can be deleted using the Delete Action Icon  in the table at the bottom of the Extra Parameter form
Field Descriptions
Field | Description |
|---|---|
| Parameter | The base System identifiable Parameter |
| Extra Parameter Name | The name for the new Parameter |
| Extra Parameter Value | The numerical value for the calculation |
| Operator | The mathematical operator for the calculation. Options are:
Only one option can be selected. |
