Multi Campus Module
- Andrew Aylesbury (Deactivated)
Introduction
Multi Campus
In a student management system, a multi-campus refers to a system that allows education providers with multiple campuses to manage their students' information and academic records in a centralized location, despite the students being enrolled in different locations.
This system provides several benefits for education providers, as it simplifies administrative tasks and provides a comprehensive view of students' academic progress across different campuses. For example, a multi-campus system allows administrators to manage class schedules, student attendance, and academic progress reports in real-time. It also enables institutions to track student progress.
Overall, a multi-campus student management system provides education providers with a comprehensive and streamlined approach to managing student records and academic progress across different campuses.
Meshed Platform
The Meshed Platform Multi Campus Feature (Optional Module) allows a Provider to create one or many campuses within the Higher-Ed Student Management System.
Activation of the Multi Campus Module on an existing Meshed Platform includes free of charge updates for the inclusion of Campus details to the following templates:
- Offer Letter
- Student ID Card
- Letterhead
Any additional template updates will be considered as a template customization request.
Campus Selection
On your Homepage, you can select the campus you will be working on by selecting the campus from the drop down menu found on the right top hand corner of the page (as shown below). This way, you can be assured that the information you are going to view is from the campus selected.

This feature can be managed as per the process below:
Add New Campus
- Click Admin > Campus/Training Venue/Room
- On the Setup Menu located on the right hand side, click Manage Campus. This will only be visible if this feature is enabled in the platform.
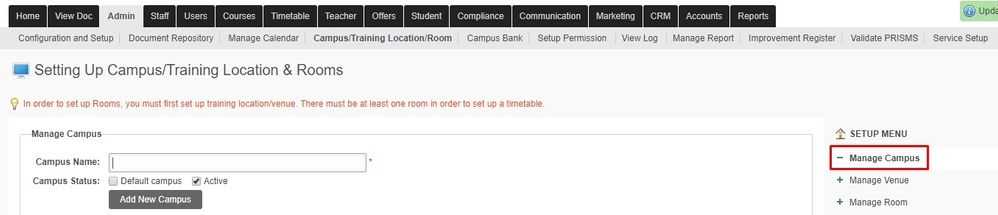
- Enter Campus Name on the field provided e.g. Melbourne Campus.
- Tick the box that corresponds Campus Status e.g. Default Campus, Active Campus.
- Click Add New Campus to save.

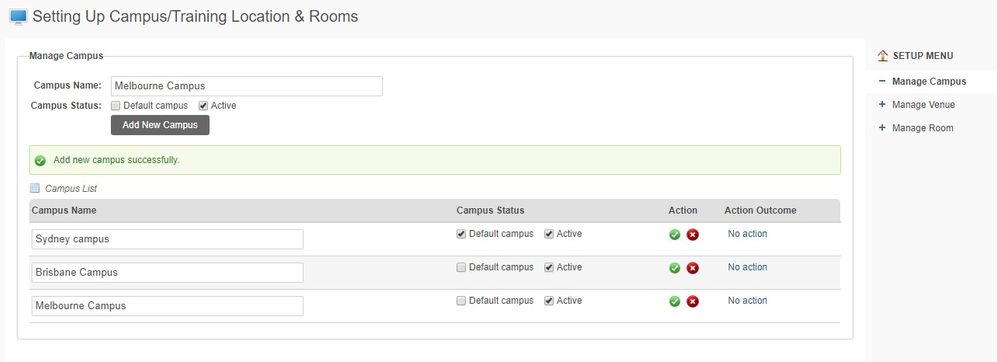
- A confirmation message will appear to indicate that new Campus has been saved and has been added on the Campus List (as shown below).
Campus Venue/Training Location
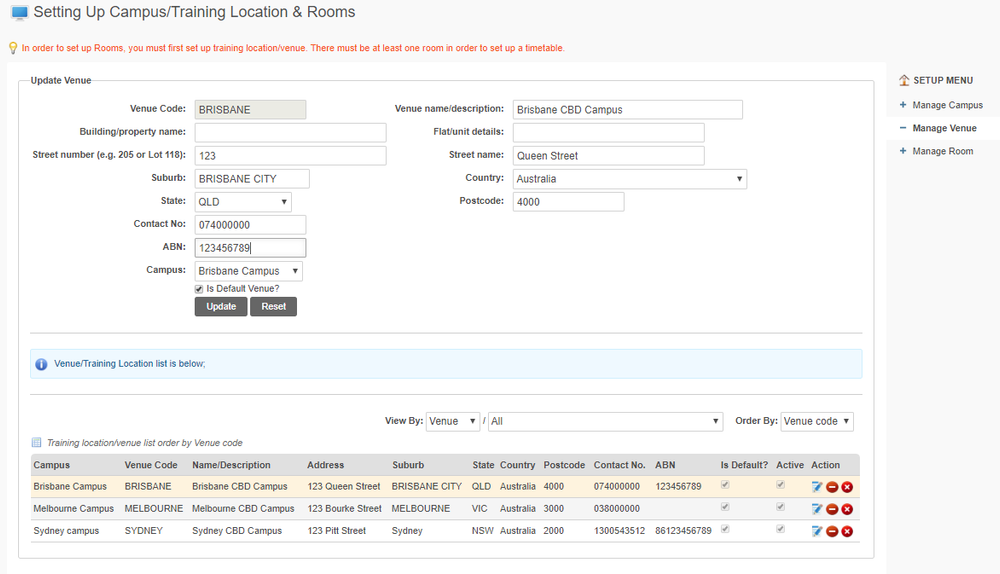
- Click Admin > Campus/ Training Location/Room > Manage Venue
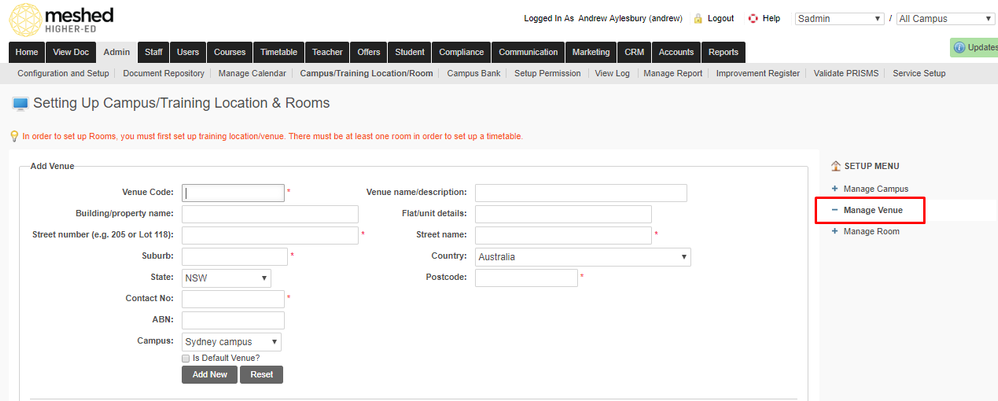
- Enter relevant venue information. Make sure that you select the correct Campus for this venue.
- Click Add New to Save.
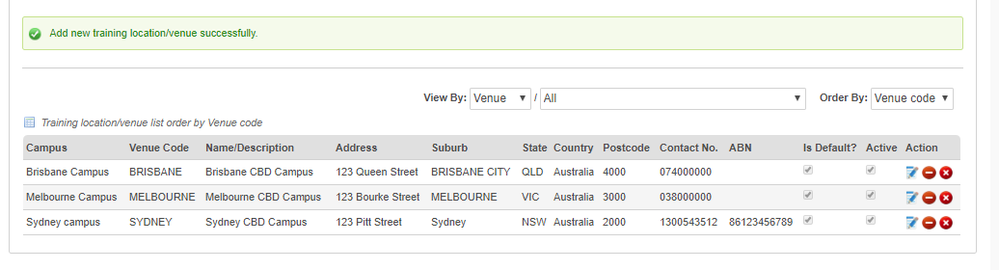
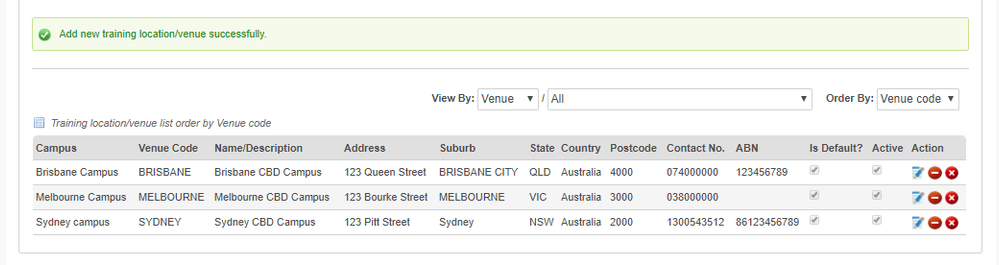
- A confirmation message will appear to indicate new training location has been added to the training location list (as shown below).
- To edit the Location/Venue information, click the Edit Action Icon
 in the list.
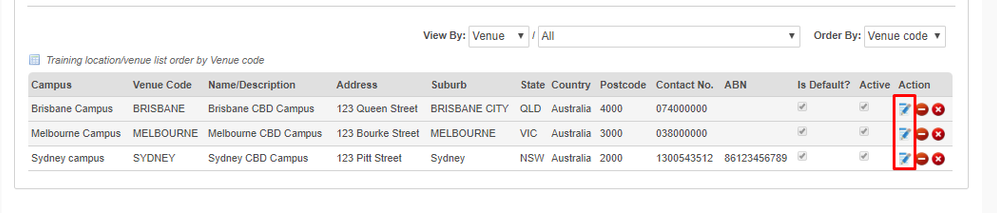
- Note that the Location/Venue that needs to be updated will be marked orange.
- The system allows modification of the information for the Location/Venue.
- Click Update to save.
- A confirmation message will appear on the screen to indicate the change has been updated (as shown below).
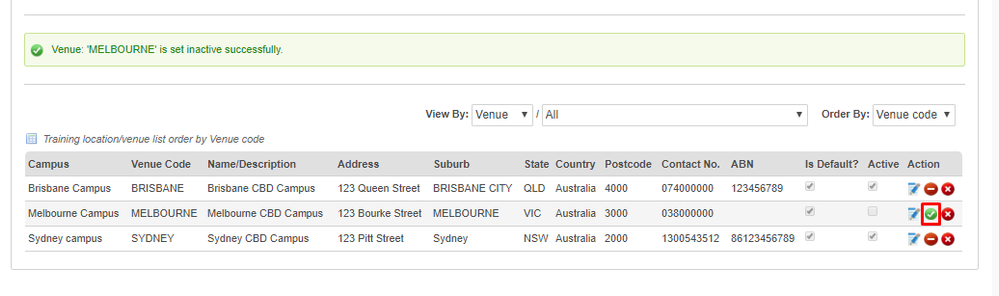
- To set a Location/Venue as Inactive, click the Inactive icon
 located on the action column (as shown below)

- User confirmation of the Rooms to be set as inactive is required.

- Confirmation message will appear to indicate venue has been set to Inactive. To make it active again, click the green icon

- To delete a Location/Venue, click the Delete Action Icon
 . A message will appear to confirm it has been deleted.
Classrooms
- Click Admin > Campus/ Training Location/Room > Manage Room.
- Enter relevant Classroom information: Room ID, Room Name and Maximum seat capacity.
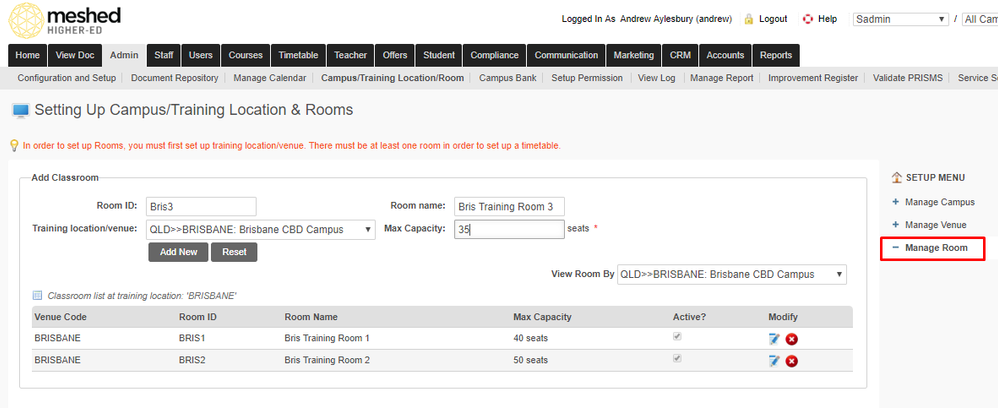
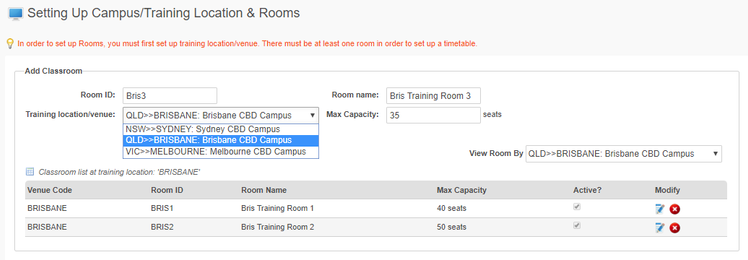
- Select the training location/ venue from the drop-down menu.
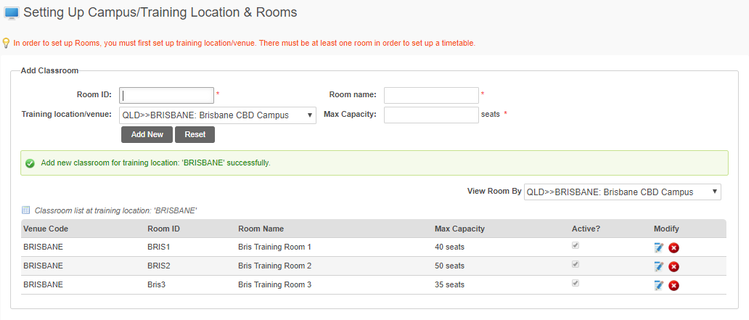
- Click Add New to Save.
- A confirmation message will appear to indicate a new classroom has been added to the Classroom list.
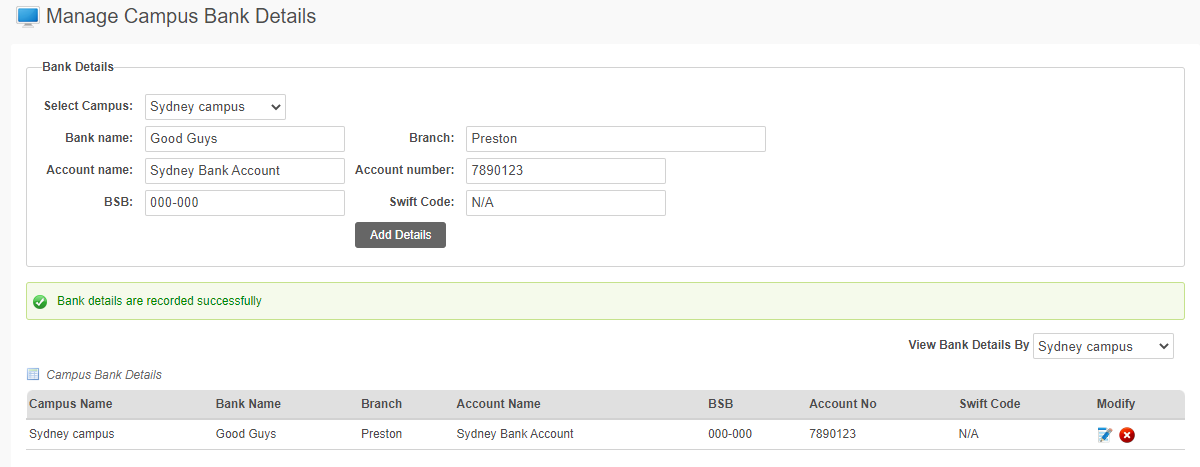
Campus Bank
If you have multiple Campus the System supports individual bank details for each Campus.
- Click Admin > Campus Bank
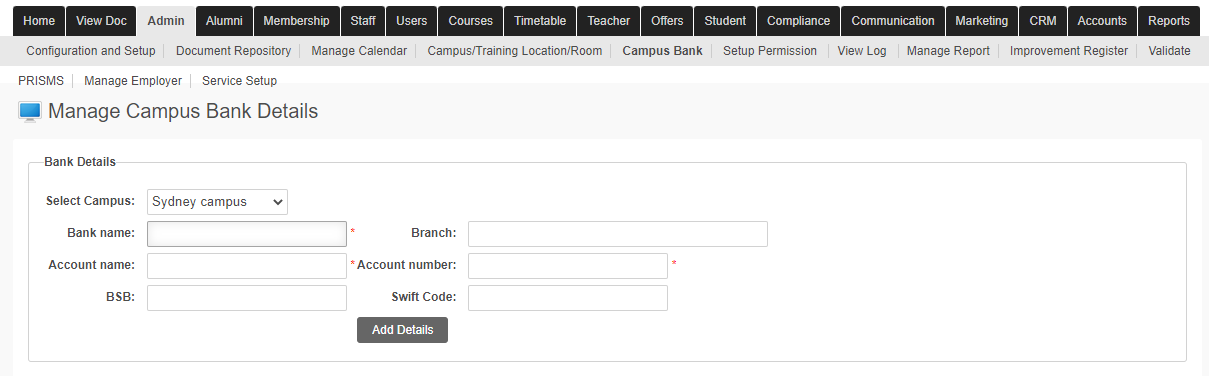
- Select the relevant campus from the drop down-menu.
- Enter Bank details e.g. Bank name, Branch, Account name, Account number, BSB, and Swift code (if applicable).
- Click Add Details to save.
Staff Campus
Staff for each Campus can be managed by following the instructions below:
- Click Staff > Manage Staff Campus
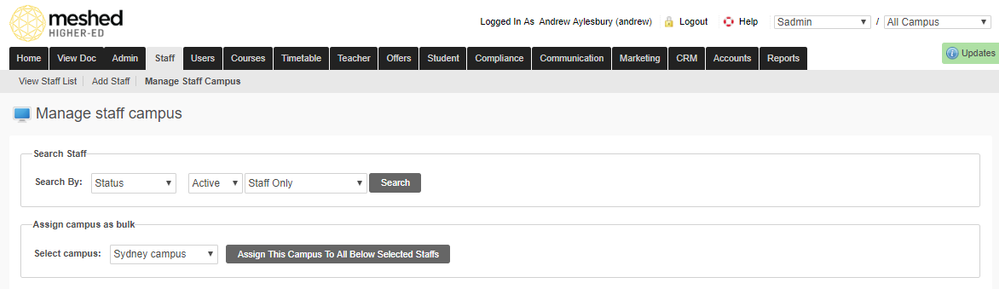
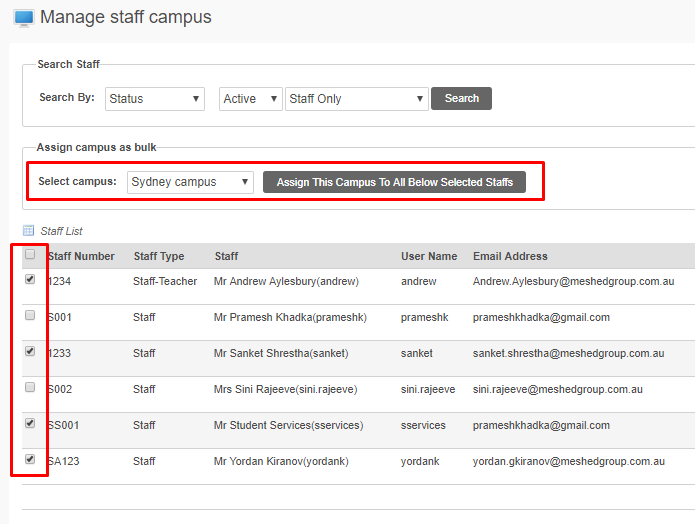
- Search for the staff using search criteria available on the drop-down menus.
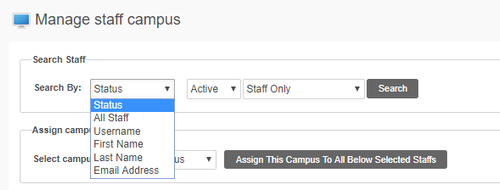
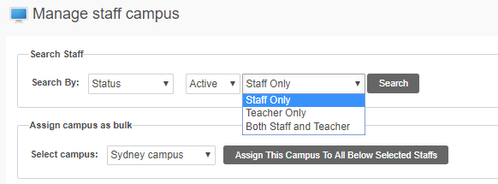
- Click Search and the Staff information will appear on the list.
- To assign the Campus to the relevant Staff on the list e.g. Sydney Campus, tick the staff to be assigned
- Click Assign this campus to all below selected Staff
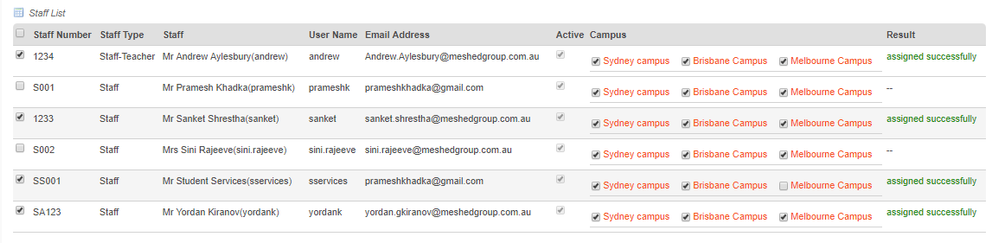
- System will confirm the results once the Staff is assigned successfully (as shown below).
- To individually assign Staff to a Campus, search for the Staff using the search criteria then tick the Campus on the right ( as shown below)
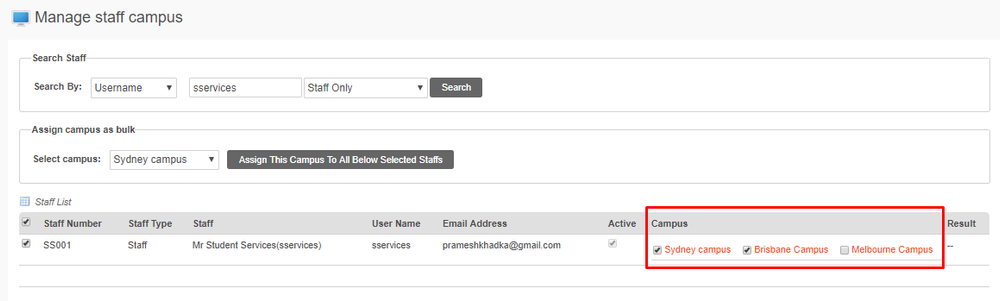
- Once the Campus is ticked, the system result will appear to confirm successful update (as shown below).

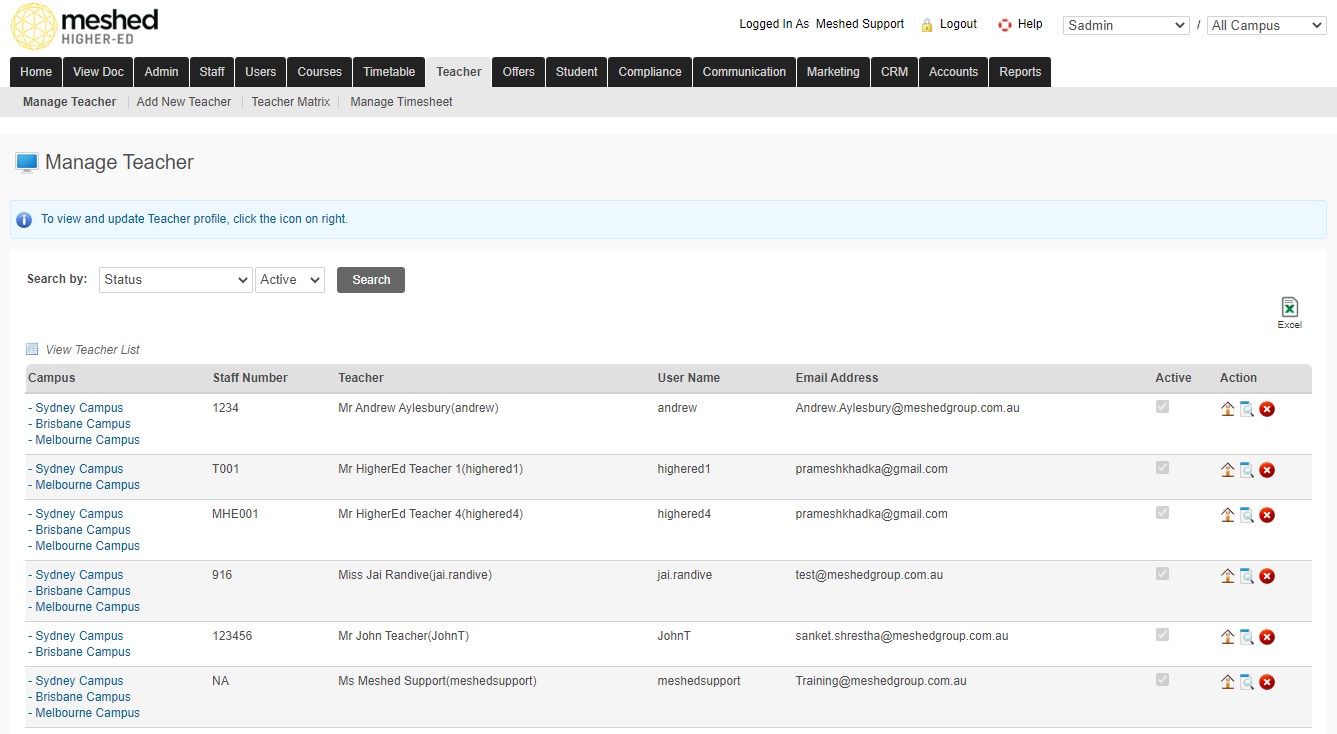
Teacher Campus
Teachers for each Campus can be managed by following the instructions below:
- Click Teacher
Course Campus
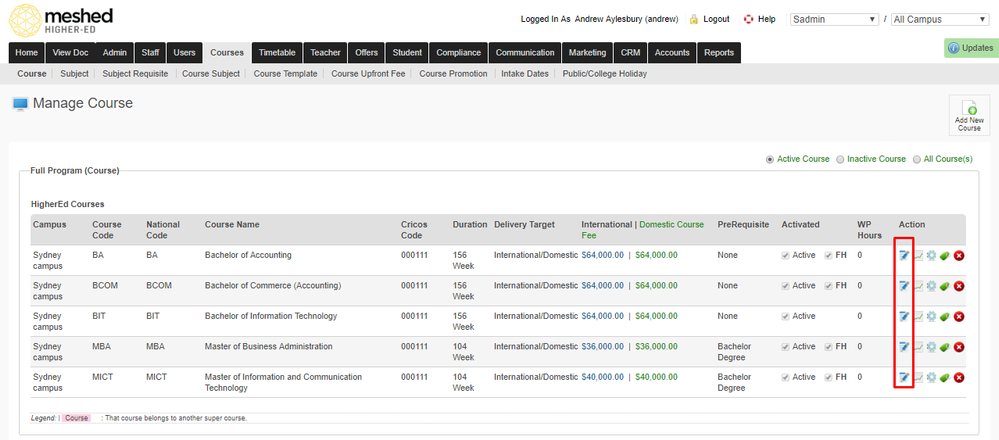
For existing Courses which will also be offered in the newly added Campus, you can manage this by following the directions below:
- Click Courses > Course.
- On the Course list, select the relevant Course and click the Edit Action Icon
 to edit the Course detail.
- On the Course information section, make any changes as required.
- On the Specific Information section, Select and tick the Campus/es that offers the Course (as shown below)
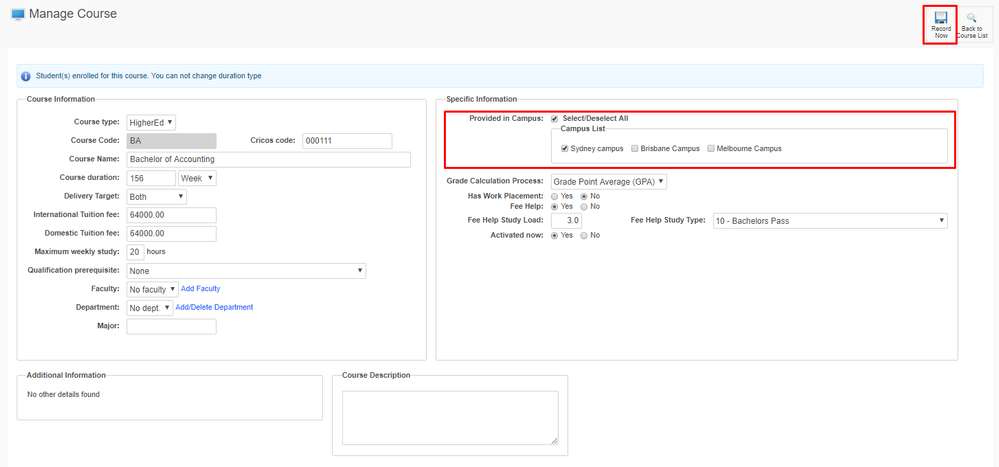
- Click Record Now icon
 to save changes.
 - Confirmation message will appear on the page to indicate successful update.

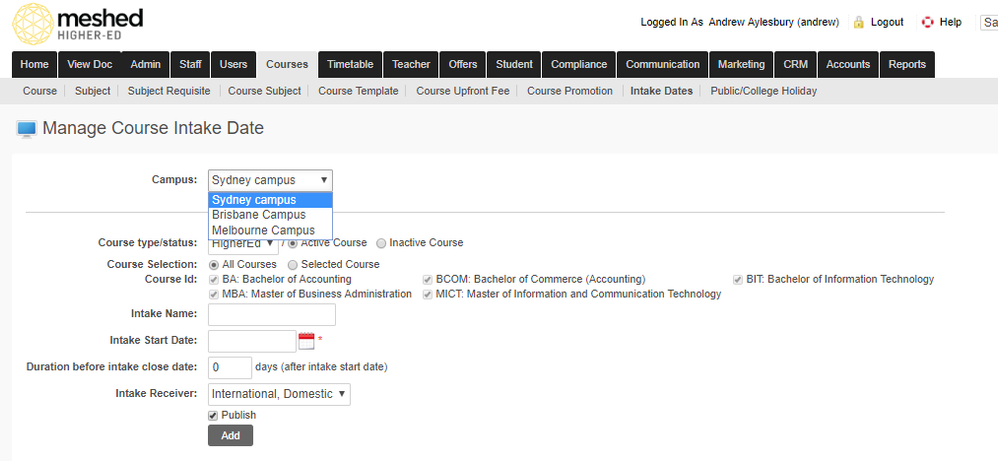
Intake Dates
- Click Courses > Intake Dates
- On the drop-down menu, select the relevant Campus to set Intake dates for
- Set up Intake Dates (details of this are documented elsewhere)
- Click Add.
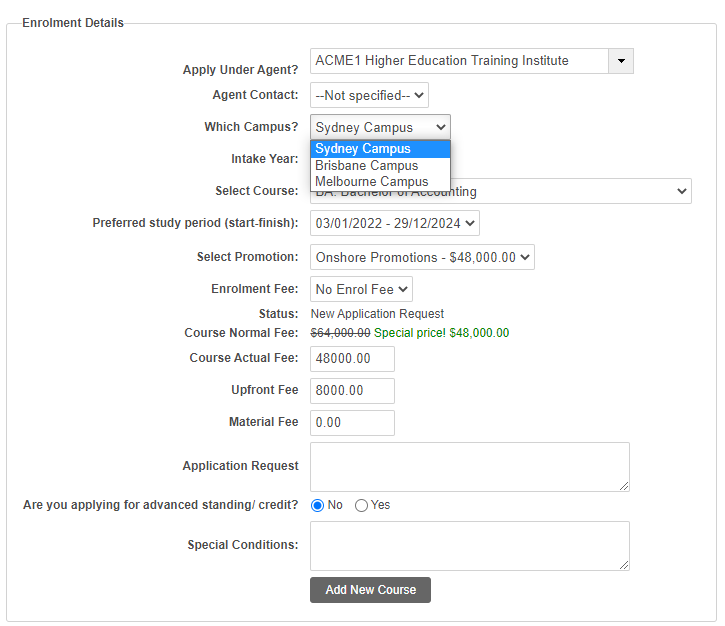
Application Form
Step 3 of the Application Form allows the applicant to select a Campus which will filter the Courses and Intake Dates that can be selected.
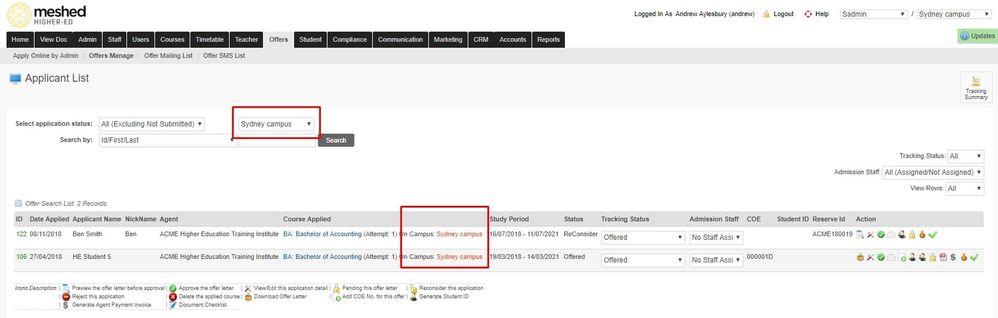
Applicant List
The Student Applicant list can also be filtered by selecting relevant Campus.
To manage this, follow the instructions below:
- Click Offers > Offers Manage
- Using the selection criteria, select Application status e.g. converted, Approved, offered etc. and relevant Campus.
- Continue with the standard Application process using the system.
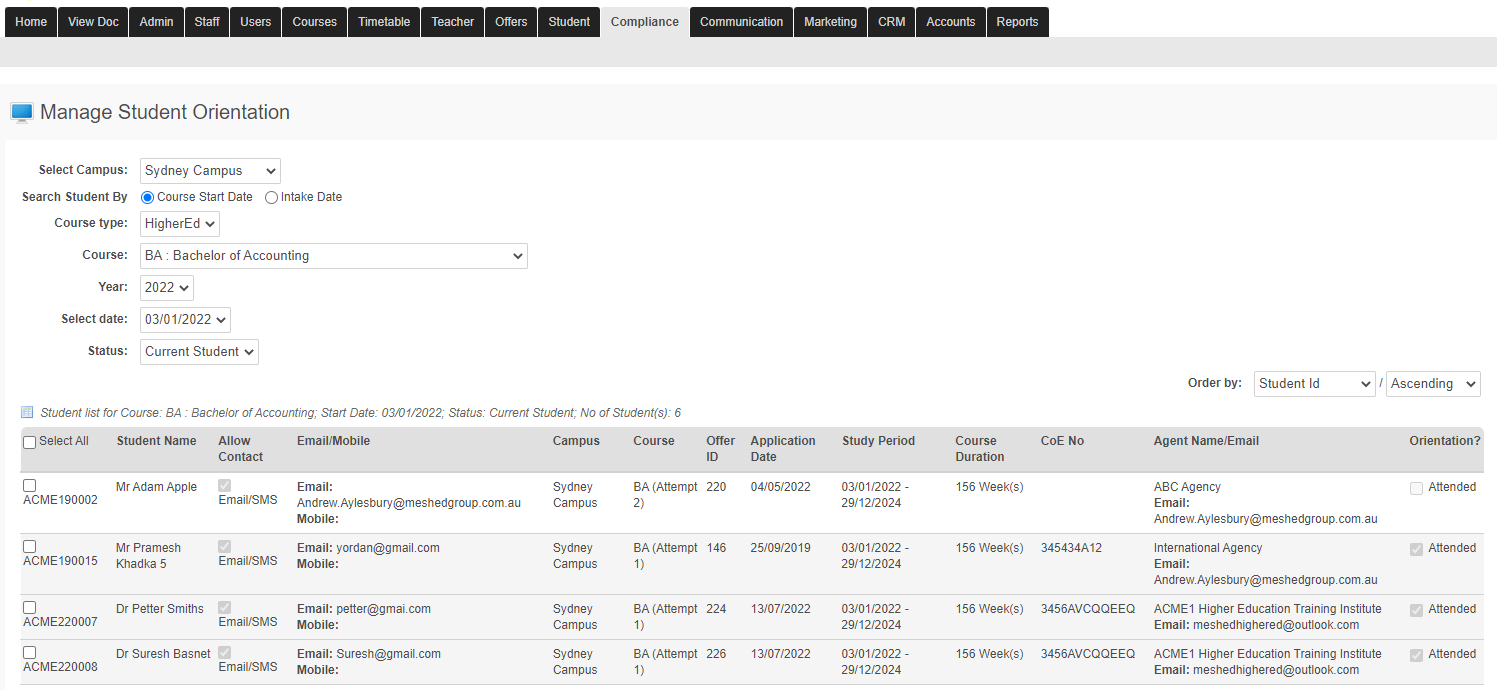
Manage Orientation
Student list can also be filtered by selecting relevant Campus.
To manage this, follow the instructions below:
- Click Compliance > Manage Orientation
- Use the selection criteria and relevant Campus to filter the Student List.
- Continue with the standard Orientation process using the system.
Academic Management
To manage Student Academic progress when there are multiples courses in different Campus follow the instructions below:
Setting up Timetable
- Click Timetable > Manage Class Timetable
- Select the Campus e.g. Sydney campus
- Proceed in Setting up class and class mode as per the usual Timetable set up process
- Click Add New Class.

Manage Assessment Group
- Click Timetable > Manage Assessment Group
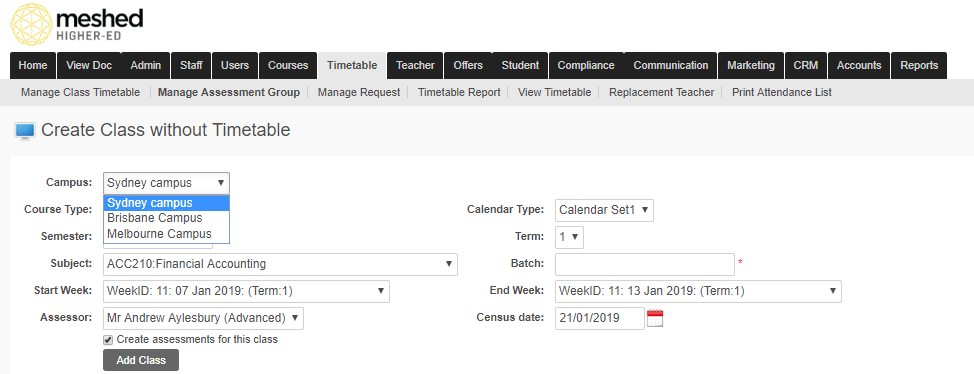
- Select the relevant Campus e.g. Sydney Campus
- Follow the standard Timetable creation process
- Click Add Class.
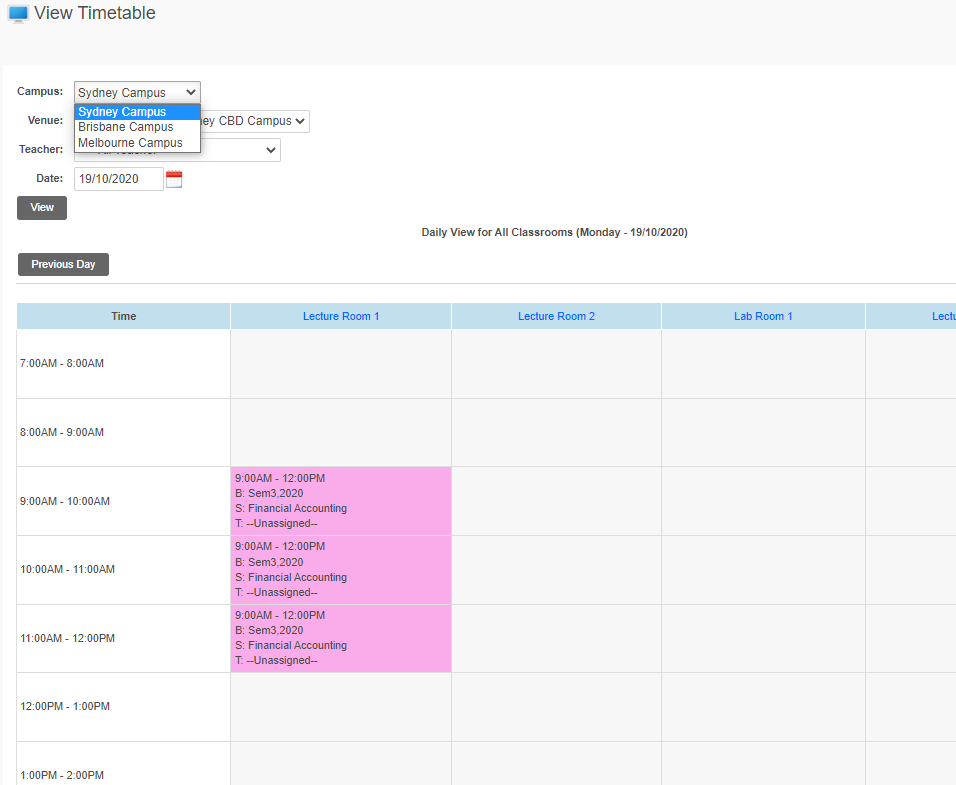
View Timetable
- Click Timetable > View Timetable
- Select the relevant Campus e.g. Sydney Campus
- To view a specific timetable, use the search criteria e.g. Year, Month, Course type, venue and relevant teacher/ trainer and timetable information will appear in Calendar view (as shown below).
Attendance Management
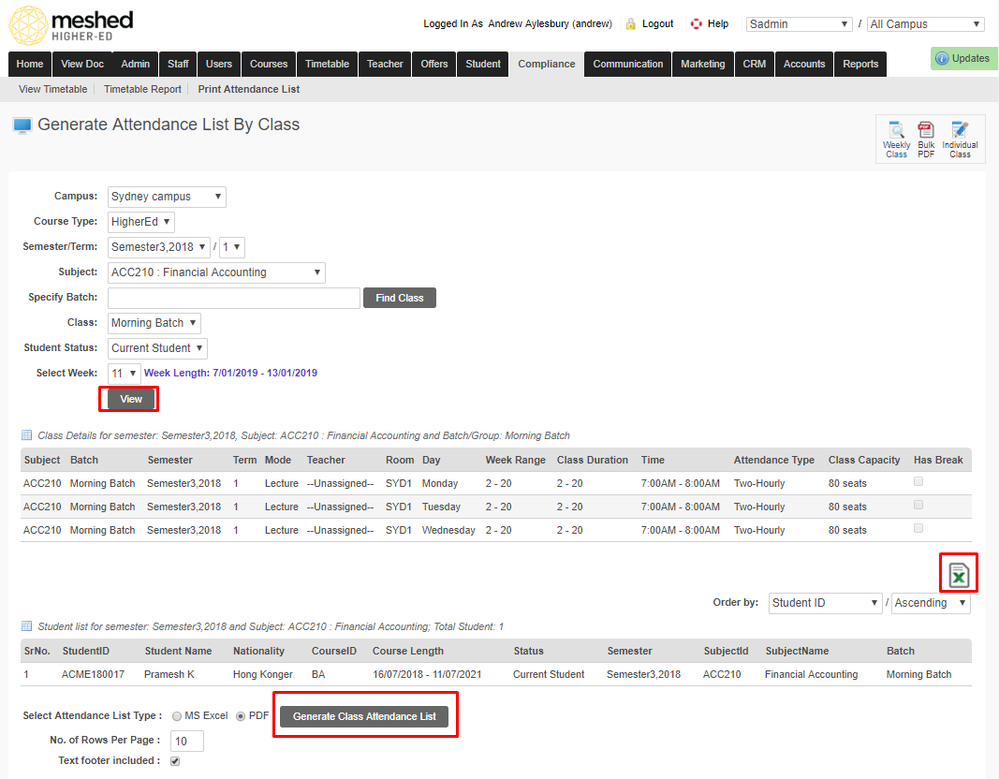
Generate Attendance list by Campus
- Click Timetable > Print Attendance List
- Select the Campus e.g. Sydney Campus
- Enter search criteria e.g. selected Course type, Semester/term, Subject, Batch, Class, student status and week
- Click View.
- Class details for the selected semester, subject and class will appear as well as the student list for the semester.
- Select your preferred format in generating Class attendance list - PDF or MSExcel.
- Click Generate Class Attendance List to download list.
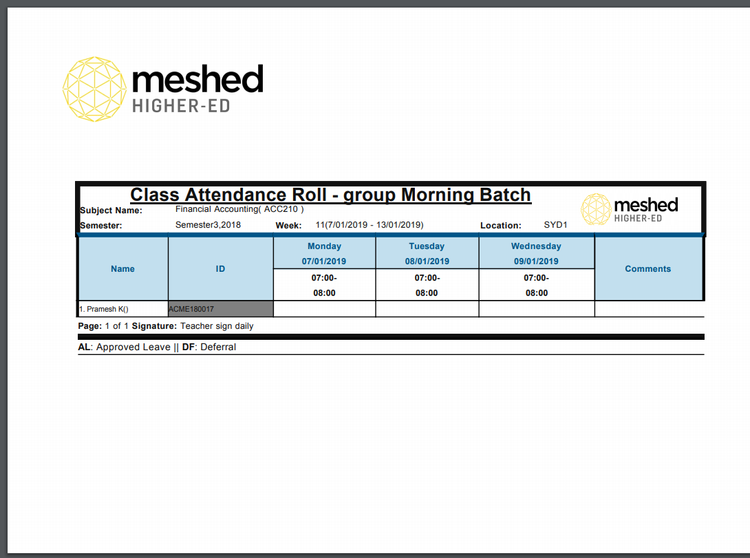
- Refer to screenshot below for Class attendance roll generated in Excel format:

- For Class attendance roll generated in PDF format, refer to the screenshot below:
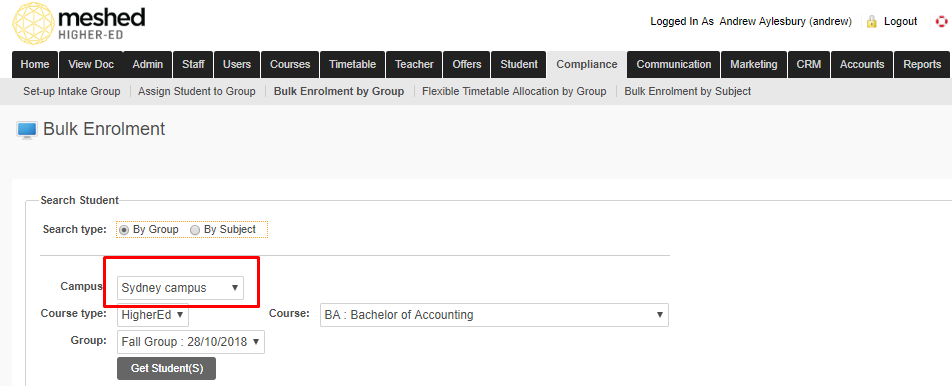
Bulk Enrolment by Group
- Click Compliance > Group Management > Bulk Enrolment by group
- Select relevant campus e.g. Sydney campus
- To find Students to enrol in bulk, select the relevant Course type, Course and Group
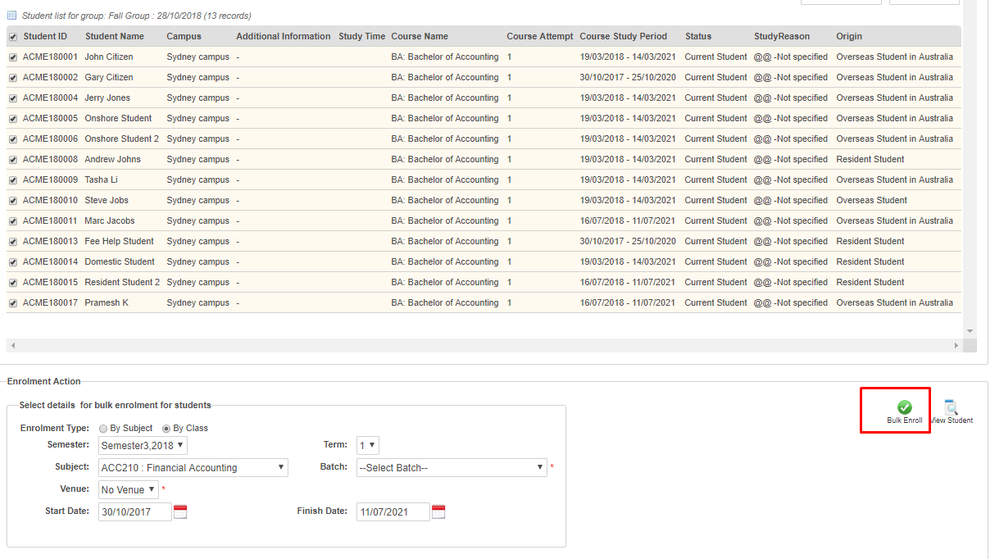
- Click Get Students.
- Tick the Students enrol and complete the enrolment action by selecting relevant details for students to be enrolled in bulk
- Click Bulk Enrol
Bulk Enrolment by Subject
- Click Compliance > Group management > Bulk Enrolment by Subject
- Select Campus e.g. Sydney Campus.
- Select relevant information to generate list of students to enrol e.g. Student type, Course type, Course, year and Intake date
- Click Get Students.

- Tick the Students enrol and complete the enrolment action by selecting relevant details for students to be enrolled in bulk
- Click Bulk Enrol

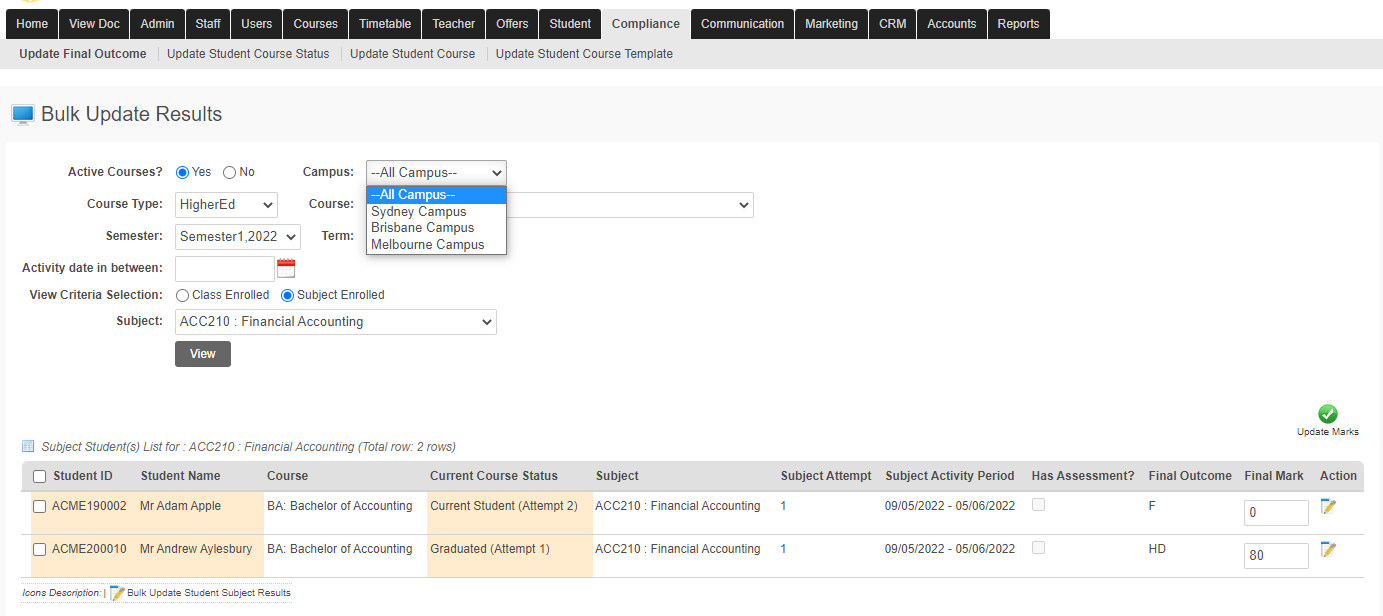
Bulk Update - Final Outcome
- Click Compliance > Bulk Update > Update Final Outcome
- Select relevant Campus e.g. Sydney Campus.
- Select relevant information to generate list of students to enrol e.g. Course type, Course, Subject Class
- Click View.
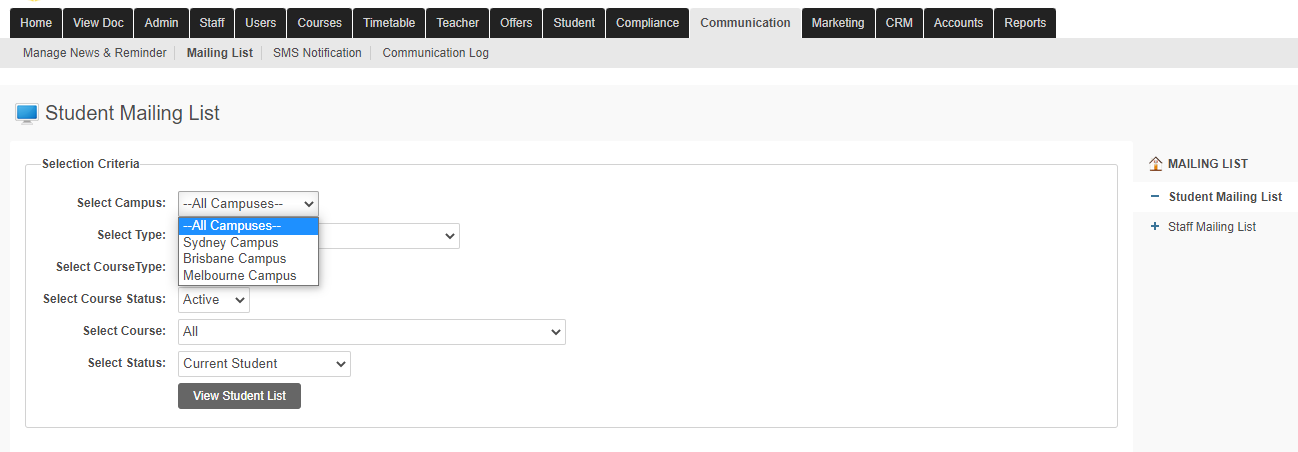
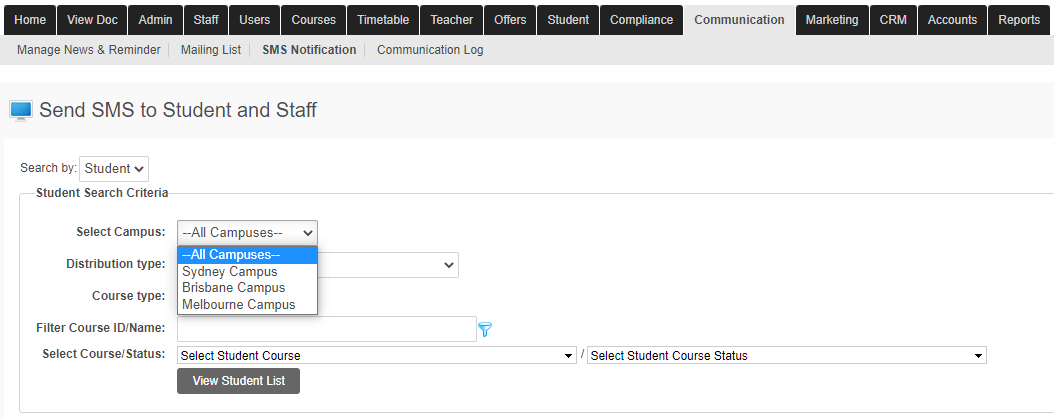
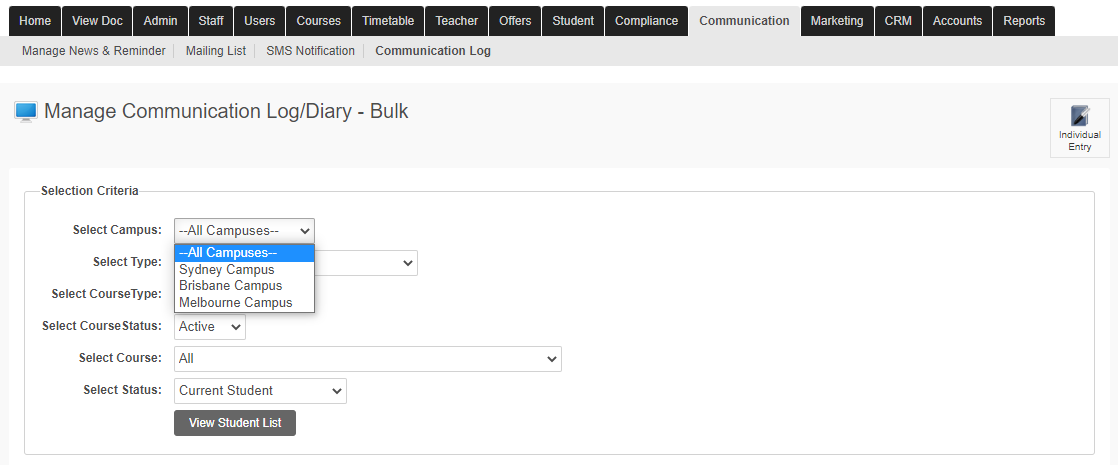
Communication Tools