Agent Portal Module
- Andrew Aylesbury (Deactivated)
Introduction
Welcome to the Higher-Ed Agent Portal Manual online help.
The Portal is an optional module for providers who has a need to provide system access to their agents.
This means that agents may submit student applications directly to the provider, manage the student application process from application to enrolment and monitors their commission statements etc.
Access to the Agent Portal can be provided by the the marketing team by adding the agents to the Administration Portal and creating a user account. When a user account is created, an auto generated email with the login details will be sent as a notification to the Agent.
User Login
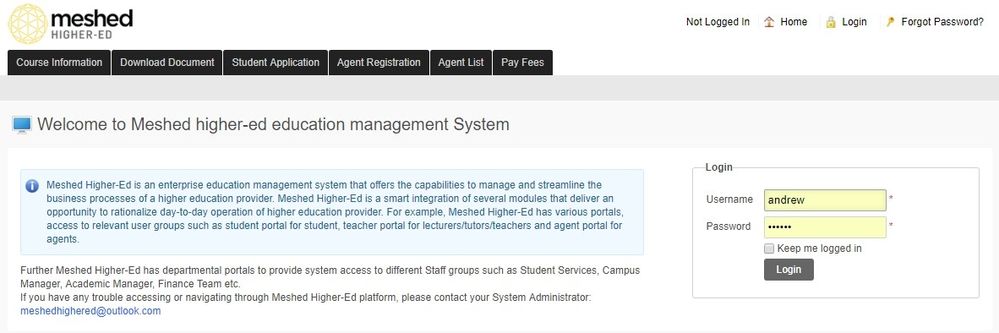
To access the portal, an Agent will need to use their user name and password to log in to the portal.
1. On your browser, type in the provider URL, for example: https://yourprovider.meshed.com.au
2. Enter your user name and password and click Login (as shown below).
Home
Home page is the initial screen you see after you log in to the system. This page contains the following Main Menu functions, Quick view icons, News reminders and Agent Activity.
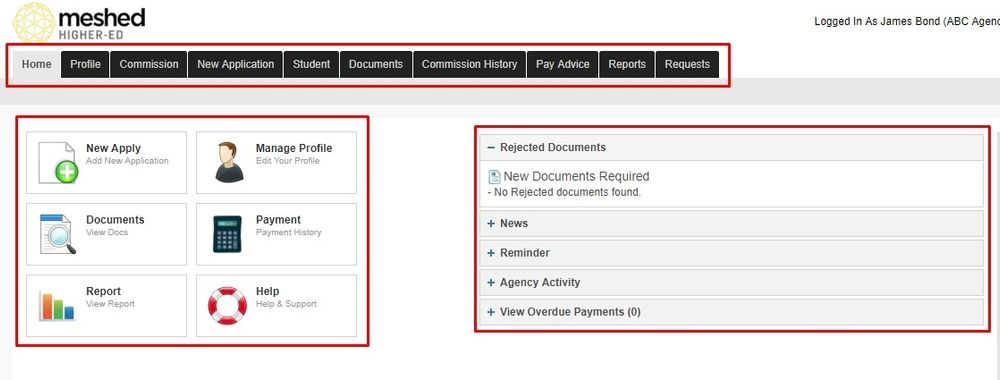
- Main Menu tabs located on the top page includes different functionality: Home, Profile, Commission, New Application, Student, Documents, Commission History, Pay Advice, Reports and Requests.
Note: The number of Menu Tabs can vary for the Agent Portal depending on the Provider setup
From here you can navigate to any page by clicking on any menu as per your role and permissions.
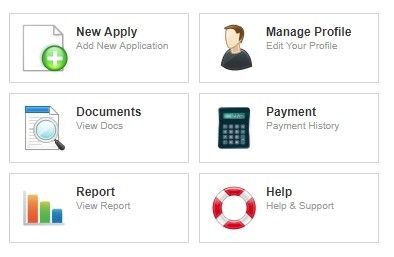
- Quick view icons located on the left hand side allows users to access functions quickly without going to each individual page.
Rejected Documents Section shows Agents information about any Documents (for Applicants or Students) that have been rejected by the Provider.

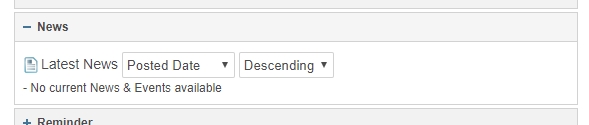
News and Reminder sections allow Agents to view any News and Reminders set by the provider. For example, news about a tuition fees, or target country promotions.

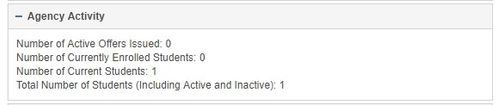
Agency Activity section allows the Agent to view a snapshot of all their activities with the provider as per the example shown below:
View Overdue Payments section shows the Agent information for overdue payments related to their Students

Profile
This tab allows you to edit your profile and change password. To manage these functions, follow the instructions below:
Change Password
1. Click Profile > Change Password
2. Enter current password, new password twice (to confirm) and click Change password to save.
Note: the new password and confirm new password must be the same
A confirmation message will appear to confirm changes.
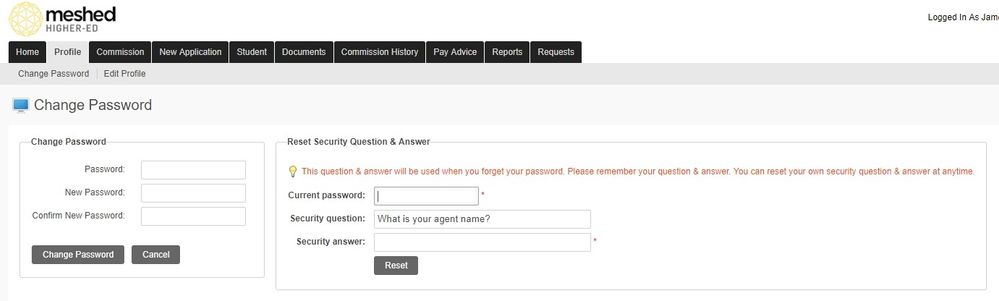
3. To reset your security question and Answer, enter current password and new security question and answer. Click Reset to save.
Edit Profile
1.Click Profile > Edit Profile

2. To make some changes on your profile. Click edit icon ![]() to edit Agency information, address information and Bank details.
to edit Agency information, address information and Bank details.
3. Enter the new information and click Update to save (as shown below)

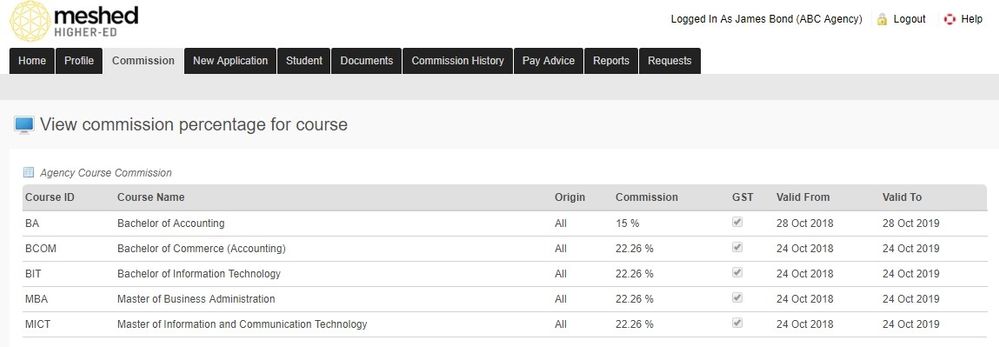
Commission
This tab allows you to view your commission percentage for course(s) and the validity dates. The commission rates are setup based on the agreement between the Agent and the Provider.
1. To view, Click Commission. Please note that this is a read only page. If information is incorrect, contact the marketing team.
New Application
This menu tab allows Agents to send Student applications, view and manage Student offers and pending applications.
New Apply
This tab allows you to submit student applications directly to the provider. To manage this function follow the instructions below:
1. Click New Application > New Apply.
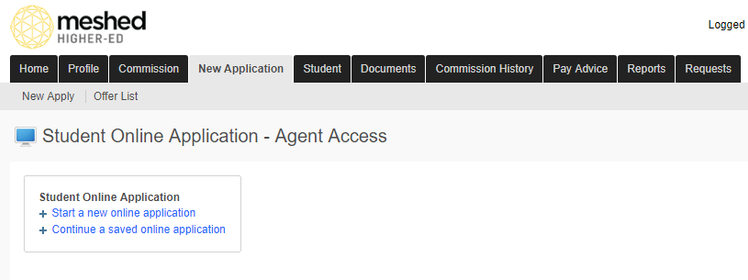
2. Click Start a new online application to start a new student application. You will need to agree to the Terms and Conditions to commence application.
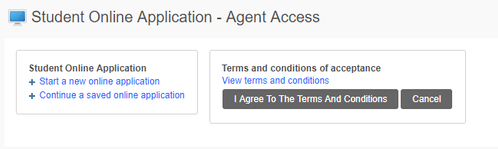
3. Click I agree to the terms and conditions button as shown above. This will take you to the Step 1 of the Student application process.
4. Select the Student Origin e.g. Overseas Student (offshore), Overseas Student in Australia (Onshore) or Resident Student (Domestic).
5. Enter the Student Personal Information in the fields provided. Make sure all mandatory fields (with asterisks) are filled in to progress to the next stage.
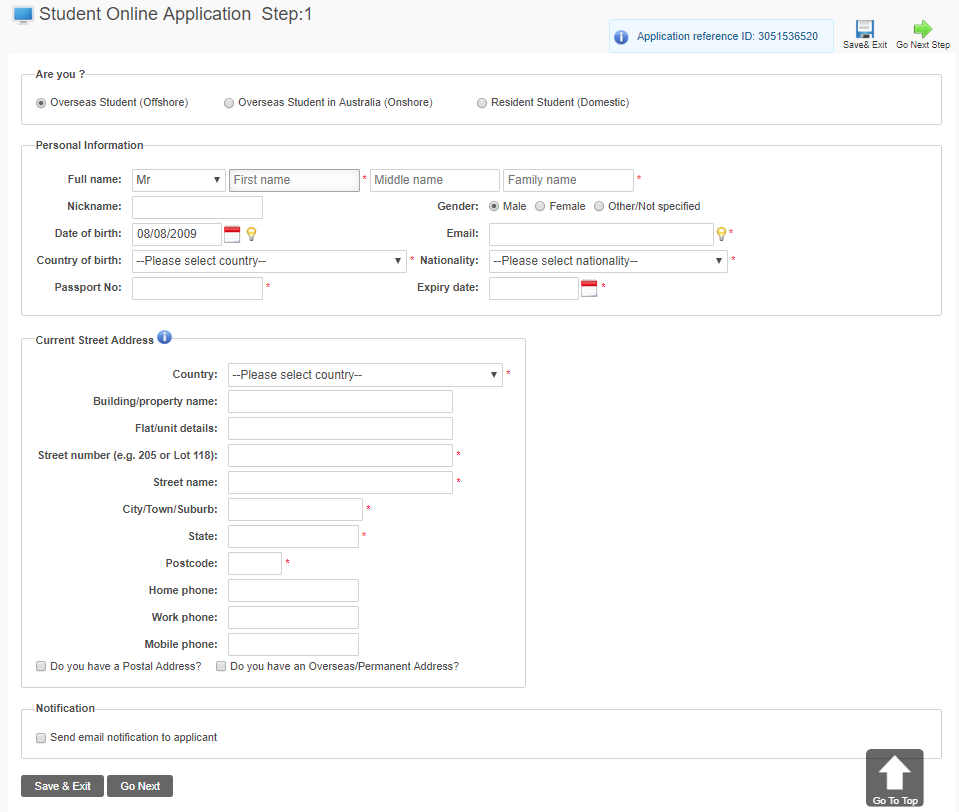
There is an option for the Applicant to receive an email notification and by default the email notification is not sent.
The email notification to the Applicant uses a Predefined Email Template (AgentOnlineApplication1stStepNotification) which can be customised by SAdmin Users in the Meshed Platform.
6 Once the necessary fields are completed, click Go Next.
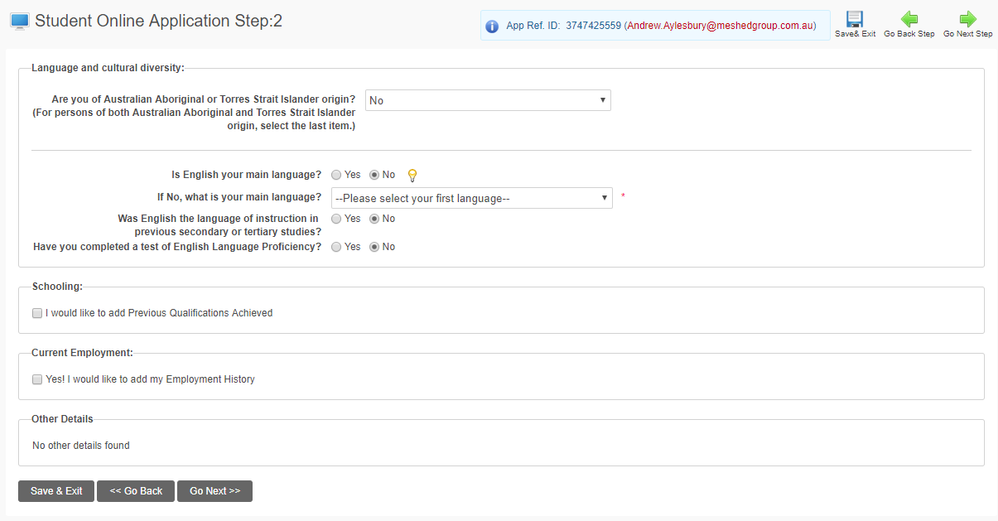
7. Application Step 2 requires you to enter relevant information about Student's Language and diversity. Once completed click Go Next.
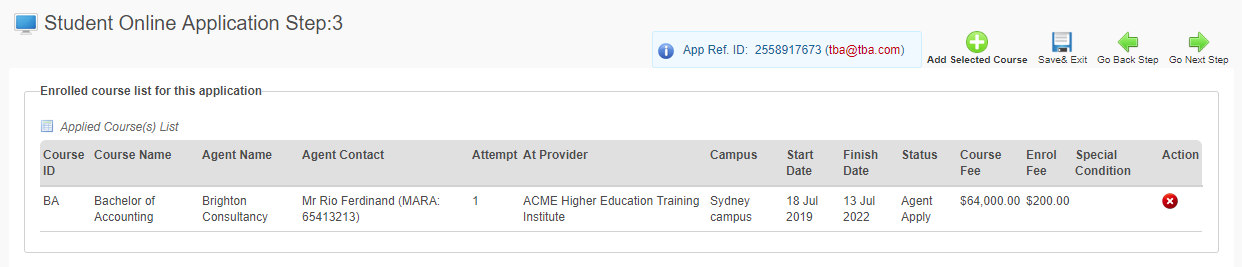
8. Student Online Application Step 3 includes selecting course to apply.
From the drop down selection available, Select the Agent Contact, Campus, intake year, course to apply, preferred study period (intake dates), Enrolment fee, Study reason (you can select form the drop-down list), Application request (free text in the field available and if applying for advanced standing credit, tick yes or no. As shown below).
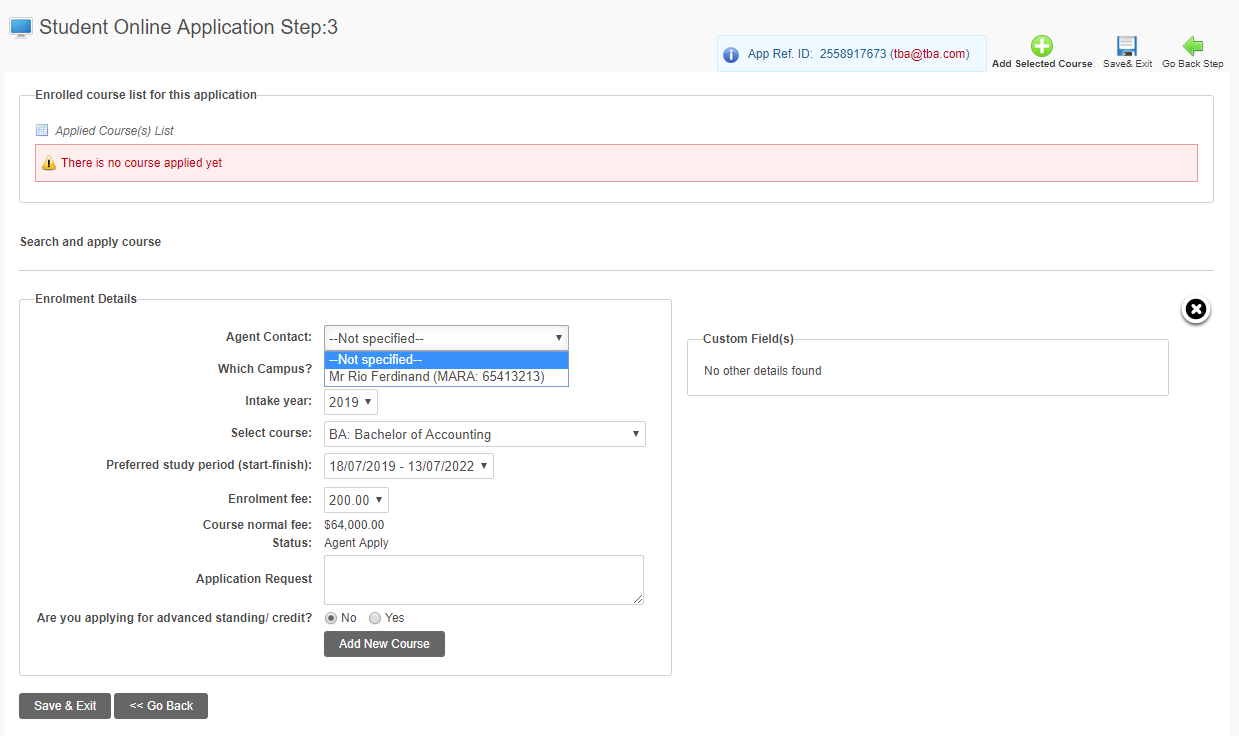
9. Once relevant information has been entered, tick Add selected Course located on the top right hand side of the page. A pop up message will appear to confirm Course added ![]() Click Go Next to continue.
Click Go Next to continue.
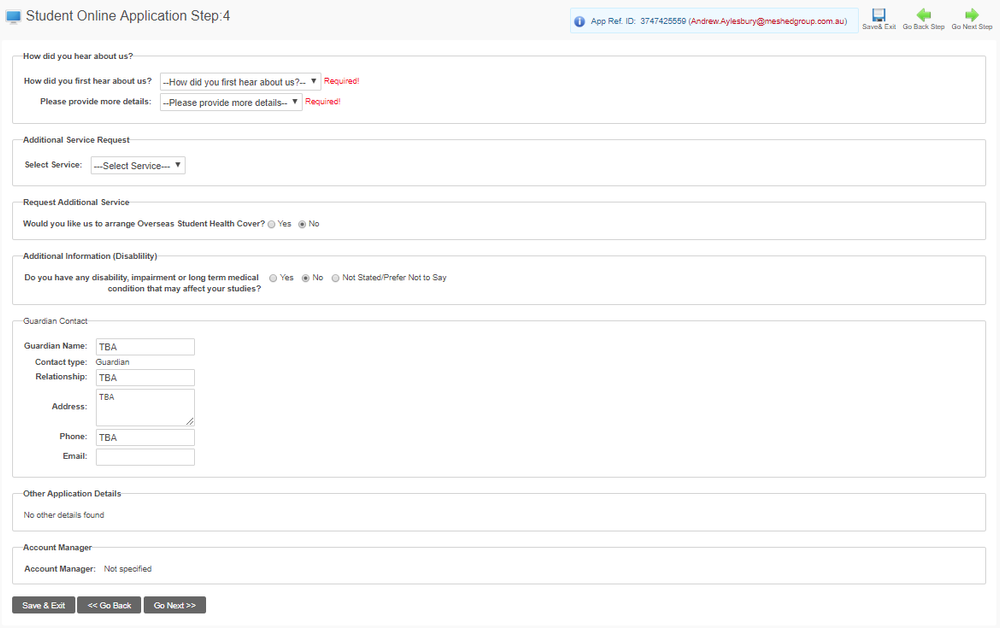
10. Enter all relevant information as per Step 4 (as shown below). Note that the first question is a marketing question. This information will be used for marketing and advertising activities. Enter information for Additional service request (if any), Overseas Student Health Cover, and Emergency contact details.
Once completed, click Go Next.
11. An application preview page will appear to allow you to preview the application and make some changes as needed. To edit information, click the edit icon ![]() . Once application is checked and ready for submission, click Confirm icon
. Once application is checked and ready for submission, click Confirm icon ![]() located on the top right hand side of the page (as shown below)
located on the top right hand side of the page (as shown below)

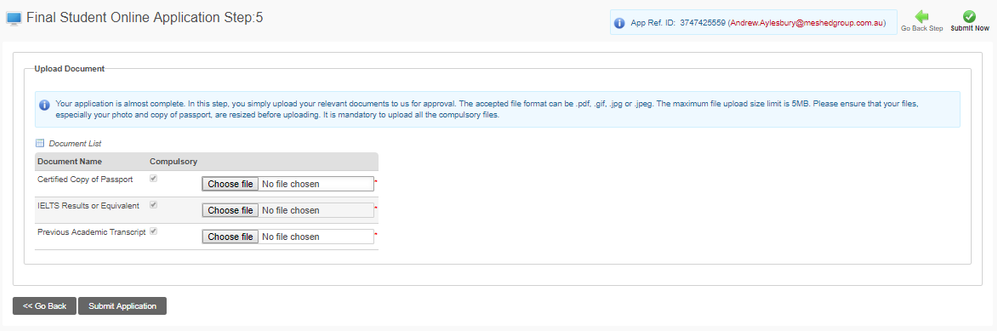
12. Step 5 requires you to upload documents needed as part of the application stage. These documents will assist with the application process. Click Choose File and attach the document. Once documents has been attached, Click Submit Application (as shown below).
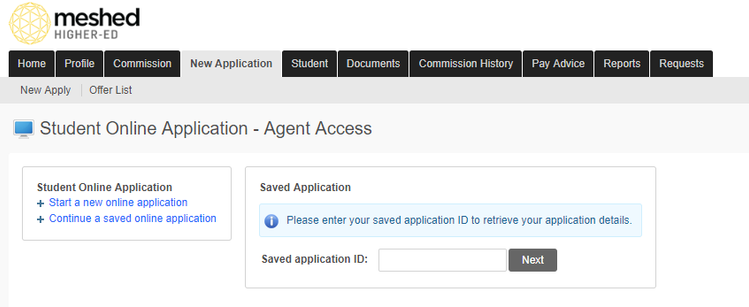
Continue a Saved Application
1. If you have an existing saved online application, click continue a saved online application link. A box will appear allowing you to type in the saved application number and click Next.
2. Complete the Student online application form by following a 5 step process (as for a New Application). This includes capturing personal information, Language and diversity, apply courses, leads generating questions and uploading documents needed to process the application.
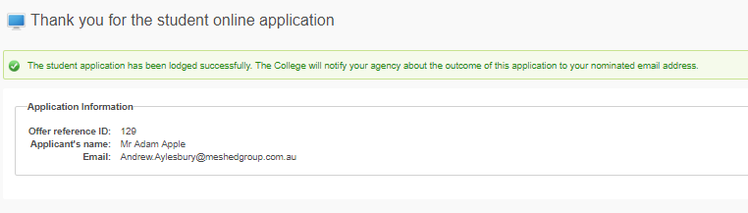
5. Once all information has been entered, click Confirm to send it to the admissions team. An auto generated email will be sent to the Agent/Student to notify them of the application submission.
Offer List
This page allows you to view and manage your Student offers and pending applications. You can use the search for Applicants using the criteria available on the drop-down and click Search.
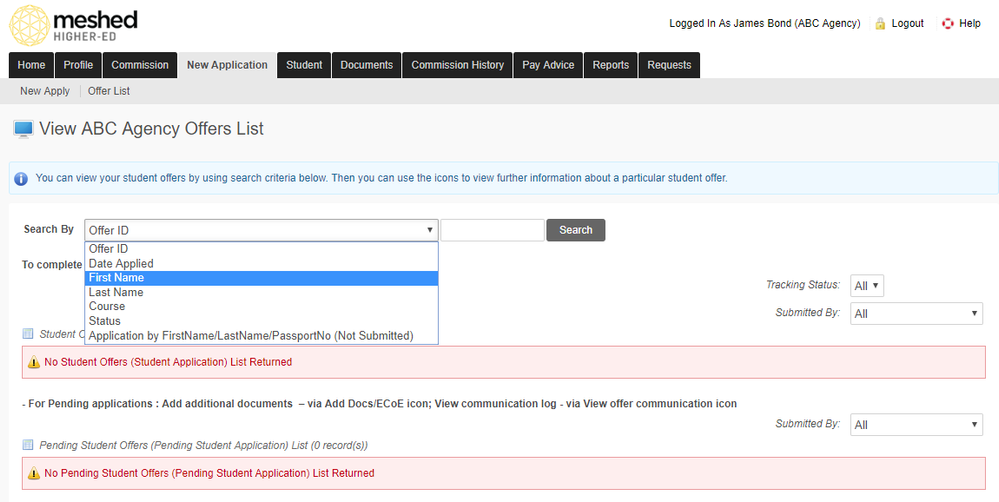
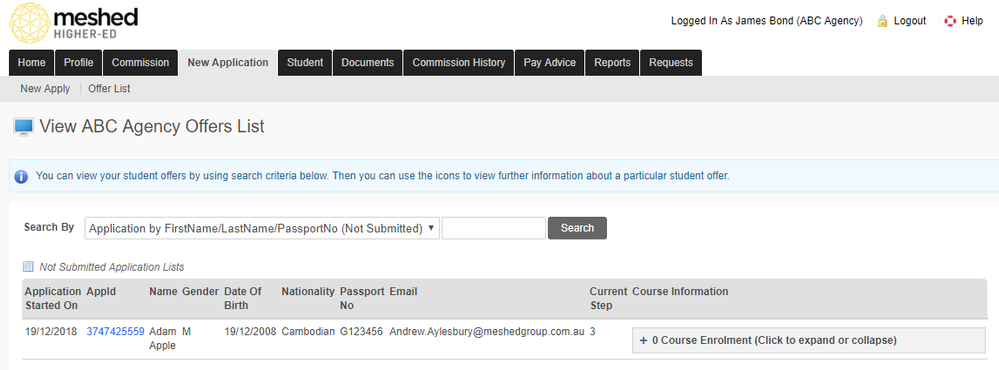
You can also use the search for Not Submitted Applications using the criteria available on the drop-down and click Search.
From this page, agent can manage offer list by clicking the different action icons located on the right hand side.
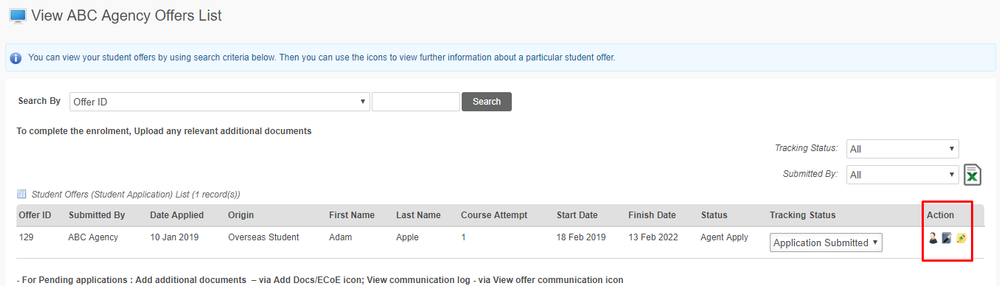
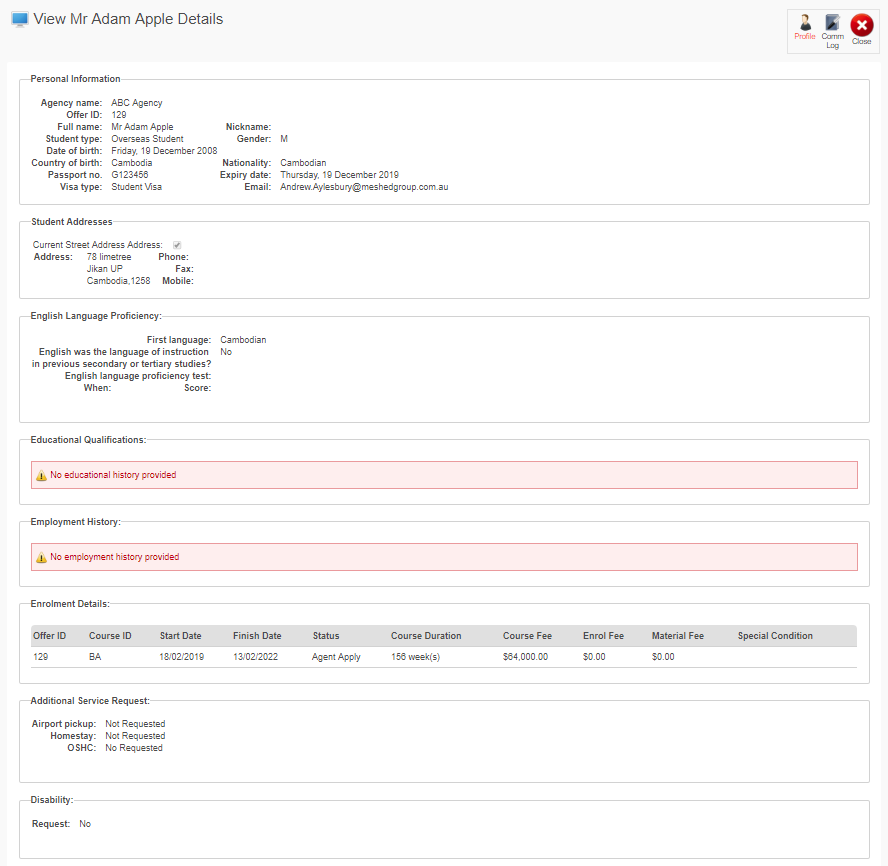
![]() This icon allows you to view selected student profile.
This icon allows you to view selected student profile.
This includes Student's personal information, educational qualifications, employment history, Student address, English language proficiency, enrolment details etc.
![]() This icon allows you to download letter of offer.
This icon allows you to download letter of offer.
This document will open up in a PDF file and you may be able to print or save on your desktop.
![]() This icon allows you to view and add communication records during offers stage. It can be in a form of email, message, note, or any means of communication that needs to be logged for recording purposes.
This icon allows you to view and add communication records during offers stage. It can be in a form of email, message, note, or any means of communication that needs to be logged for recording purposes.
To record information, follow the instructions below:
- Type in the message on the field provided (free text)
- Select Communication Category Type (e.g. General, Student related)
- Select Communication Status (e.g. Informed, Resolved, Pending)
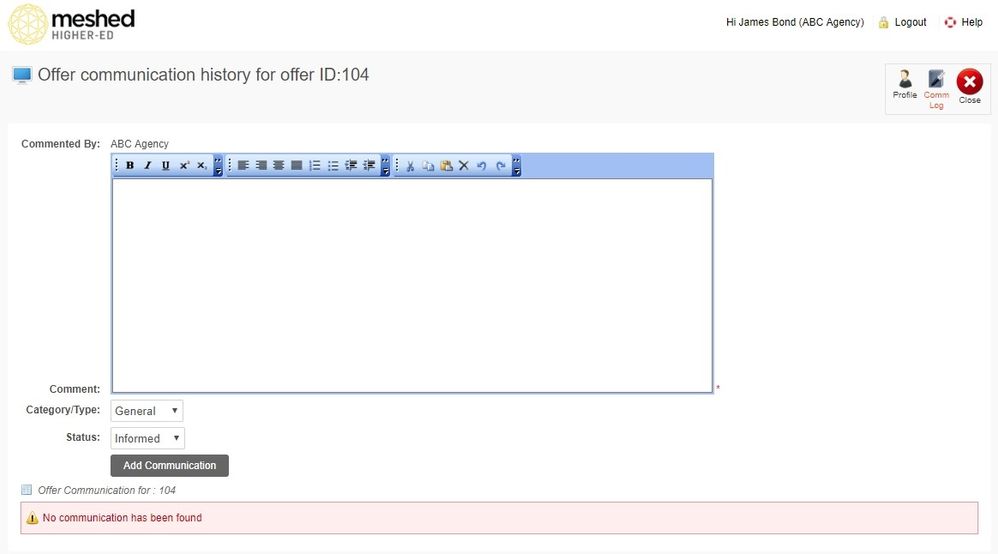
- Click Add Communication to save.
![]() This icon allows you to Upload/view document Checklist.
This icon allows you to Upload/view document Checklist.
It allows you to upload documents on behalf of student in order to receive the offer letter and part of Eligibility requirement.
- A pop-up window opens where the Agent can view document names for various Types and Status:
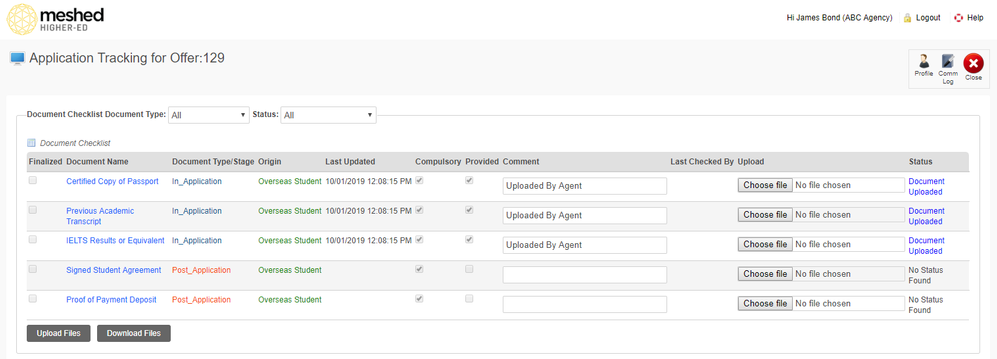
- Agent can upload documents.
- For documents the Agent Uploads the Status will change to "Document Upload" and the comment will be recorded as "Uploaded by Agent".
Note: Agents are not able to update status but can edit the comment.
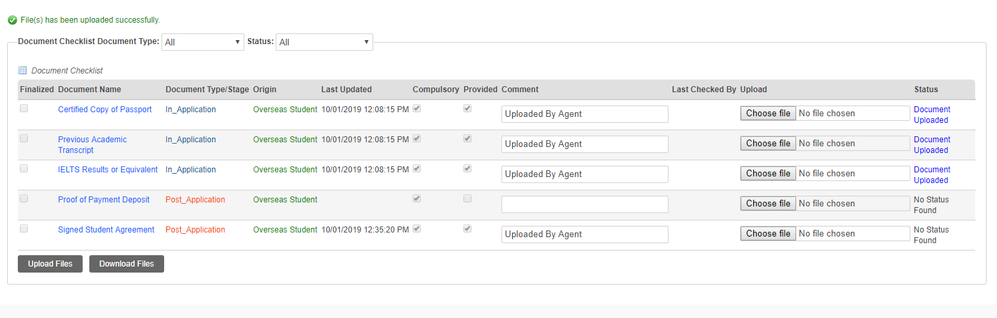
- Click the Download Files button and the files are downloaded in a zipped format. The zip file contains the files in document type folders, for example "In Application", "Offer" and "Post Application".

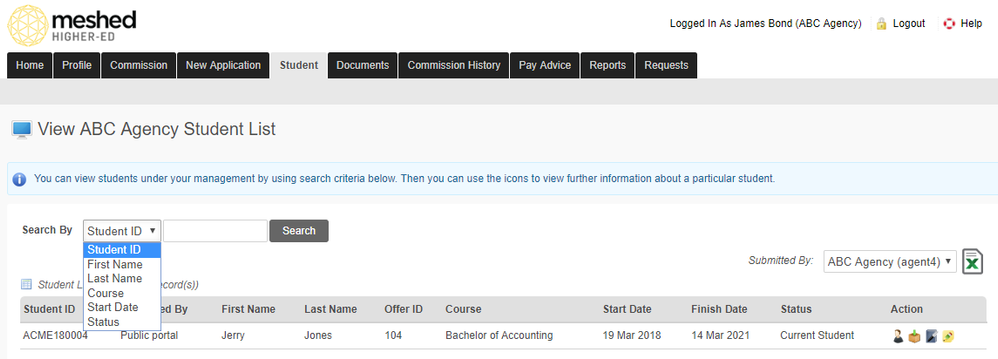
Student
This menu tab allows you to view Exiting/completed Students under your management.
You may search using the search criteria as shown below.
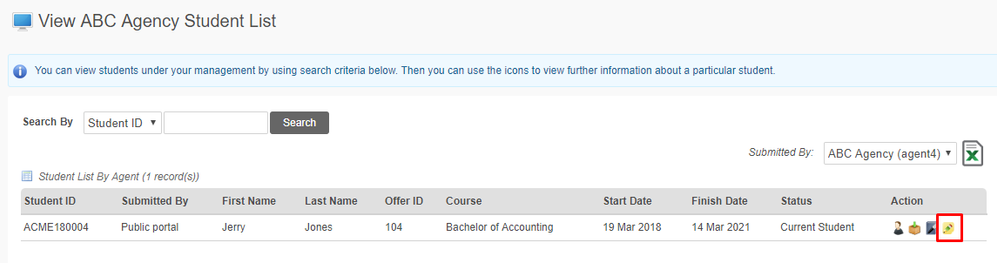
Viewing Document Checklist of Student in Agent Portal
- Log into the Agent Portal.
- Navigate to Student > Student Profile.
- Click Upload/View Document Checklist Action Icon.
- Agent can view the list of documents and their status and can upload and download documents.

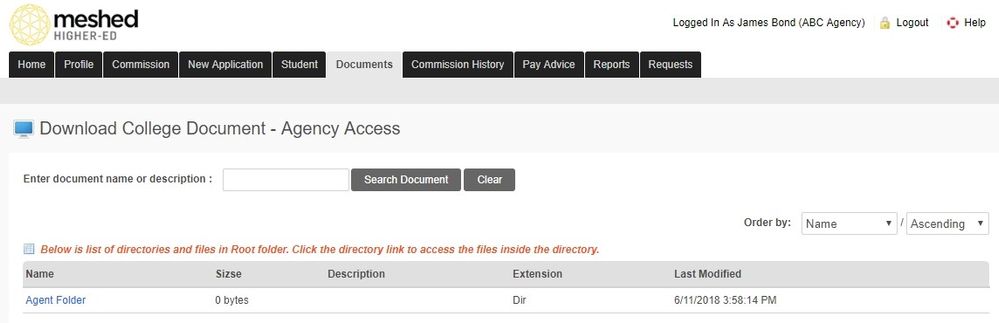
Documents
This page allows an Agent to download documents e.g. Academic notices, marketing materials, Policies and Procedures etc. These documents can be printed or save in your desktop.
Note that this is read only page.
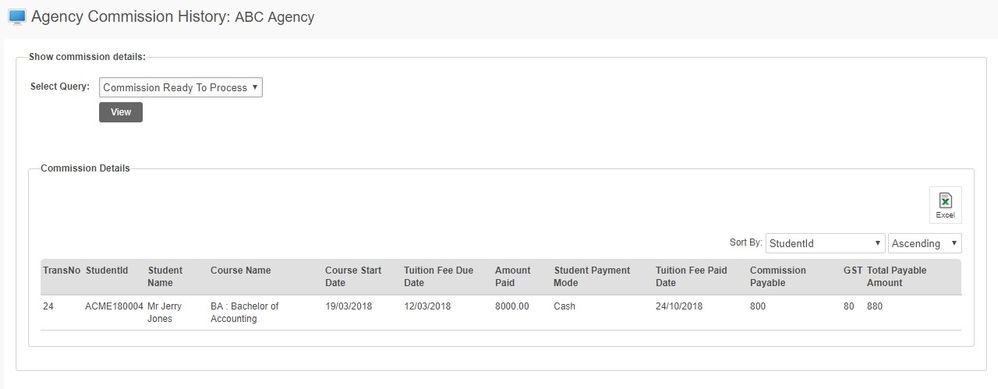
Commission History
This tab allows an Agent to view commission details. The details can be generated by using the search criteria as per below.
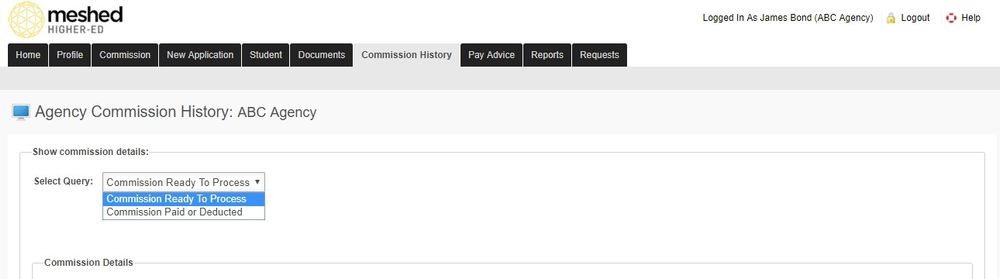
To generate commission details, follow the instructions below:
1. Select List to view from the drop down menu e.g. Commission ready to process, Commission Paid or deducted.
2. Enter the range of dates between which you want to view the payment history and click View.
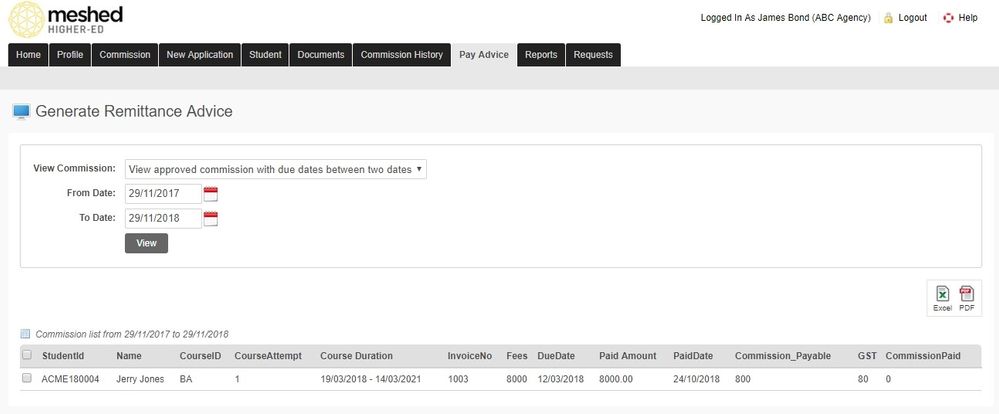
Pay Advice
This menu tab allows an Agent to generate remittance advice. Note that an Agent can only generate a Remittance Advice for commission which has been approved as payable after the Student/Agent has paid the invoice.
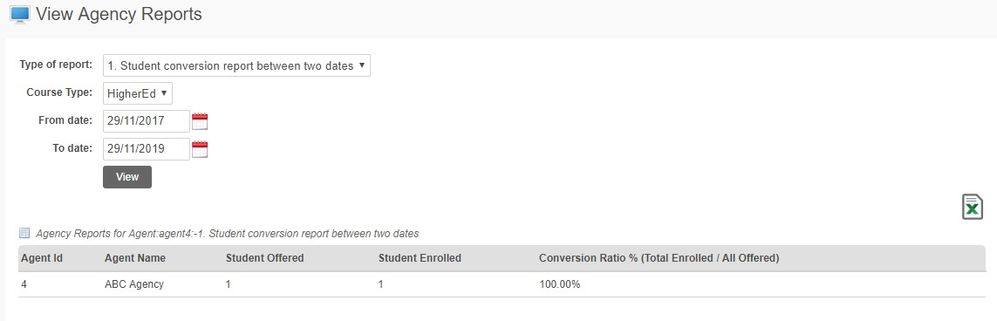
Reports
From this menu tab you can view and print various reports for e.g. number of offers issued, number of enrolled students, number of current students etc. These data provides you with an understanding on how you are tracking in terms of student enrolments.
To generate and print desired report, follow the instructions below:
- Once you have logged in, click Report as shown below. You will go the View Agent Reports page as shown below.
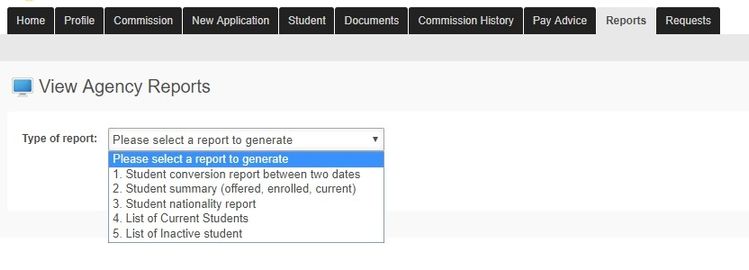
- Select the type of Report to generate form the drop down menu.
- Select Course type e.g. HigherEd, Short Course
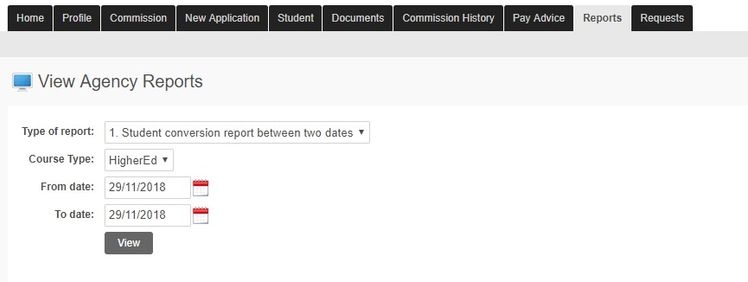
- Enter the range of dates between which you want to view specified report and click View. Data generated can be exported to MS Excel format by clicking the Excel icon
Requests
This menu function allows agents to directly communicate with the provider in regards to any requests required. It may be a request for new published materials, make enquires about promotions etc.
To use this function, follow the instructions below:
- Click Requests menu and compose the email as shown below.
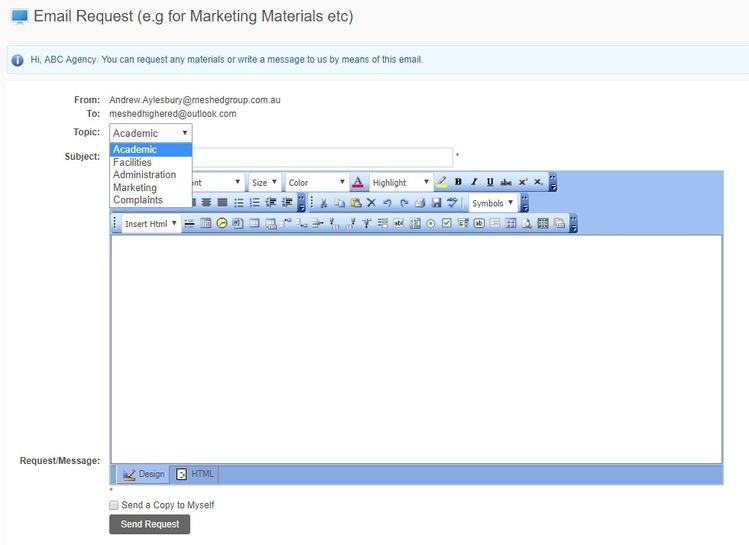
- Select the Topic of the Request e.g. Academic, Facilities, Administration, Marketing, Complaints, etc.
- Type in the letter on the field provided and click Send Request to send email.
Preventing email sent from Meshed System being considered as spam or treated as Junk email
To assist with preventing email sent from Meshed Student Management System from being considered as spam and treated as Junk email, our Network Administrator has suggested adding or modifying an SPF record in your DNS server. Further information see Ensuring Email Delivery
