Survey Management Module
- Andrew Aylesbury (Deactivated)
- Pramesh Khadka
Overview
The Survey Management (Optional) Module allows you to set up electronic questionnaires or evaluation forms and surveys to get feedback from Students, Agents or Staff, including Teachers. You can also view their submitted evaluation results.
Meshed Higher-Ed Survey management process starts as per below:
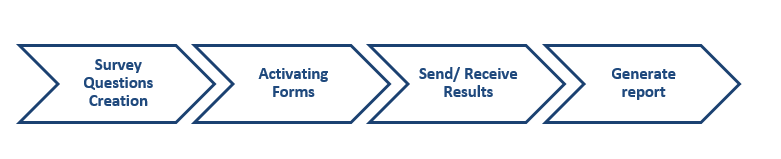
Survey – Questions Management
You can set up questionnaire (questions) electronically for evaluating Courses, procedures, Teachers' class performance etc. These surveys are mainly used to obtain feedback from Students to improve courses to better streamline the provider business processes.
Questionnaire/survey only appears in specific user portal/s as per the assigned user group during creation.
To set this up, follow the instructions below:
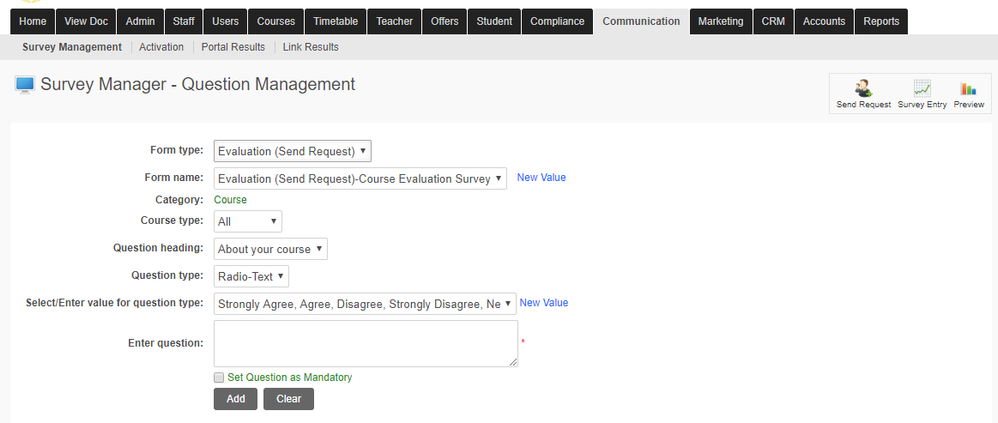
- Click Communication > Survey Management
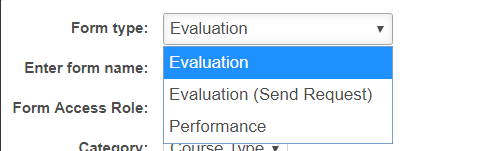
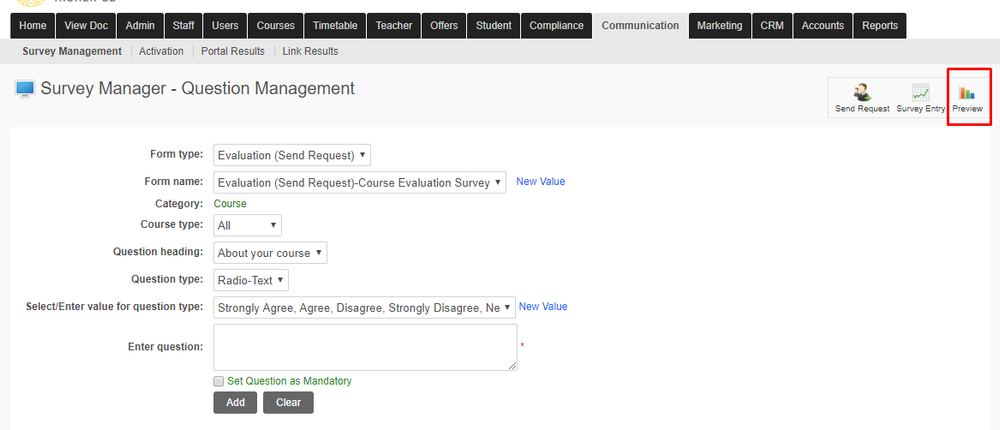
- On the Survey manager- question management, select the form type you would like to use from the drop down menu. The available Options are
- Evaluation (Send Request) - use this to send the link to the user email and evaluation can be submitted without user needing to log in the Meshed Higher-Ed platform
- Evaluation - user this to send the link to user email, however the evaluation can only be submitted after user log in the Meshed Higher-Ed platform
- Performance - use this for sending to manage Teacher or Agent performance (similar to Evaluation)
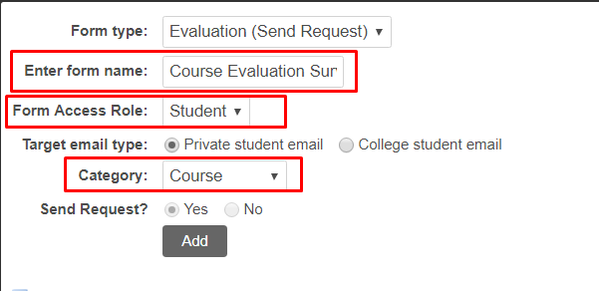
- Create a new evaluation form - Course Evaluation Survey.
- If the name you are after is not on the drop-down list click New Value and enter form name on the field provided
- Click Add.
- Click Add to add the Evaluation

To Set up Questions, follow the instructions below
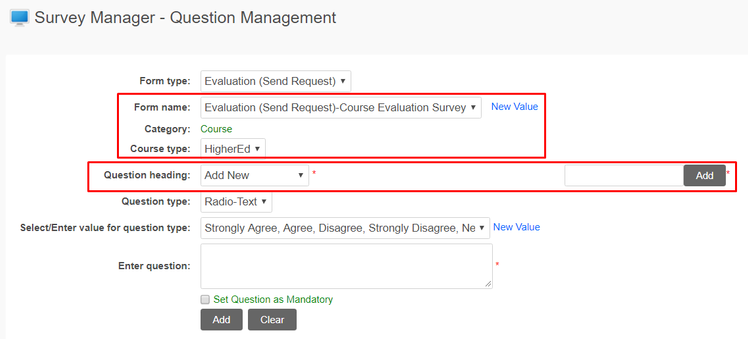
- Select Form created above
- Select Course Type e.g. HigherEd
- Select Question heading form the drop down list, if it's not available, click Add New. A free type field will appear so you can type in your new Question heading.
- Click Add to Save.
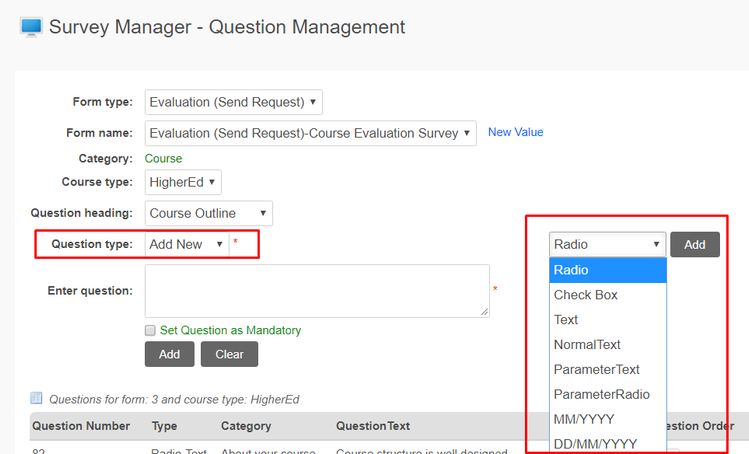
- Select Question type from the drop-down list. If the type is not available, click Add New. A new drop down will appear and will let you choose another question type. Once you have selected the question type, click Add.
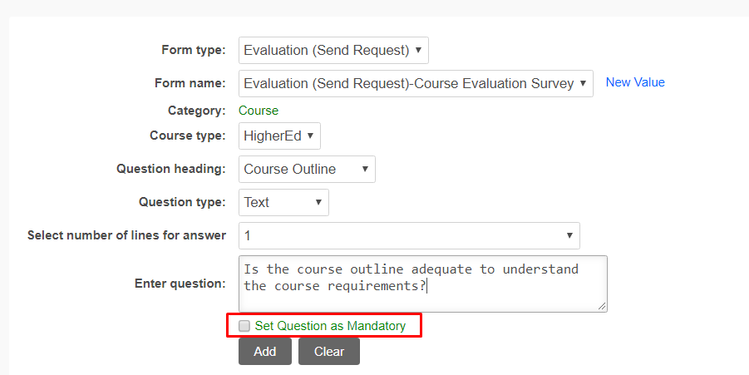
- Type in the question you would like to add in your questionnaire in the field provided. You have a choice to set the question as mandatory.
- Click Add to Save.
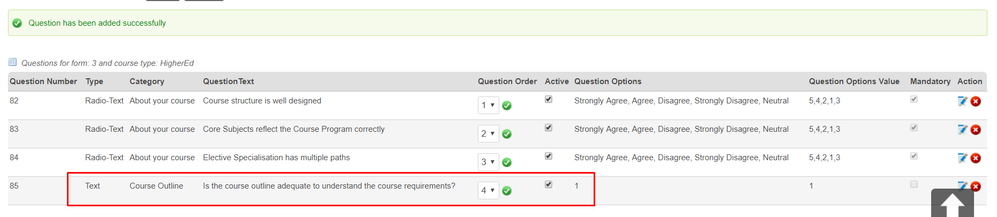
- Once question has been added, a message confirming that it has been added will appear on the screen and will be on the list as shown below:
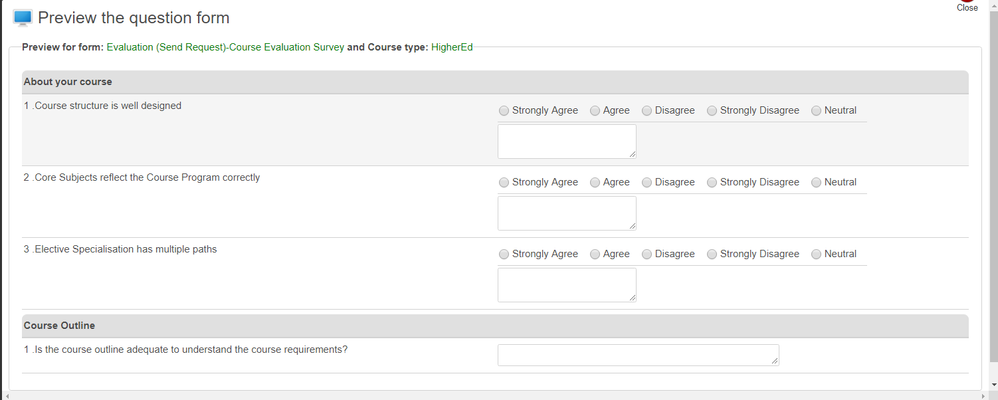
- To see a preview of the questionnaire, click the Preview icon
 located on the right hand side of the page.
- A pop up page will appear for you to preview the question form (as shown below).
Evaluation/Survey – Form Activation
After you have finalised the questionnaire and is ready for use, you need to activate the form in the system. To do this, follow the instructions below:
- Click Communication > Survey Management > Activation
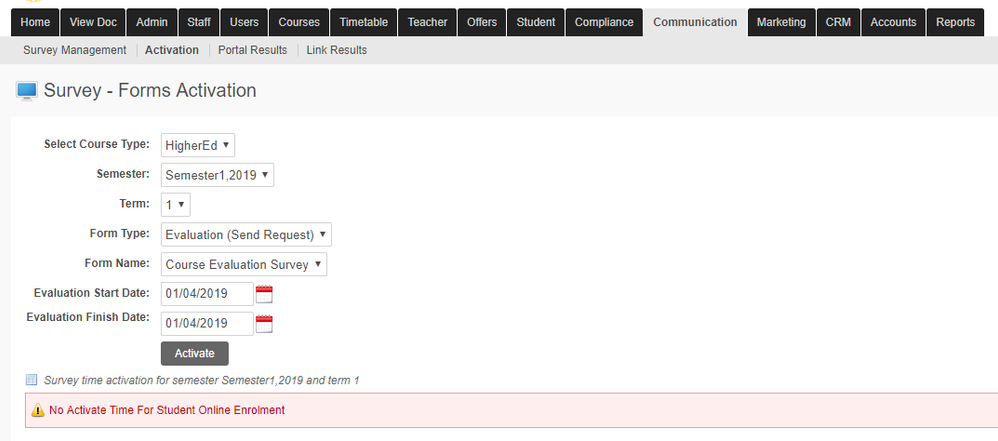
- Using our previous example, Select Course Type e.g. HigherEd
- Select the Semester, Term, Form Type e.g. Evaluation and Form name e.g. Course Evaluation Survey
- Select the Evaluation start and finish date –this is the date duration when this evaluation is activated e.g. this survey is open from 1/9/2018 and will not be available after 1/10/2018.
- Click Activate to start the process. A confirmation message will appear to indicate successful activation

Portal Results
This menu allows you to view students' response to the questionnaire that has been activated. Let us use the Evaluation form we have activated earlier 'Course Evaluation Survey'.
When a survey has been activated in the system and the Student has access to the Student portal, and are enrolled in a class during the activation period, they can complete the survey by logging in to their portal and completing the survey. To find out how a student can fill up a survey via their portal
To view the evaluation results, follow the instructions below:
- Click Communication > Survey Management > Portal Results.
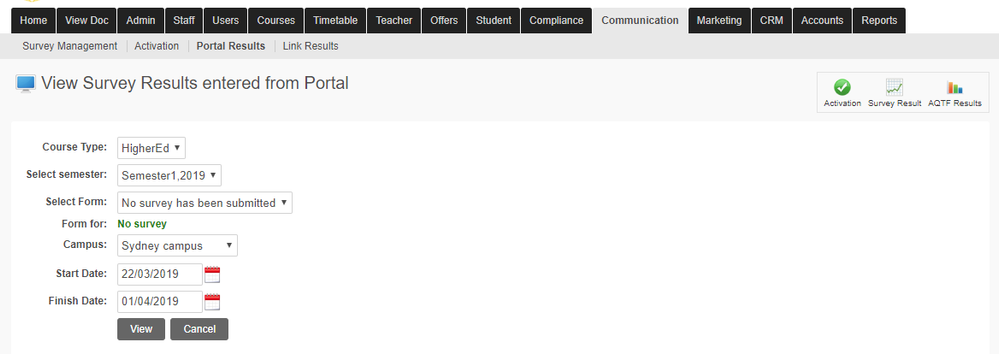
- Evaluation results will appear on the page as shown below:
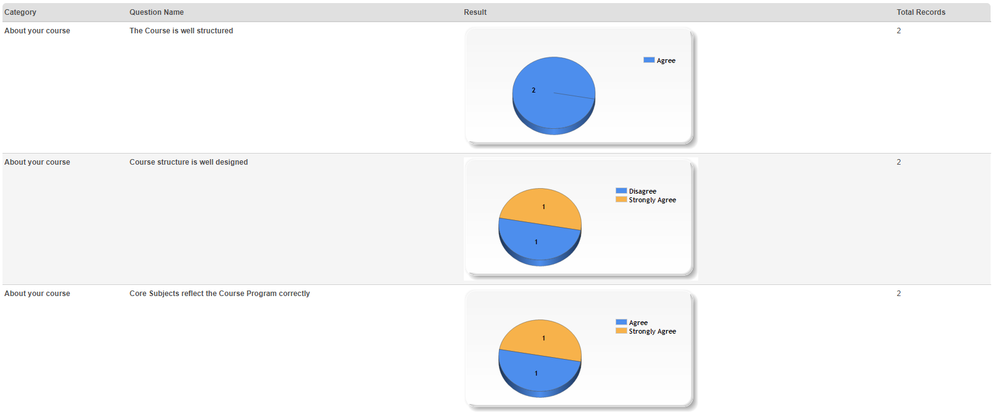
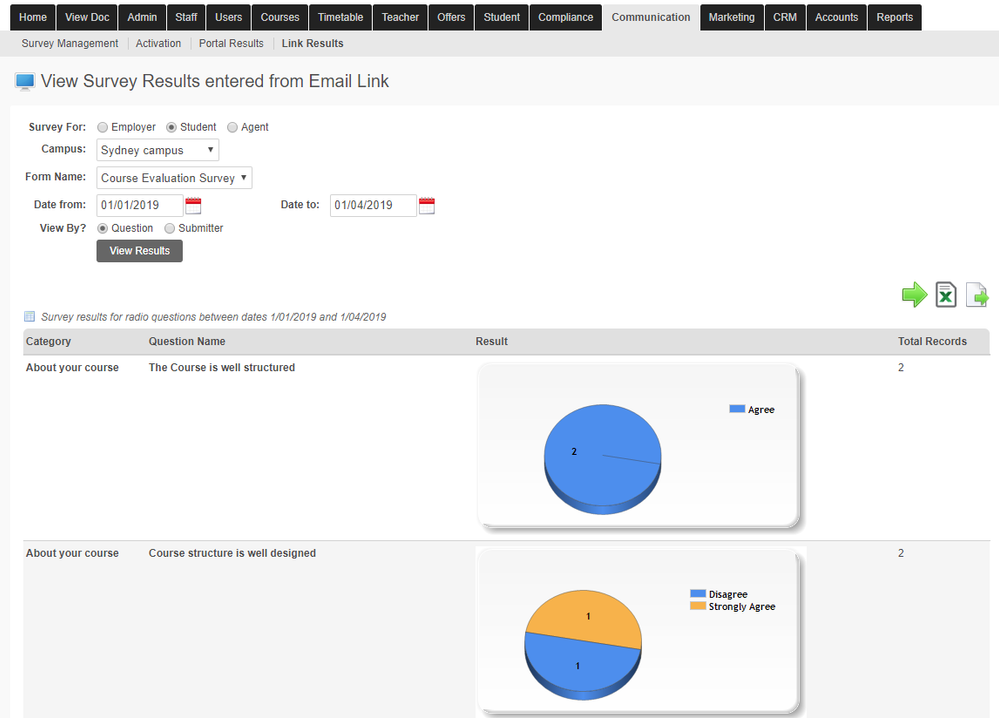
Link Results
To view results for Send Request by following the instructions below:
- Select for which demographic the survey is for e.g. Teacher, Student, Agent.
- Select Form name from the drop down menu
- Enter date period to collate responses sent from and to date e.g. 6/11/2018 to 30/11/2018.
- You select you view by question ( as shown below) and click View Results
- If you choose to view by submitter, the system will show the name, submission date as shown below.

- Results can also be seen by clicking the preview icon
 located on the right hand side. You can download it in a PDF version by clicking PDF icon
  / download icon
  .
.
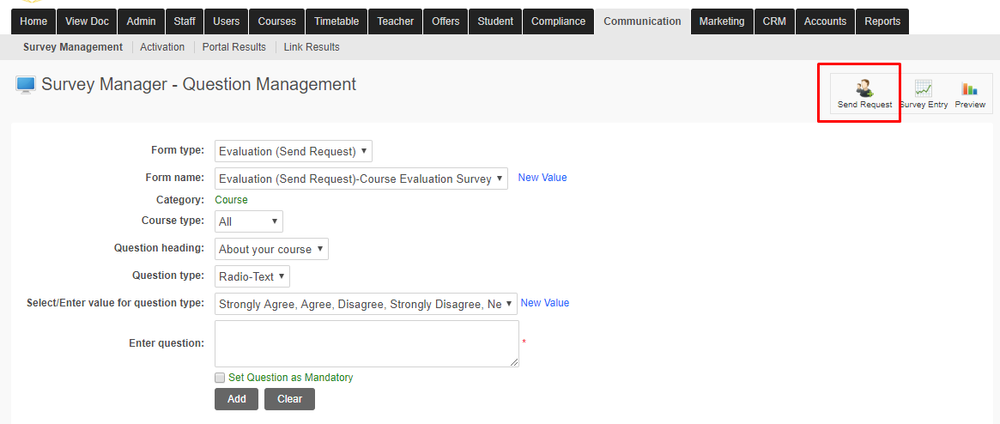
Invite Student to Submit Survey
Once the survey is created, you can invite students to complete the survey. To do this, follow the instructions below:
- Click Communication > Survey Management
- Select the form type e.g. Evaluation (send Request)
- Select Form name e.g. Course Evaluation Survey
- Select Course type e.g. HigherEd.
- Click Send Request Icon
 as shown below.
- A pop up screen will appear to allow you to search for the students/class to send the survey.
- Enter due date to submit survey e.g. 28/07/2017
- Select Group e.g. 1
- You may also search student using the options on the drop down menu. As for the below example, we have chosen search using course and start date between dates 14/01/2017 and 28/07/2017.
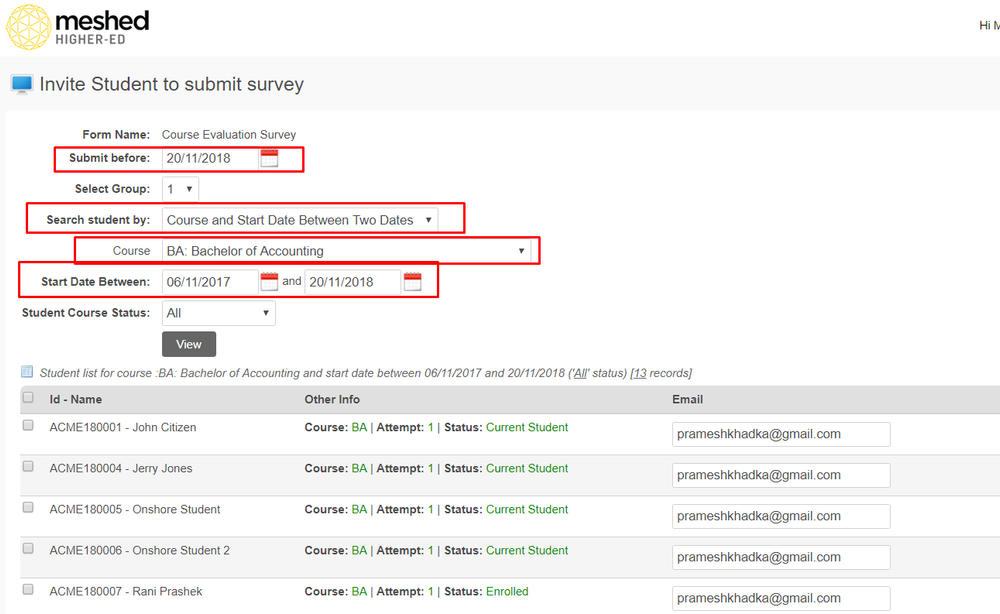
- Select Course status and click View. Student list as per search criteria will appear on the list.
- Tick all the students on the list and click Send Request.

- The survey invitation will be sent to the student via email.

- Please note that you can set up the auto generated email in the system via email template set up (Reports > Add/Edit Email template).
Preventing email sent from Meshed System being considered as spam or treated as Junk email
To assist with preventing email sent from Meshed Student Management System to your students from being considered as spam and treated as Junk email, our Network Administrator has suggested adding or modifying an SPF record in your DNS server. Further information see Ensuring Email Delivery
