Student Work Placement (Optional Module)
Overview
Many Education Providers deliver Courses which require work placement. Work placement is component for a Subject, or Subjects, depending on the Provider requirements. Providers can have agreements or arrangements with various employers with whom they can place Students to fulfil the work placement requirements.
In the Meshed Platform, the work placement feature allows the user to:
- Identify Courses which require work placement
- Identify Subjects which require work placement
- Enrol Students into Courses and Subjects which require work placement
- Link Student work placements with an Employer
- Record and view work placement activity for Students
- Recorded work placement attendance for Students
Initial Setup
It is important for an Education Provider to identify Courses and relevant Subjects which have a work placement requirement. In the Meshed Platform, users need to configure the initial work placement setup as described in the steps below.
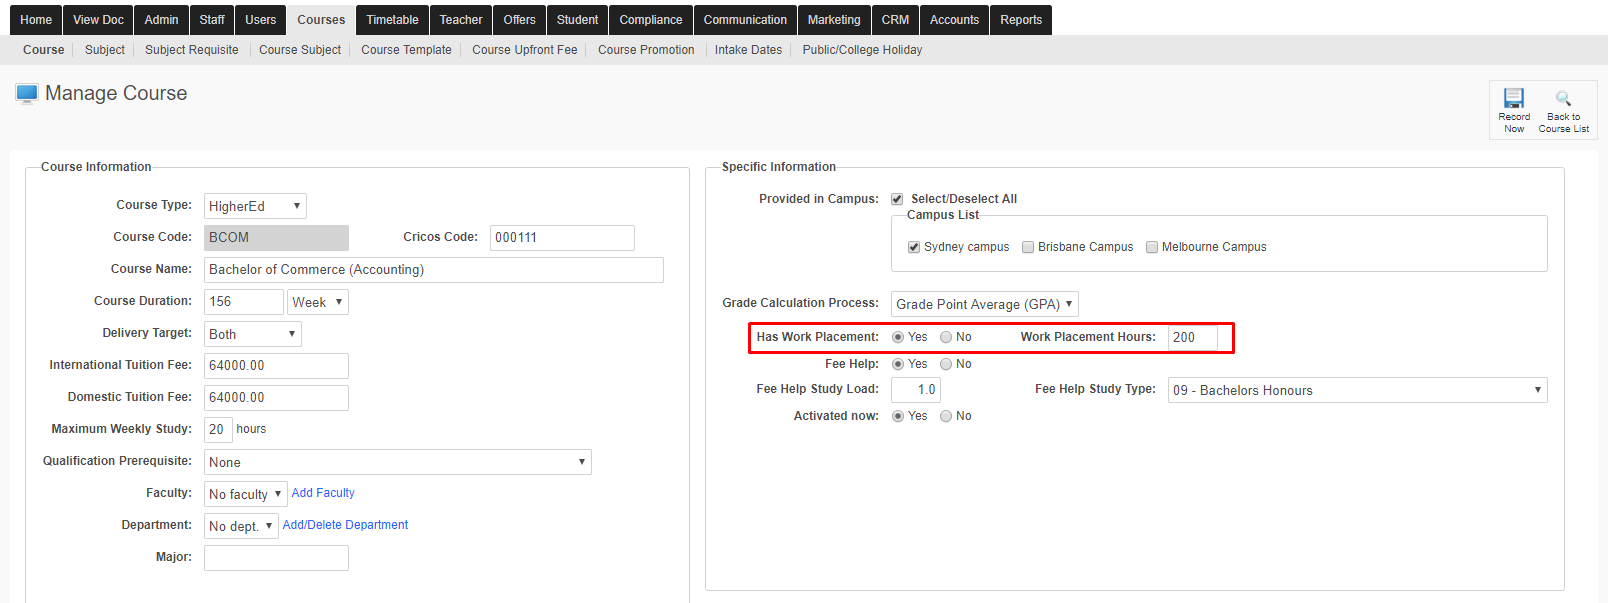
- Navigate to Courses > Course > Edit Course for a Course that has a work placement requirement.
- Select the Yes option for Has Work Placement.
- Enter a value for Work Placement Hours.
- Click Record Now.
- Navigate to Courses > Course Subject.
- Select Course Type and a Course that has a work placement requirement.
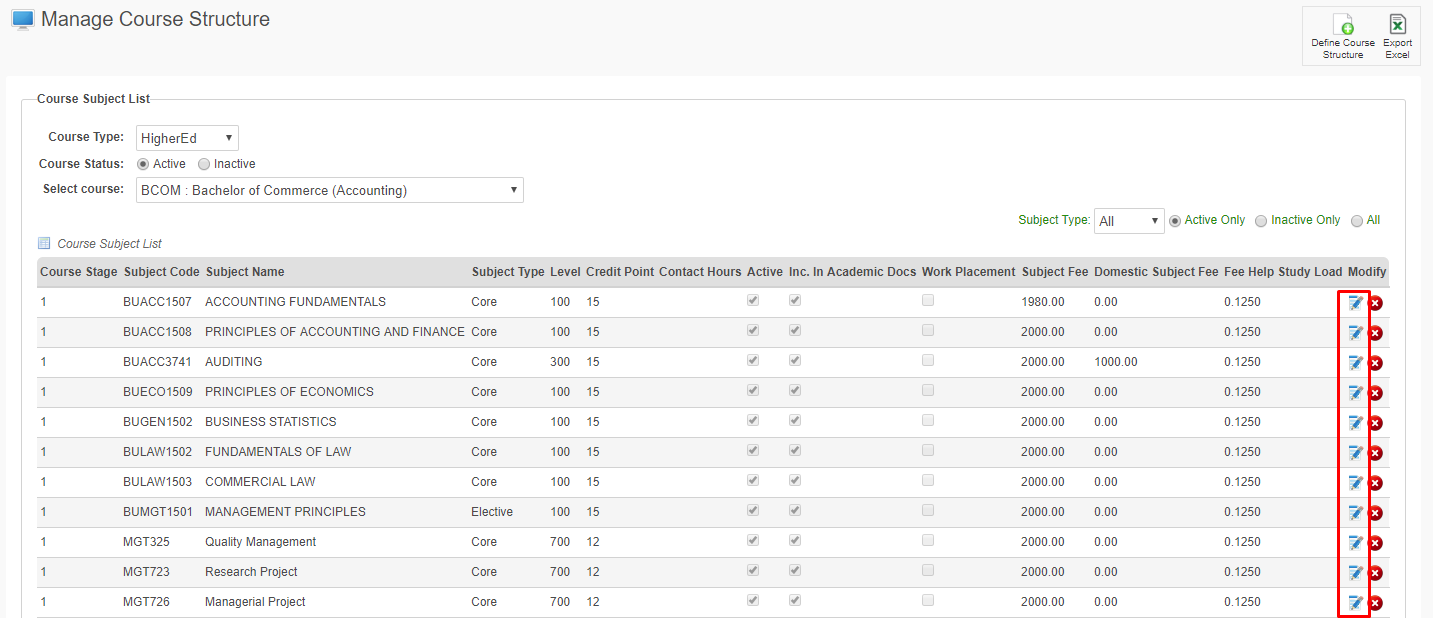
- Click Edit Subject Term for the Subject that is to be linked to a work placement.
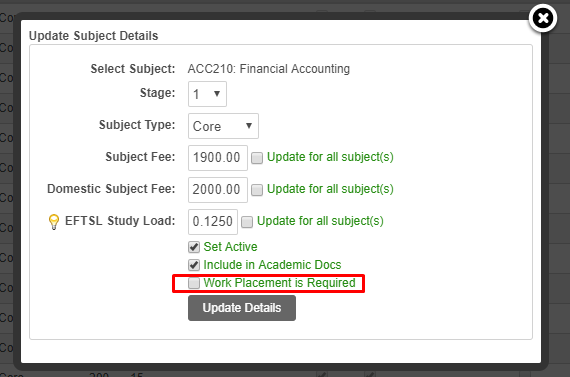
- Check the Work Placement is Required option.
- Click Update Details.
- Repeat the above steps for any additional Subjects required to be linked to a work placement.
The Work Placement is Required check box is only displayed if the Course that the Subjects are being managed (added/edited) for has a work placement requirement set as Yes.

Add Work Placement
When a Student enrols in a Course which has a Work Placement requirement, the Student is automatically enrolled in any Work Placement Subjects for that Course. The steps below show how to add a Work placement for a Student.
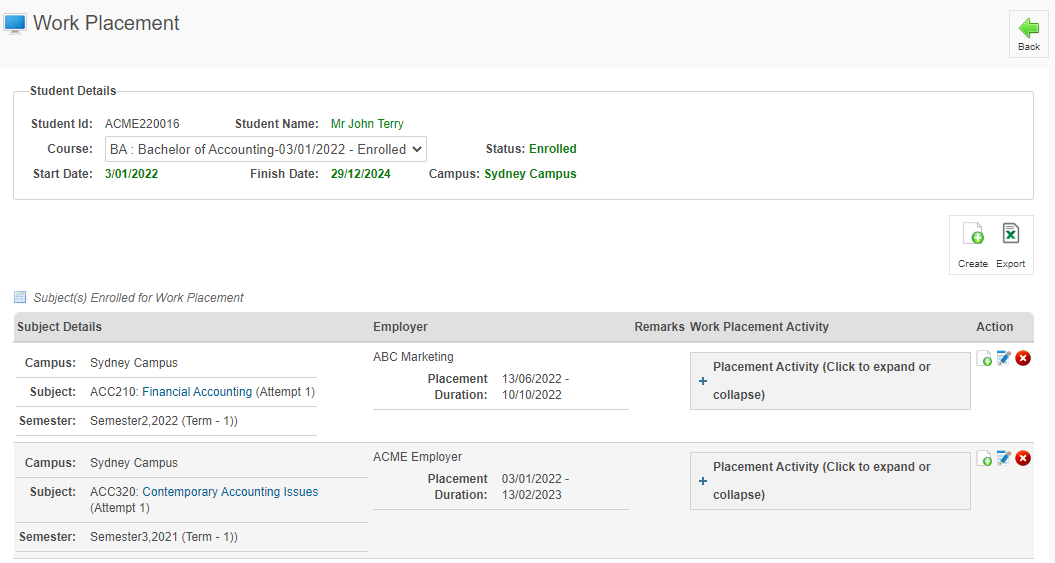
- Navigate to the Student Profile Summary for a Student who is enrolled in a Course with a Work Placement requirement. The Work Placement Action Icon will be Shown.
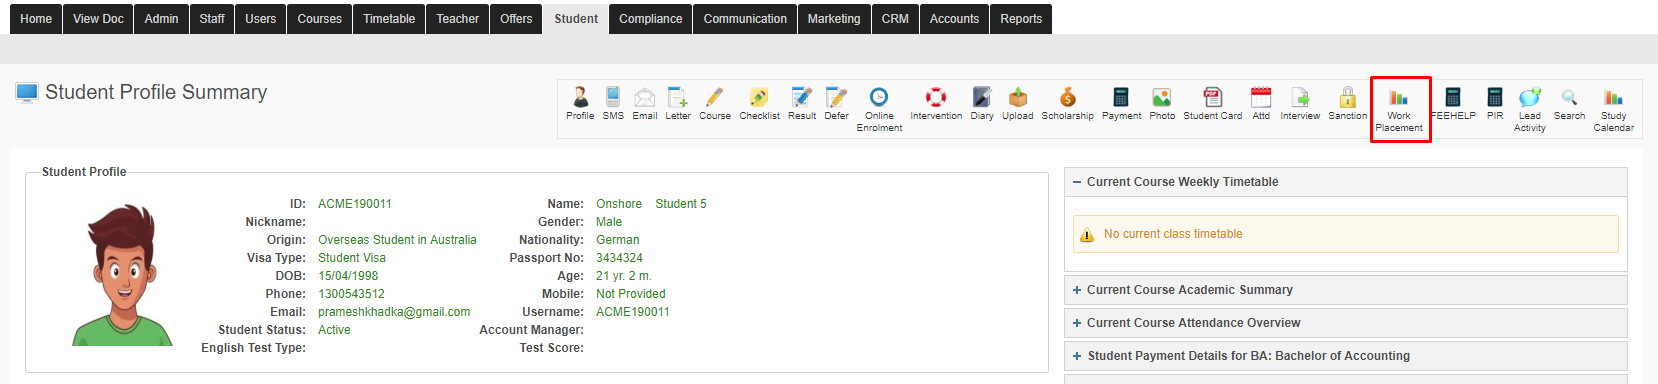
- Click the Work Placement Action Icon
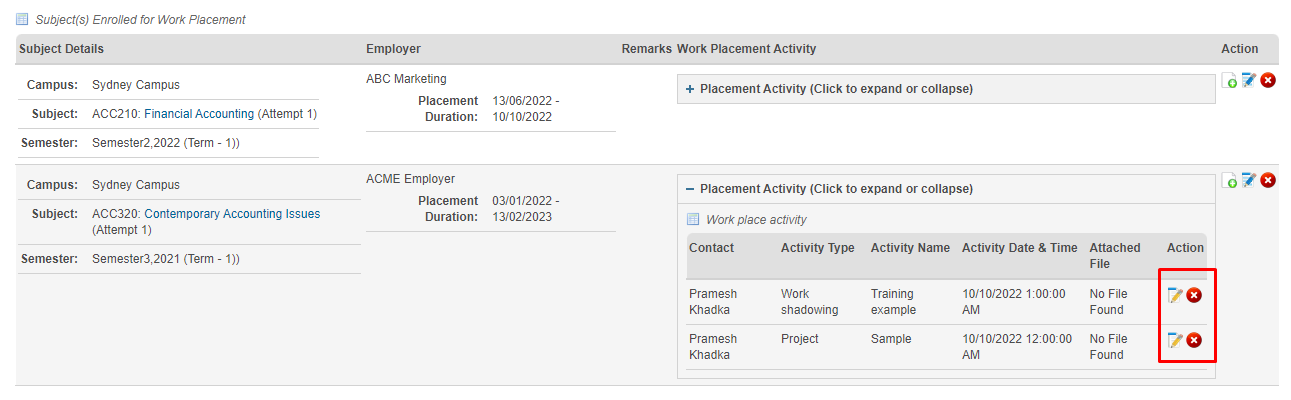
- The Student Work Placement information will be shown
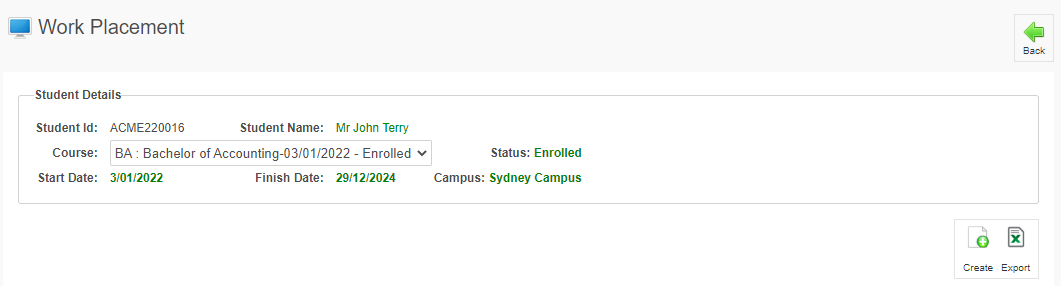
The Work Placement Action Icon will be only be shown if the Student is enroled in a Course with a Work Placement requirement and Course Subjects with a Work Placement requirement.
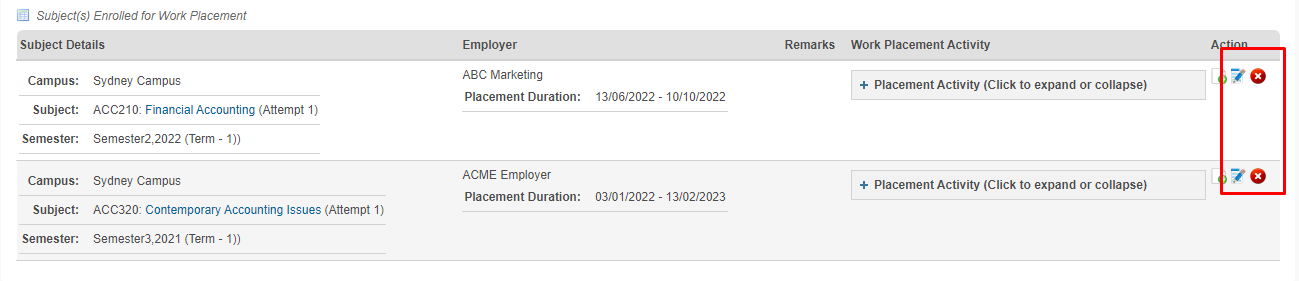
- Click the Create Icon.
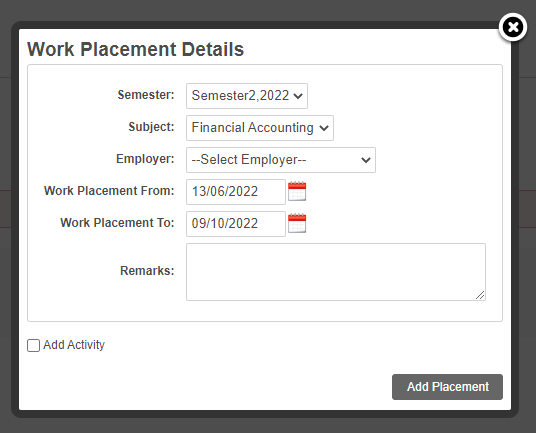
- Select the Semester.
- Select the Subject. Only Course Subjects with a Work Placement requirement are available to select.
- Select the Employer. See more information about managing Employers here.
- Set the Work Placement From date. This cannot be earlier than the Subject enrolment Activity Start Date.
- Set the Work Placement To date. This cannot be later than the Subject enrolment Activity End Date.
- Enter any Remarks.
- Click Add Placement.

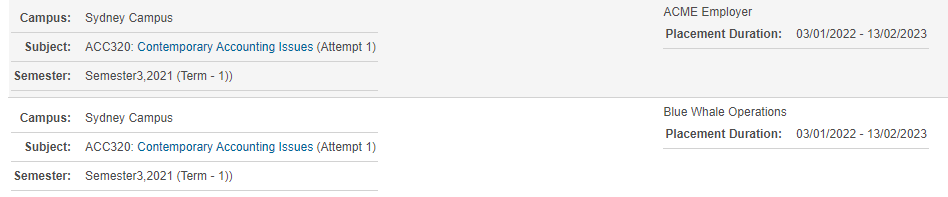
- It is possible to assign multiple Work Placement Employers to the same Subject
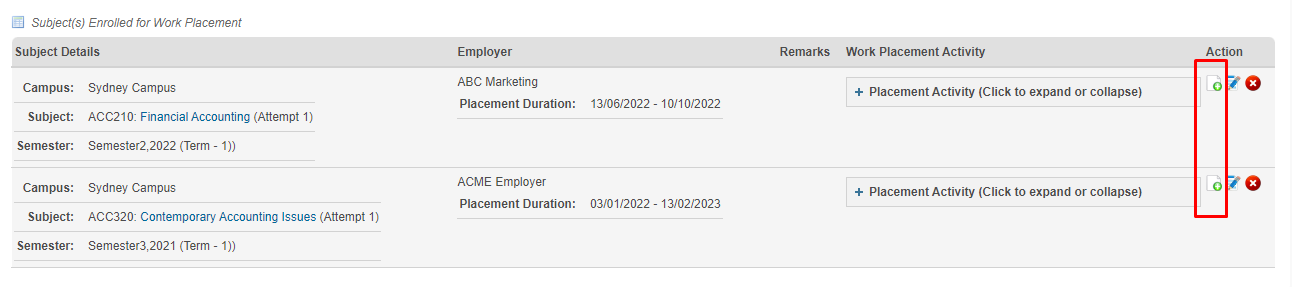
- Selecting the Add Activity option allows for recording of a Work Placement Activity when adding a Work Placement. See Manage Work Placement Activity for more information on Work Placement Activity.
Tip
Work Placements for multiple Subjects and Semesters can be added without closing the window.
A work placement can be modified or deleted using the relevant Action Icons
Manage Work Placement Activity
During Work Placement, a Student will undertake activities of various types. It is important for the Education Provider to record all Student activities. This helps ensure that a Student has met all the Work Placement related requirements. The steps below show how to record Work Placement Activities.
- Navigate to the Student Profile Summary for the Student to link the Work Placement with an Employer.
- Click the Work Placement Action Icon.
- The Student Work Placement information will be shown.
- Click the Add Work Placement Activity Action Icon.
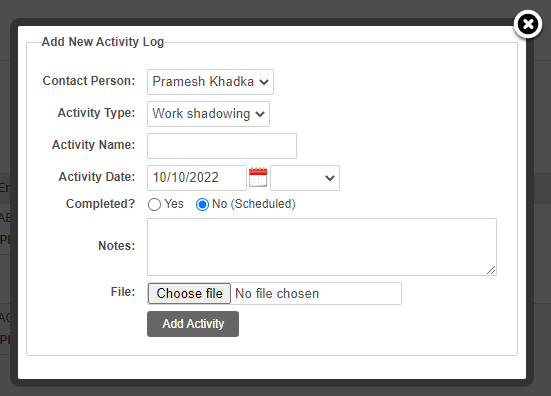
- Select the Employer Contact Person. See more information about managing Employers here.
- Select the Activity Type. The values for Activity Type are configured in Admin > Configuration and Setup > System Fields Setup.
- Enter the Activity Name, Date and Time
- Select the Completed status
- Enter any Notes
- Upload any File.
- Click Add Activity.
A work placement activity can be modified or deleted using the relevant Action Icons
 The Excel Icon exports the displayed information from the Meshed Platform in an Excel format.
Manage Work Placement Activity - Bulk
- To view and manage Work Placement activity for multiple Students, Navigate to Compliance > Work Placement Log
- Enter Search criteria values
- Click View. The Student list will appear at the bottom of the page.
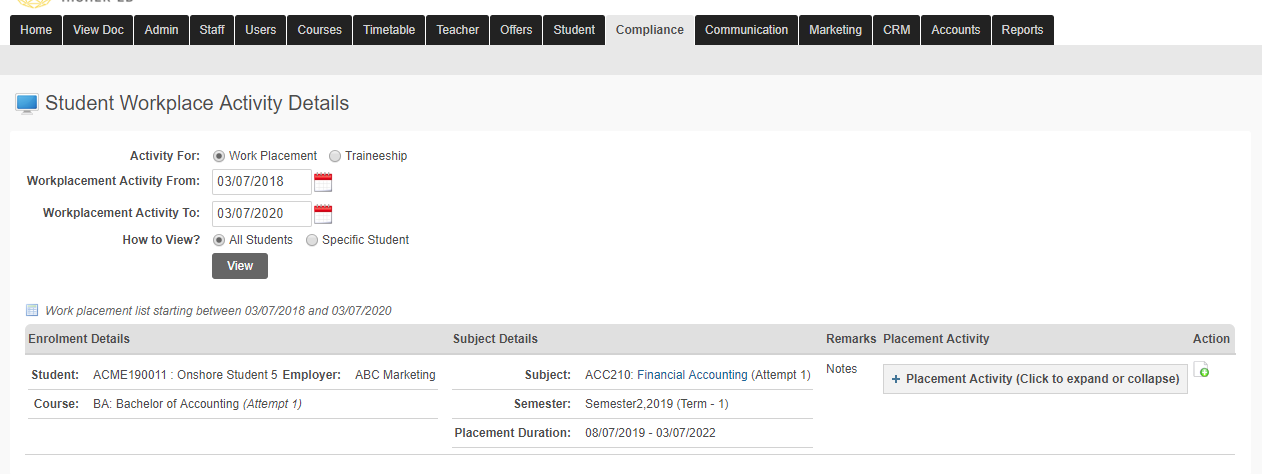
- Work Placement activity for each listed Student can be added, modified, or deleted using the relevant Action Icons
The Excel Icon exports the displayed information from the Meshed Platform in an Excel format.
Work Placement Attendance Recording
The following steps show how to record Student Attendance for work placement in the Meshed Platform.
- Select the Attendance Entry Option
- Select the relevant Course Type (e.g. Short Course, Higher Ed) and Course Name
- Select Semester, Term and Week.
- Select Student Status
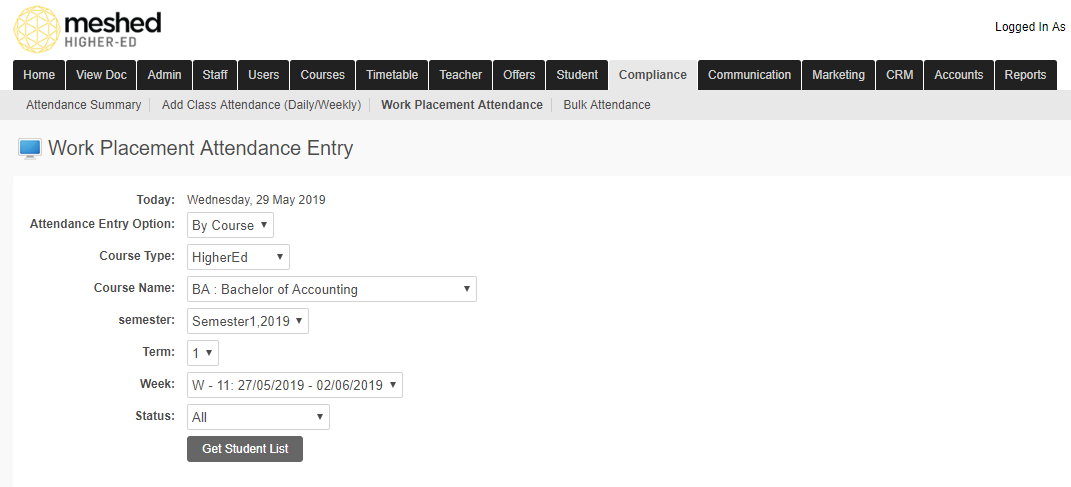
- Click Get Student List. The Student list will appear at the bottom of the page.
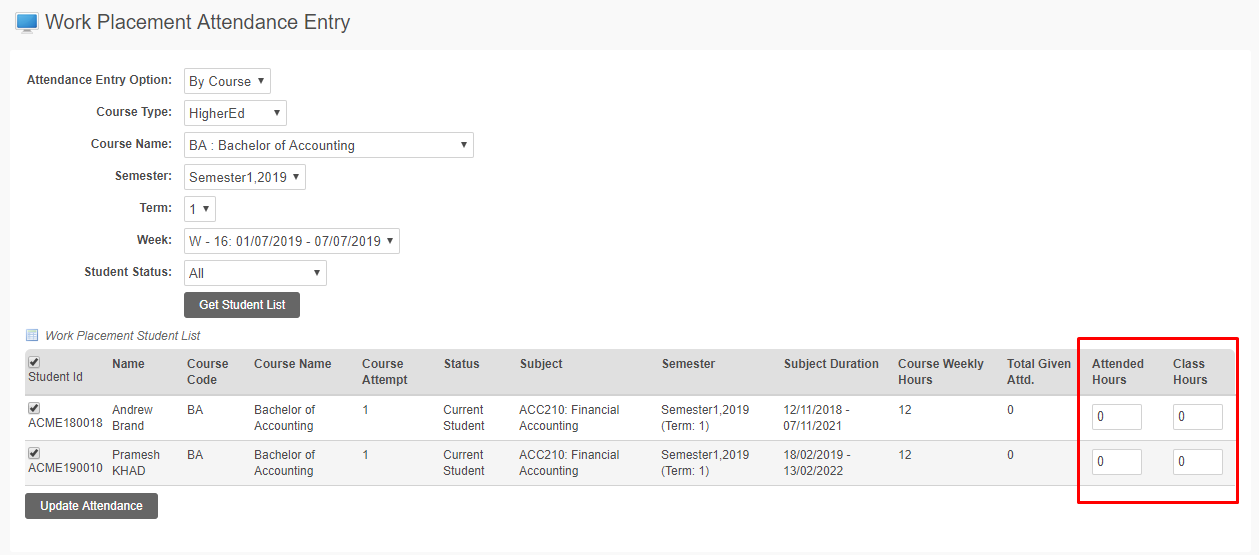
- Manually enter the information for Work Placement Hours.
- Click Update Attendance.
Reports
Work Placement information gathered and saved in the Meshed Platform can be viewed and saved (exported) using the standard Generate Reports functionality.
See Reports for further information.
The following reports are available for Work Placement information:
- Work Placement: Student work placement with employer details
- Work Placement: Student work placement with employer and activity details
